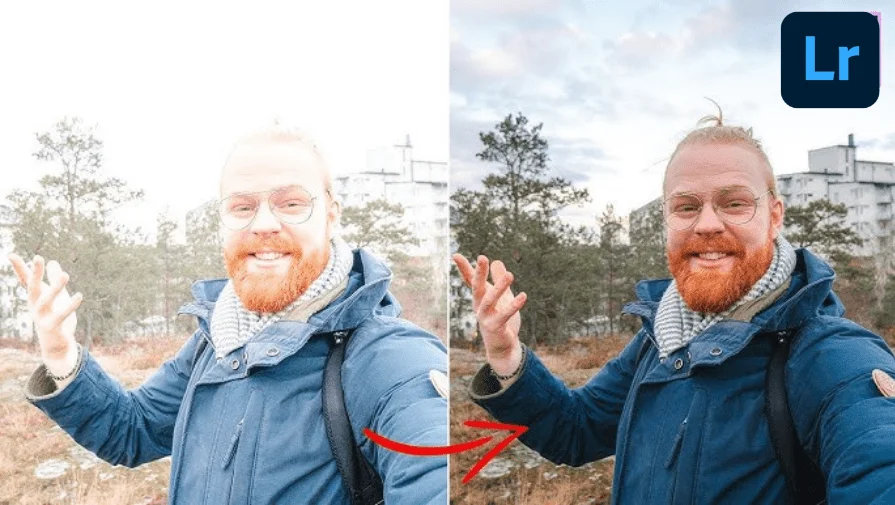
Color correction in Lightroom helps photographers make their images look clear, bright, and true to life. Whether you’re editing photos for fun, for a client, or for your online store, Lightroom has all the tools you need — like sliders for fixing exposure, adjusting white balance, and fine-tuning colors.
In this easy Lightroom color correction tutorial, you’ll learn step by step how to improve your photos, starting with simple edits in the Basic Panel and moving to more detailed changes using the Camera Calibration panel.
Color Correction Using the Basic Panel
Step 1: Import Your Image
Start by importing your photo into Lightroom. Click the Import button, select your image, and then open it in the Develop module by clicking “Develop” at the top right.
Step 2: Open the Basic Panel
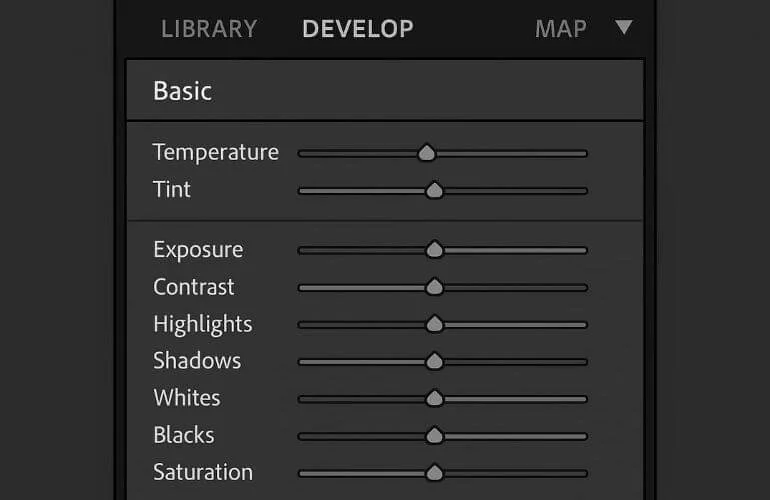
The Basic panel is the best starting point for beginners. Here, you’ll make the most essential exposure and color fixes. On the right side of the Develop module, find the Basic panel. This is where most of your initial color correction will take place.
Step 3: Adjust Exposure and Contrast
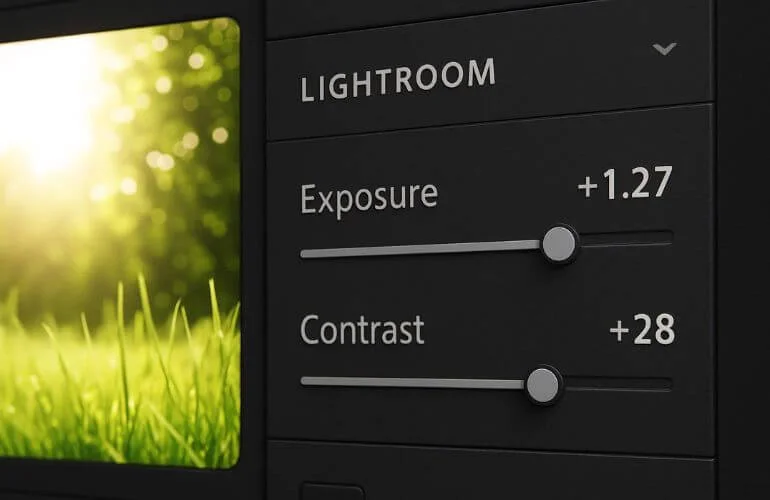
Use the Exposure slider to brighten or darken the entire image. Adjust this first to set a good overall brightness. Then, move the Contrast slider to increase or decrease the difference between the light and dark areas, helping to add depth to your photo.
📘 For more insights, see Adobe’s official exposure correction guide.
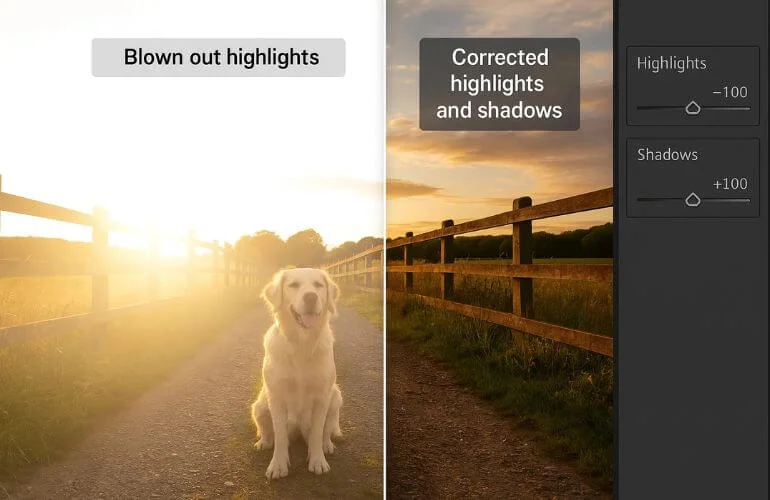
Step 4: Modify Highlights and Shadows
The Highlights slider recovers detail from bright areas that may be overexposed, while the Shadows slider brightens dark areas to reveal hidden details.
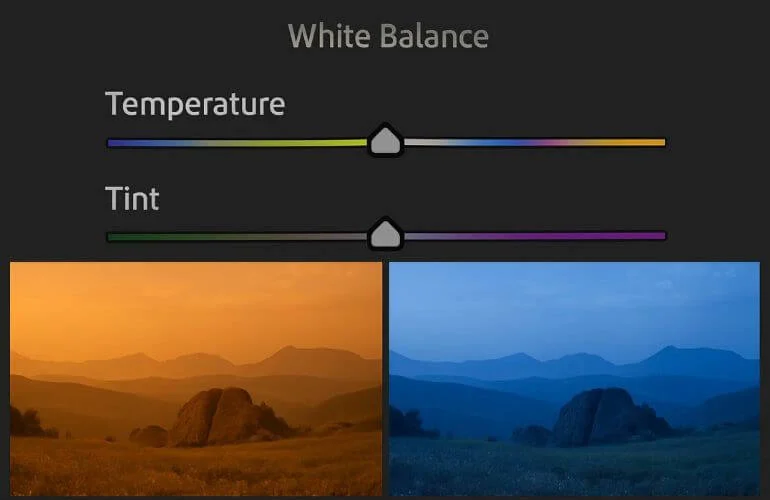
Step 5: Correct White Balance with Temperature and Tint
White balance affects the overall color tone of your photo.
- Slide Temperature to the right to add warmth (yellow tones), or to the left to cool the image (blue tones).
- Adjust the Tint to fix green or magenta color casts.
Step 6: Fine-tune Whites, Blacks, Vibrance, and Saturation
- Use the Whites and Blacks sliders to set the brightest and darkest points of your image.
- Adjust Vibrance to boost muted colors without oversaturating skin tones.
- Use Saturation to increase or decrease the intensity of all colors — and if you want to learn how to control colors precisely, check out our Hue and Saturation Technique tutorial.
Advanced Color Correction Using Tone Curves
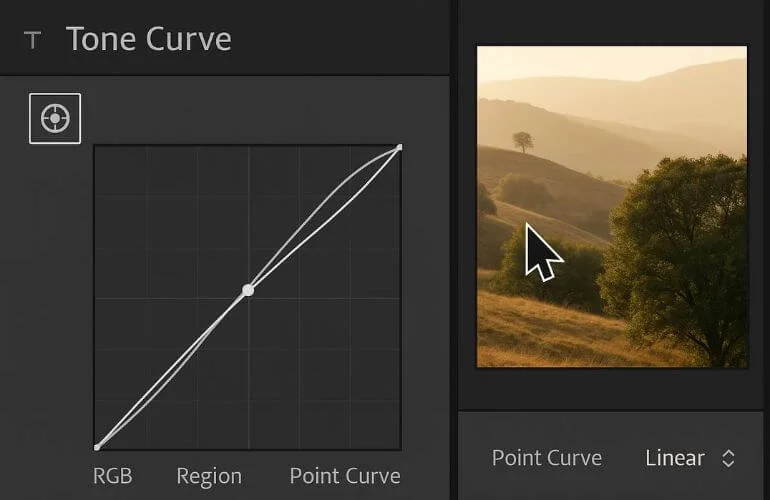
Step 1: Access the Tone Curve Panel
Find the Tone Curve panel below the Basic panel and expand it. The diagonal line represents the original tones of your image, input on the horizontal axis and output on the vertical axis.
Step 2: Adjust the RGB Tone Curve
Click on the curve line to add control points. Dragging a point upward brightens that tonal area; dragging down darkens it. Adjusting the RGB curve affects overall contrast.
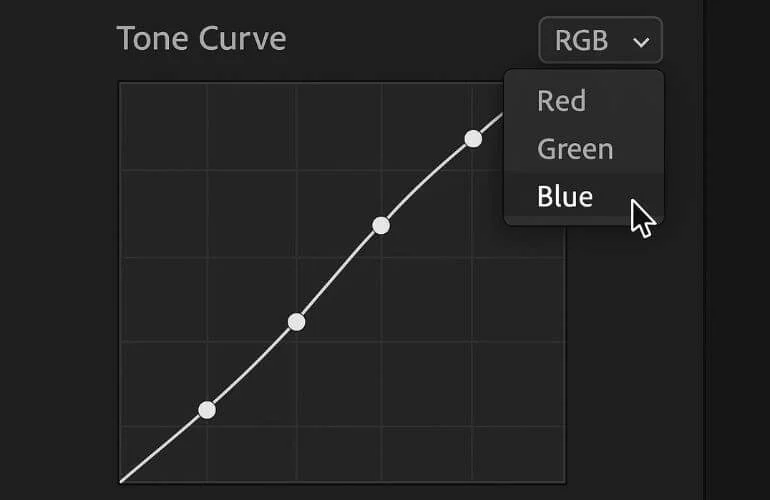
Step 3: Work with Individual Color Channels
Use the dropdown menu to select Red, Green, or Blue channels. Adjust these curves to fix color imbalances.
Step 4: Use the Targeted Adjustment Tool
Click the bullseye icon (Targeted Adjustment Tool) in the Tone Curve panel. Then, click and drag directly on areas in your image to precisely adjust tones based on those regions.
Once you’ve corrected colors, you can move into creating a mood or style, which is where color grading comes in. This color correction vs. color grading article breaks down both steps to help you edit smarter.
Deep Color Correction with the Camera Calibration Panel
Step 1: Locate the Camera Calibration Panel
Use the Camera Calibration Panel for subtle but powerful color grading. Adjust Red, Green, and Blue primary hues and saturation to fine-tune your image’s overall look.

To learn more, check out this easy Camera Calibration in Lightroom guide from SLR Lounge. It explains how to fix skin tones and adjust colors the right way.
🎨 To better understand how hue, saturation, and tint affect your edits, use the Adobe color wheel as a visual guide. It’s especially helpful when learning how to balance tones and create cohesive color styles.
Step 2: Choose a Profile and Refine White Balance
Select a camera profile that best matches your shooting style. Use the sliders to refine red, green, and blue shadows to correct sensor-based color shifts. Learn more from this in-depth white balance guide by PetaPixel.
Step 3: Adjust Hue and Saturation for Skin Tones
Use the Hue and Saturation sliders to fine-tune skin tones and enhance overall image aesthetics.
Final Thoughts | Lightroom Photo Editing
Color correction is both a technical and artistic process. Mastering Lightroom’s tools takes practice, but it empowers you to transform your photos from ordinary to professional. Lightroom is great for manual precision, but for quick edits, our Automatic Color Correction in Photoshop guide shows you how to fix colors in just seconds.
At Clipping World, our professional color correction services ensure consistent, high-quality results—so you can focus on creativity or growing your business.
Frequently Asked Questions
Presets are pre-made adjustment settings that can be applied with one click. They help speed up editing and provide consistent color styling.
Apply the same presets or use synchronized settings. Stick to a structured workflow using consistent profiles and tone settings.