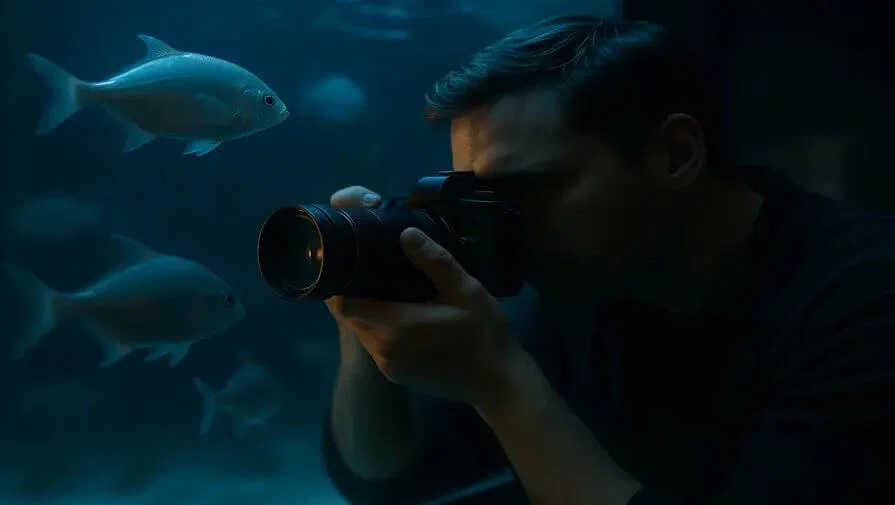
In aquariums and zoo enclosures, reflections can ruin a great shot. Glare, fingerprints, and mirrored lights often make it hard to capture the moment. This guide will show you how to photograph through glass clearly and capture distraction-free, professional-looking photos every time.
Why Glass Reflections Happen in Photography
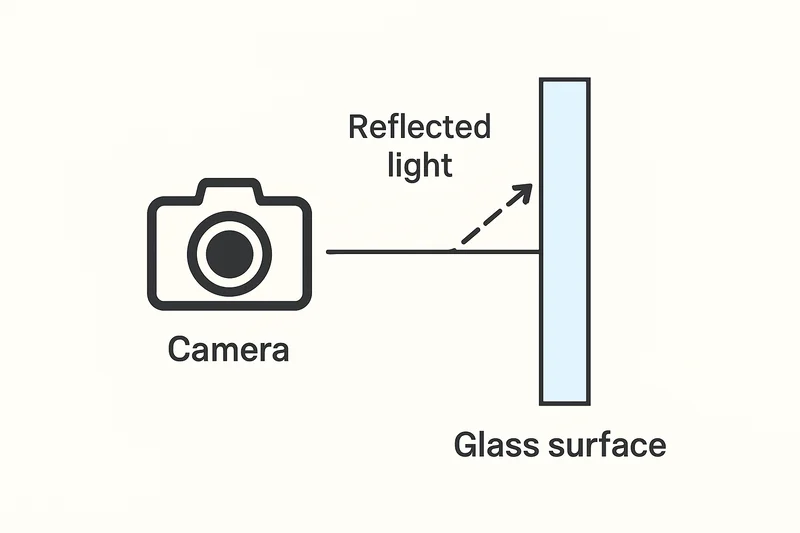
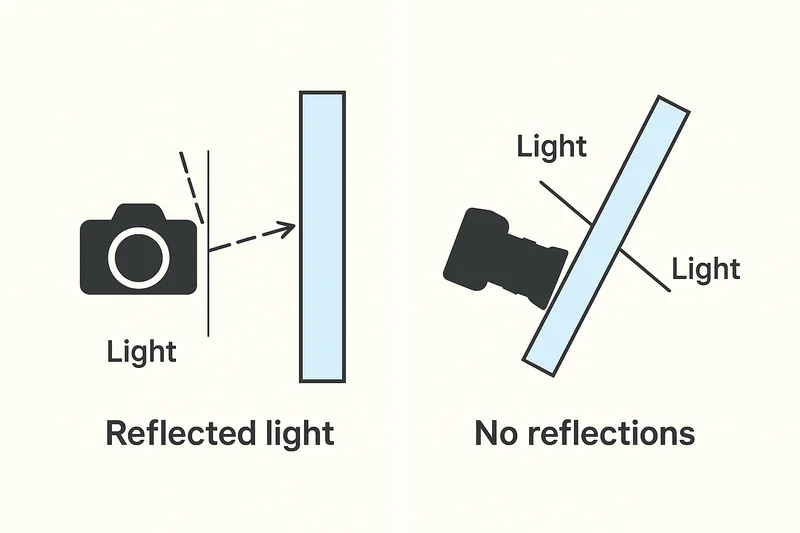
Reflections occur because glass surfaces reflect light rather than transmitting it. The camera captures both the subject and the surrounding light when you take a photo. You may also capture your own reflection.
Factors that Increase Glare Include
- Ambient light behind you
- Using flash
- Scratched or dirty glass surfaces
- Shooting directly perpendicular to the glass
Now that you know why reflections occur, let’s look at how to eliminate them step-by-step.
Step-by-Step: Photograph Through Glass Without Reflections
Step 1: Prepare to Photograph Through Glass
Clean the Glass
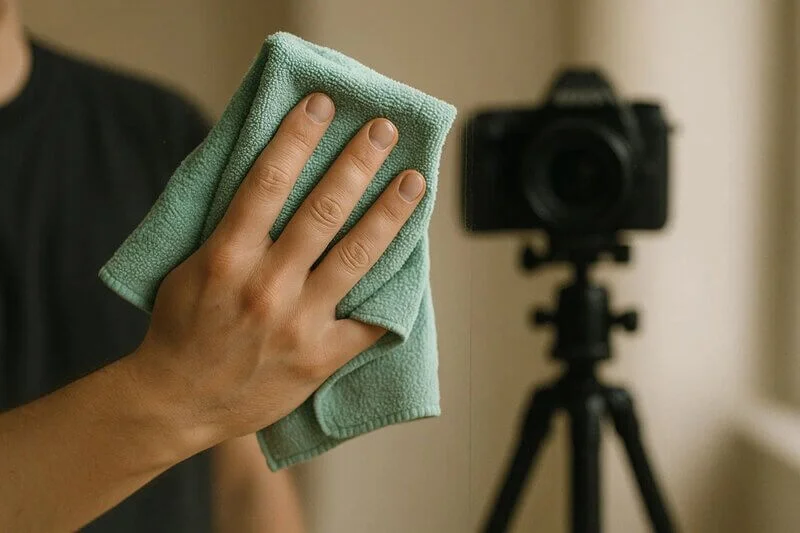
Always start with a clean surface. Fingerprints, dust, or smudges will reflect light and become more noticeable in photos. If possible, bring a microfiber cloth to quickly wipe away marks.
Turn Off Your Flash
Flash creates a mirror-like reflection on glass. Instead, use natural or ambient lighting. If you need extra light, consider a diffused LED panel placed off to the side.
Use a Lens Hood or Rubber Hood
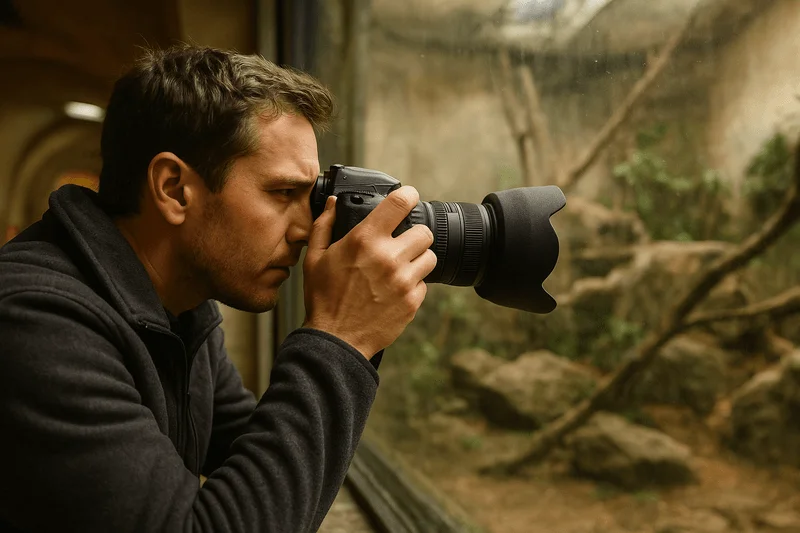
A rubber lens hood gently presses the lens against the glass. As a result, the light from the surroundings is blocked from entering the frame. Professionals use this trick at aquariums and museums.
Step 2: Camera Settings for Photographing Through Glass

Aperture (f-stop)
Use a wide aperture (f/1.8–f/4) to soften glass imperfections and isolate your subject.
Shutter Speed
Shutter speeds of 1/125th or faster are needed for fast-moving subjects like fish or animals. If you are shooting static displays or cityscapes, use a tripod to avoid shake.
ISO
When there is little light (e.g., ISO 800–1600 for aquariums), increase ISO slightly. The modern camera handles noise well, so don’t be afraid to push the ISO if the lighting is poor.
Focus Mode
Switch to manual focus if your camera struggles to lock onto a subject behind the glass. Auto-focus may sometimes pick up reflections instead of the intended subject.
Step 3: Master the Shooting Angle
Get Close to the Glass
Keep your lens as close to the glass as possible (use a rubber hood to protect it). Getting closer to the subject reduces external reflections.
Block Surrounding Light
To shade the lens, use your hand, your jacket, or even your body to do so. This is particularly useful if you’re going to be in bright places like zoos.
Use Your Environment
Make sure that you find a shaded area when you are shooting indoors. The quality of the image can be instantly improved by dimming the light behind you.
Avoid Shooting Straight On
Instead of facing the glass head-on, tilt your camera about 30–45° to the surface. This deflects unwanted reflections away from your lens while keeping your subject in focus.
Step 4: Use a Circular Polarizing Filter (CPL)
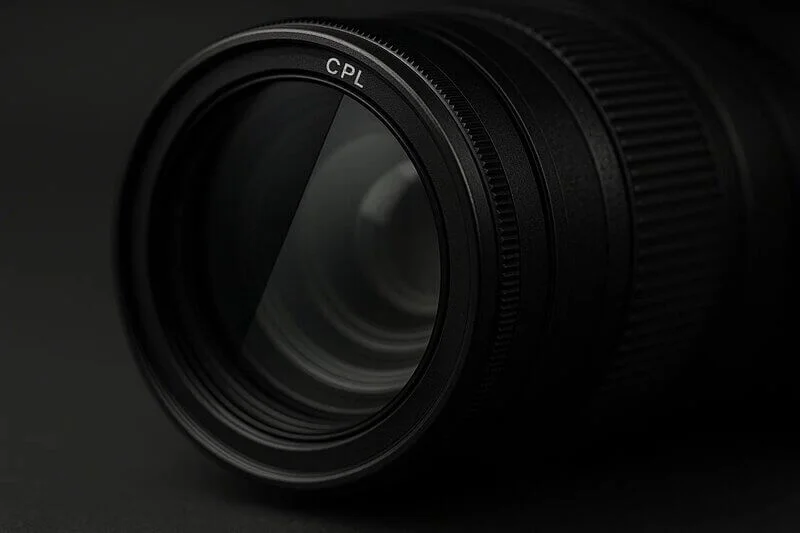
If reflections persist even after adjusting light and angles, try using a Circular Polarizing Filter (CPL). A Circular Polarizer (CPL) minimizes reflections and glare. By filtering out polarized light waves, it works on glass, water, or metal surfaces.
When to Use a CPL Filter
- Shooting through car windows, aquariums, or shop displays
- Photography of outdoor glass (buildings, reflections)
- Taking pictures of water and glass
Limitations of a CPL Filter
The CPL is less effective on thick or coated glass, such as aquarium walls. However, they still reduce most reflections at a proper angle.
Step 5: Pro Tips for Zoo and Aquarium Photography
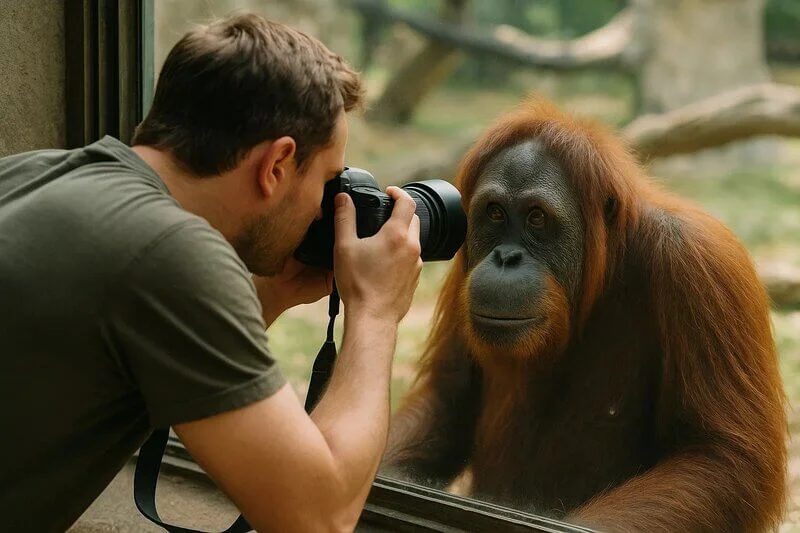
In order to photograph animals behind glass, patience and timing are both important aspects that need to be taken into consideration. As a starting point, here are some practical tips you can use:
- Low-Light Handling: Use a lens with an aperture of f/2.8 or wider.
- Fast-Moving Subjects: Use continuous autofocus (AI Servo/AF-C) and burst mode.
- Avoid vibrations: Brace your hands or elbows against the glass for stability.
- Timing is everything: Take pictures when subjects are close to the glass.
Field Tip: The best time to visit is early in the morning or during feeding times when lighting is stable, crowds are smaller, and more natural behavior is observed.
Step 6: Post-Processing to Remove Reflections
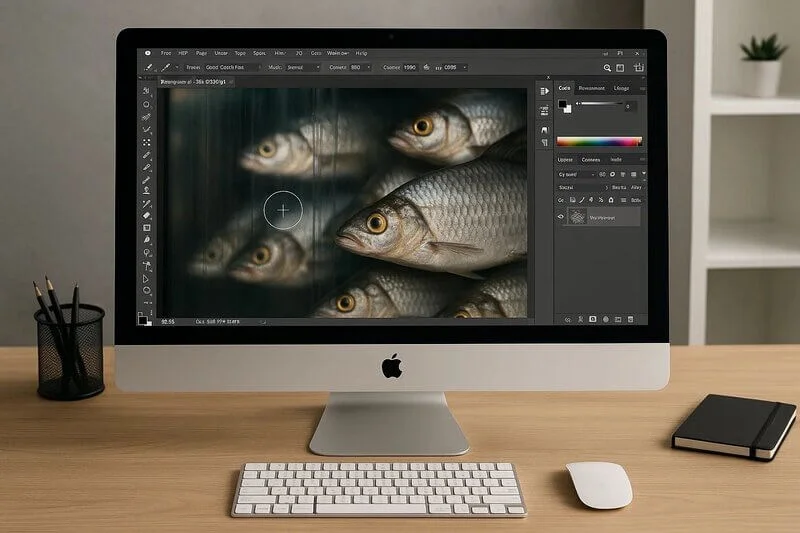
Even with perfect technique, minor reflections can still appear—but they’re easy to fix in editing. Using post-processing software or hiring our professional photo editors, you can fix these mistakes very easily and quickly.
In Photoshop or Lightroom
- For minor reflections, use the Clone Stamp or Healing Brush.
- Adjust contrast and dehaze to recover clarity.
- Tone down bright areas using Selective Adjustments (brush tool).
Free Alternatives
GIMP or Photopea offer similar tools for cloning and contrast control.
Step 7: Common Mistakes to Avoid
| Mistake | Better Option |
| Shooting straight at the glass | Shoot at a 30–45° angle |
| Using flash | Turn off flash |
| Standing far from the glass | Get as close as possible |
| Wearing bright clothing | Wear dark, matte colors |
| Ignoring nearby light reflections | Block or reposition light sources |
Step 8: Bonus Tips for Smartphone Photographers

Even phone cameras can achieve great results with the right tricks:
- Wrap your hand around the lens to block reflections.
- Manually reduce exposure before shooting.
- Clip a polarizer to your phone lens.
- Avoid wide-angle lenses close to glass.
Tip: Lightroom Mobile is an excellent app for photographing indoors or in aquariums.
Glass Photography Quick Tips
- Keep the lens close to the glass
- Turn off flash
- Shoot at an angle (30–45°)
- Block ambient light
- Use manual focus and a wide aperture
- Edit out minor glare afterward
Final Tips for Photographing Through Glass
To photograph through glass, master three elements: light, angle, and post-processing. These principles apply whether you’re using a DSLR, mirrorless camera, or smartphone. As you practice, you’ll be able to take reflection-free photos in challenging environments.
Frequently Asked Questions
Turn off flash, shoot at a 30–45° angle, and press a rubber lens hood against the glass. Wear dark clothing to reduce reflections, and use a CPL filter when possible.
Use manual focus if autofocus locks on reflections. Get close to the glass, keep it clean, and use a wide aperture to blur imperfections and focus on the subject.
Avoid direct light on your glasses. Adjust your head or glasses to redirect reflections. Use diffused lighting, and keep lenses clean.