
Eye bags and dark circles are common issues in portrait photos and can make a face look tired or aged. Fortunately, Adobe Photoshop makes it easy to fix these problems with simple retouching techniques.
In this tutorial, you will learn how to remove eye bags in Photoshop step-by-step using tools like the Patch Tool and Clone Stamp Tool. These techniques help reduce dark circles, wrinkles, and under-eye bags while maintaining a natural skin texture.
Whether you are editing portraits for personal use or professional photo retouching, this method will help you remove bags under the eyes in Photoshop quickly and effectively.
How to Remove Eye Bags in Photoshop
To remove eye bags in Photoshop, duplicate the image layer and use the Patch Tool to replace the under-eye area with smoother skin. Then use the Clone Stamp Tool in Lighten mode to reduce dark circles. Finally, lower the layer opacity to keep the skin looking natural.
Now, without further delay, let’s start the step-by-step tutorial on how to remove eye bags in Photoshop.
Female Eye Bags Removal Process
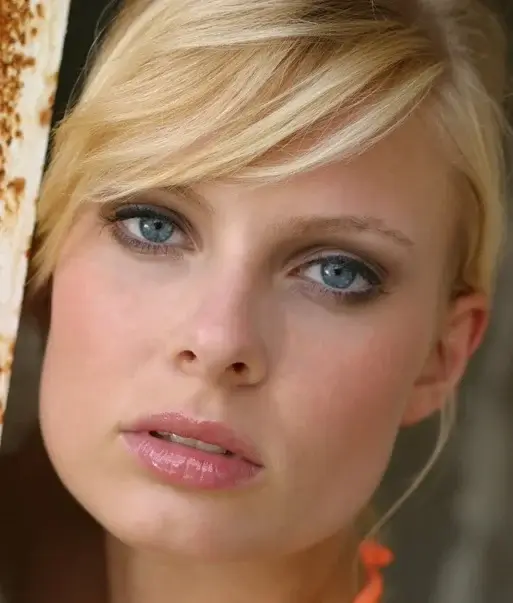
Let’s go for the female, as we know, “Ladies first”! I am going to use an image taken from the website called “Pexels”. Load the image in Photoshop. I am using Photoshop CC 2019, but you can use other versions as well.
By the way, the Remove Eye Bags app is available for smartphones, but the quality is not close to Photoshop’s performance.
Step – 01: Sample Image for Female Eye Bags Remove
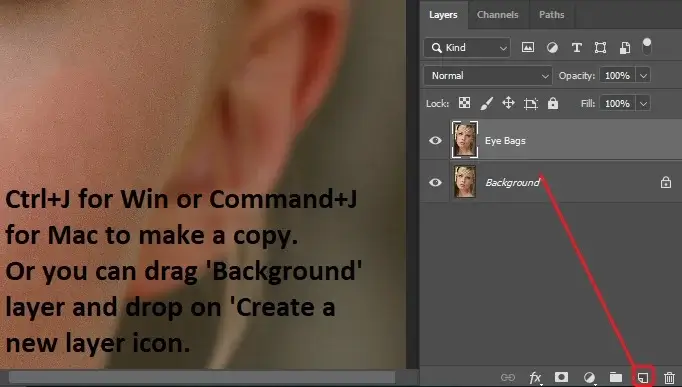
Step – 02: Create a New Layer Named “Eye Bags”
After taking the sample, we will make a copy of the layer by selecting the layer and using Ctrl+J for Win or Command+J for Mac. You can also drag and drop any layer to the ‘Create a new layer’ icon for the same. I am naming it ‘Eye Bags’.
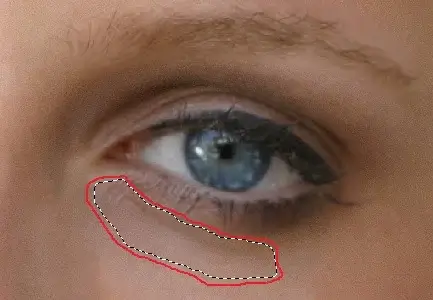
Step – 03: Use of the Patch & Zoom Tool with Selections
Select the ‘Patch Tool’. Zoom in to the level so that you can see the impurities more clearly. Press and hold the Alt key for Win or the Option key for Mac and scroll up with the mouse scroller to zoom in. Select an area under the eyes.
Drag and drop on the area you want to sample from. Bright areas are good for the process. Keep doing the same to remove all the eye bags. There will be dark shades visible under the eyes, and we will take care of them later. The same goes for the wrinkles near the nose and lips.
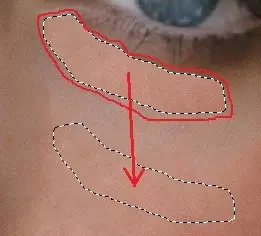
Try to make a comparatively smaller selection so that the area where we need samples from contains the same bright tone. Mentionable things are that the patch mode should be ‘Normal’ and the ‘Diffusion’ is at ‘5’. The lower the ‘Diffusion’, the harder the edges. The maximum value is ‘7’, but the default value ‘5’ is good to use.
This method is one of the easiest ways to remove eye bags in Photoshop and is commonly used in professional photo retouching workflows.
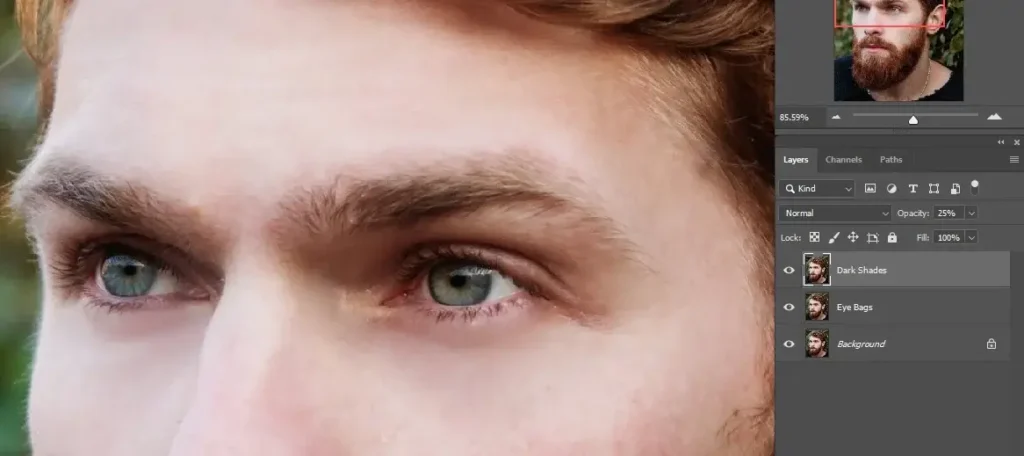
Step – 04: Handling New Copy Layer Dark Shades
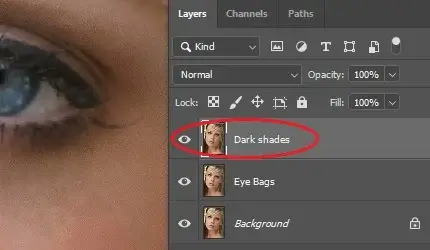
Now we will handle dark shades. Make a copy of the ‘Eye Bags’ layer and rename it as you want. And I am naming it ‘Dark Shades’.
Step – 05: Making Light and Bright Skin Tone
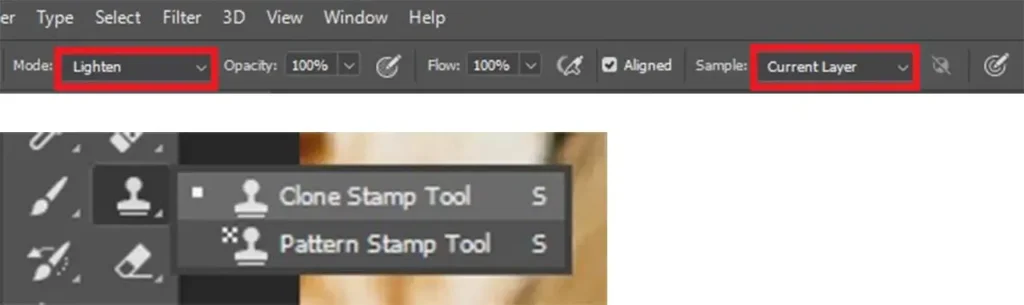
Select the ‘Clone Stamp tool’. Also, make sure the sample selection is ‘Current Layer,’ and the blend mode is ‘Lightened. Take a sample from a light and bright skin tone.
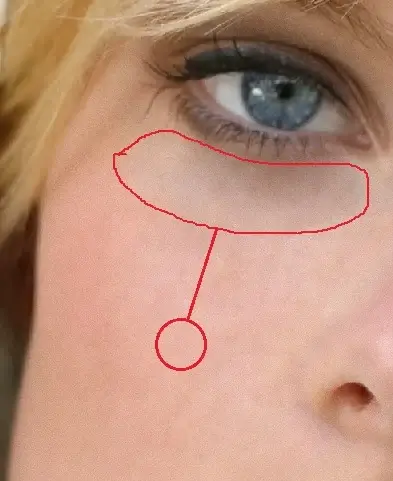
To take the sample, you need to press and hold the Alt key for Win or the Option for Mac. Take a sample and release the Alt key or Option key. Go to the dark shade areas under the eyes and brush over them.
Make sure not to brush over the eyes or any other places that could be messy. Keep doing the same until you remove all the dark shades. You can see that the bright color is applied only to the dark tone, not overall.
Still, there could be some unnatural bright shades that we will correct in the next step. Also, you can zoom in anytime whenever you want.
Step – 06: Layer Opacity Adjustment
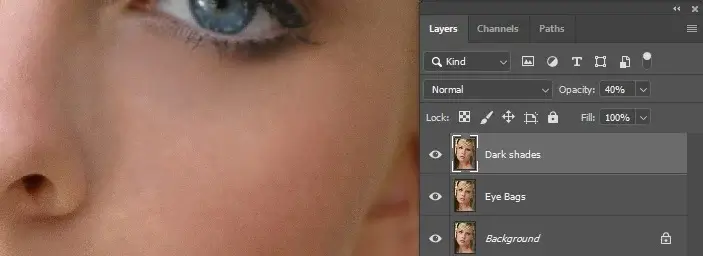
Decrease the opacity slowly to see the changes properly. Opacity ‘0%’ shows the view of the last layer, and opacity ‘100%’ will show clone stamp brushing with an unnatural effect.
So, I am keeping the opacity ‘40%’ for the image. Well, other images may require more or less, depending on the size and resolution.
Step – 07: Eye Bags Remove Finishing Touch
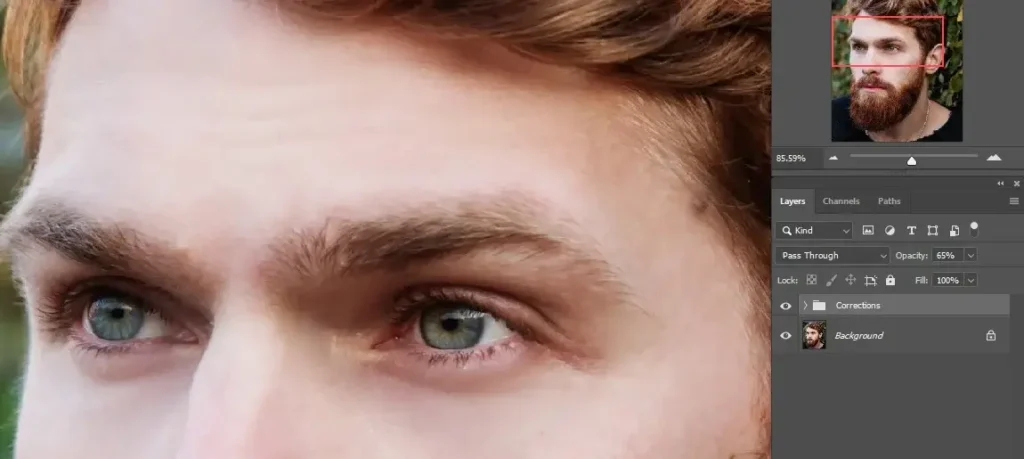
Now I am merging Eye Bags and Dark Shades layers in a group. Select both layers by using Ctrl for Windows or Command for Mac and press Ctrl+G for Windows or Command+G for Mac to make a group. You can also group them by right-clicking on both layers when selected and choosing ‘Group from Layers’.
A new window will show and hit ‘OK’ to make a group. Also, you can rename the group by double-clicking on ‘Group 1’. I am naming it ‘Corrections’.
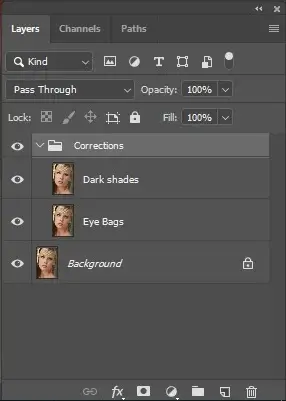
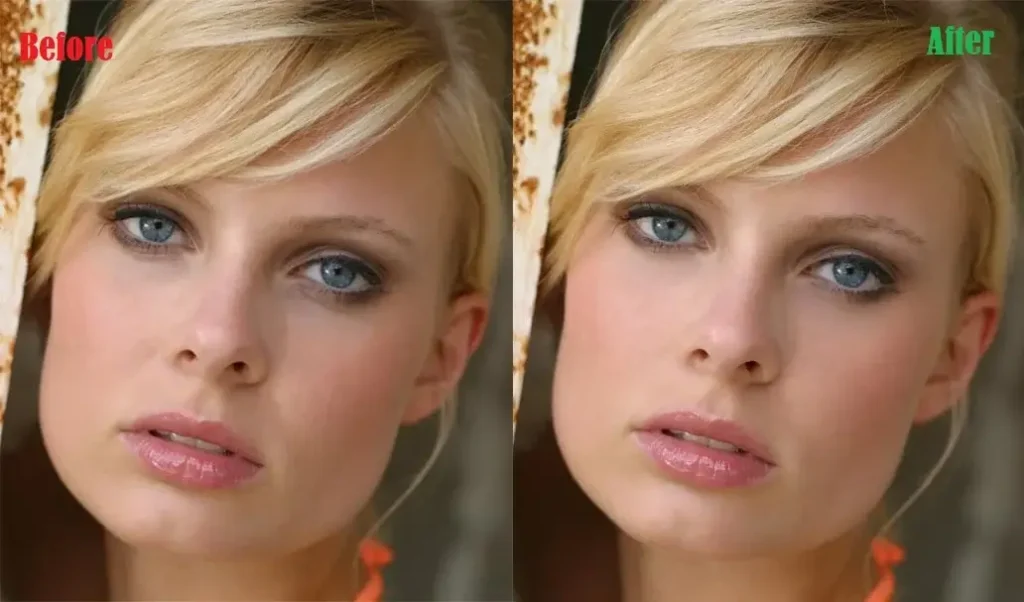
Well, it will not affect the procedure whether you rename the layer or not. Also, you can change the opacity in a group. I am using the opacity ‘65%’ for the image. And I suppose it makes the image look more natural. We are pretty done here. See the final image below before and after editing.
Male Eye Bags Removal Process
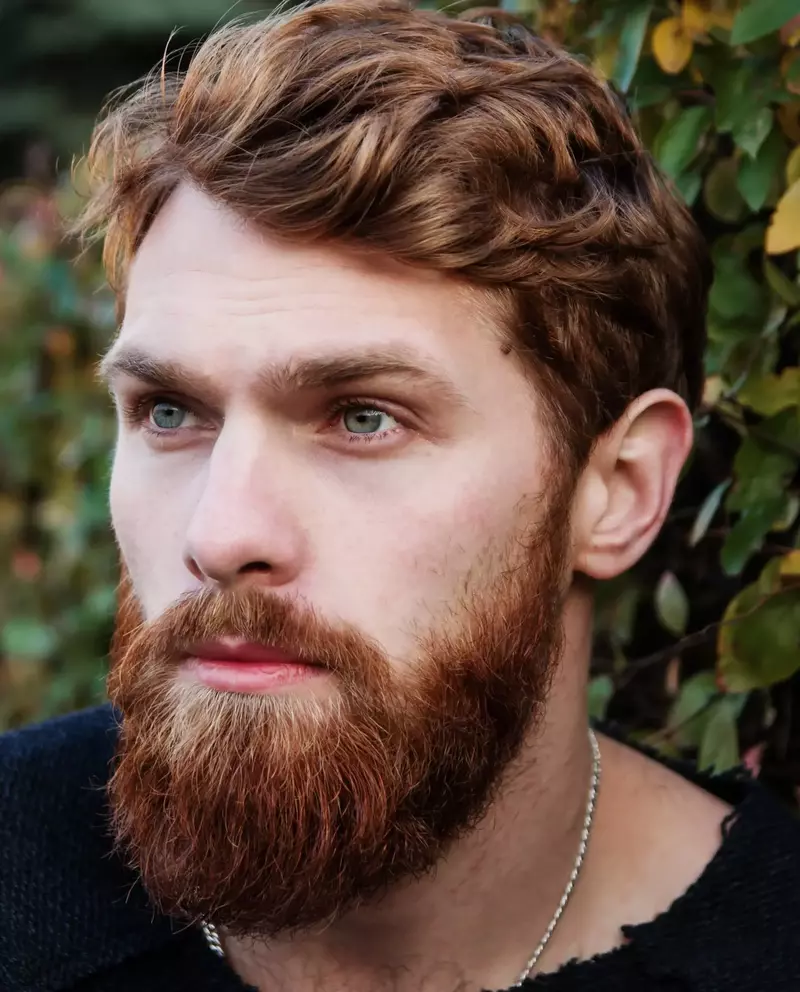
Step – 01: Sample Image for Male Eye Bags Remove
Now we will go for the male. We will do the same procedure for males, but the opacity should be less. The reason is that male faces require a rough look, unlike female faces.
If you furnish the male face as female, this could be a mismatch or unnatural. However, there are some male faces that are so flawless, and we will count them as an exception.
Step – 02: Identifying Areas and Opacity Adjustment
First, we will use the ‘Patch’ tool to replace or replicate eye bags, wrinkles, and moles. For this, we will decrease the opacity so as not to completely vanish them. The male face is better if you keep it a little bit. Of course, the impurities should be more visible than the female version.
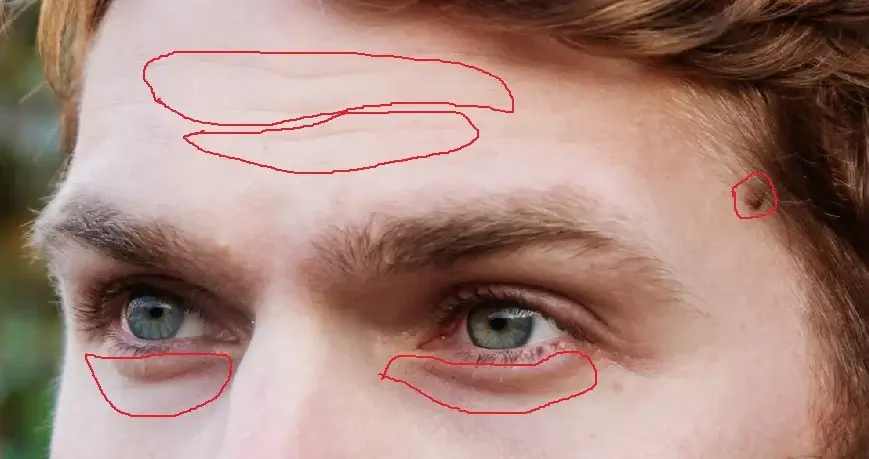
After creating a copy of the background layer for ‘Eye Bags’, I have used the ‘Patch’ tool to replicate some areas to reduce eye bags, wrinkles, and moles. Also, I am keeping the opacity at 65%, which keeps the rough effect a little bit. Well, you can decrease a little more, like 50% or 40%, and it is not a big deal.

Step – 03: Handling New Layer “Dark Shades”
Next, we will go for the dark shades. Though there is not much to do, we did a little touch on the dark shades.
Step – 04: Finishing Touch
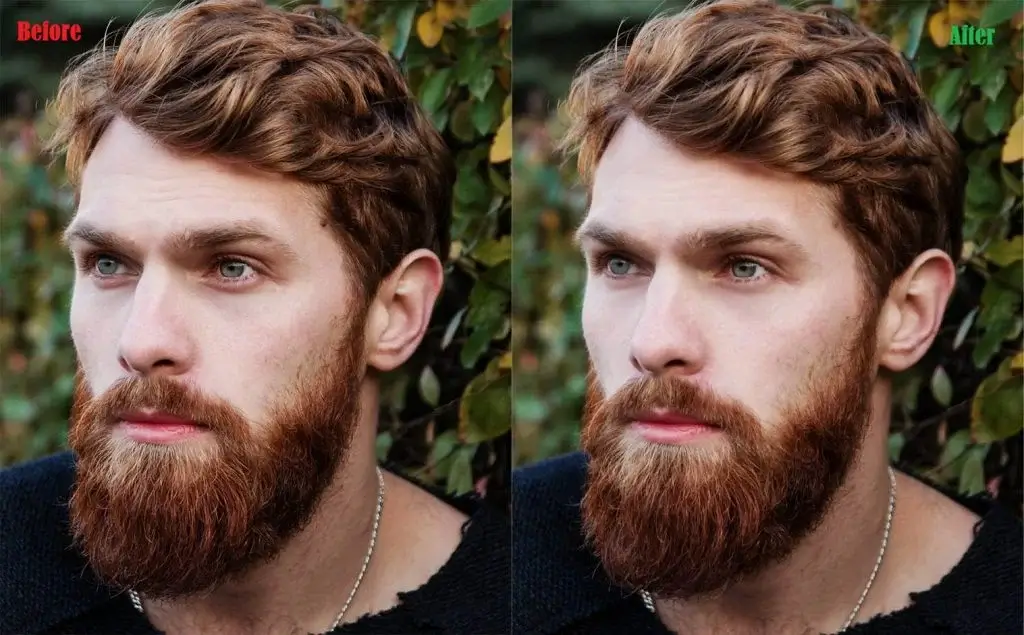
Finally, we will merge ‘Eye Bags’ and ‘Dark Shades’ Layers together and decrease the opacity to ‘25%’. And this looks pretty much appropriate for the image. Well, other images may require more or less, depending on the subject view.
Let’s see both images (before & after) together.
Another Way to Remove Eye Bags in Photoshop
Another easy method to remove eye bags in Photoshop is by using the Healing Brush Tool. Simply sample a nearby smooth skin area and paint gently over the dark circles under the eyes. This technique works well for minor wrinkles and small under-eye bags while keeping the skin texture natural.
Conclusion | How to Remove Eye Bags
I hope this tutorial helps, and if you get to the point properly, you can remove eye bags and dark circles in Photoshop in just a few minutes. In here, we have also learned how to remove shadows under the eyes using Photoshop and the techniques of Photoshop for softening bags under the eyes.
If you need professional help with photo retouching, you can check our professional photo retouching service at Clipping World.
FAQ | How to Remove Eye Bags
Yes, Photoshop can remove eye bags naturally using tools like the Patch Tool, Clone Stamp Tool, and Healing Brush Tool. These tools allow you to reduce dark circles and wrinkles while keeping the natural skin texture and avoiding an over-edited look.
To remove eye bags in Photoshop, duplicate the background layer and use the Patch Tool to replace the under-eye area with smoother skin. Then apply the Clone Stamp Tool in Lighten mode to reduce dark circles and blend the skin tone naturally.
The Patch Tool is one of the best tools to remove eye bags in Photoshop because it replaces the under-eye area with nearby smooth skin. For dark circles, the Clone Stamp Tool or Healing Brush Tool can be used to brighten the skin tone.
To remove dark circles under the eyes in Photoshop, use the Clone Stamp Tool in Lighten mode and sample a brighter skin area. Gently brush over the dark areas to reduce shadows while keeping the skin texture natural.