
Want to take your photo editing skills to the next level? Frequency separation is a powerful technique that can help you achieve professional-looking results.
In this tutorial, we’ll break down the process step-by-step, making it easy to understand & apply. Before going to the editing process, let’s know about the ‘Frequency’ first.
What Is the Frequency
Frequency is the wave that has the vibration. For example, if we draw a straight line from left to right, we can think of it without any frequency. That means it has no vibration.
Dan Margulis is called the inventor of Frequency Separation. He is an expert in photo color correction and post-production in Photoshop.
There is a great usage of frequency separation. If you work on one, the other will remain unchanged. So, you can work without any hesitation.
Frequency Separation with Photoshop CC 2019 is the most convenient than any other version. People may say Frequency Separation Photoshop CC 2018 is preferable. This is a debating matter, and we will not go for that.
Frequencies To Know for This Chapter
The main thing Frequency Separation does is separate the image into two different parts. One of them contains color. With this one, you can change the color or shade. This will not affect the other one.
The “Low Frequency” layer holds volume, tone, shadows, and light information for correction, while the “High Frequency” layer contains fine details like skin texture, wrinkles, and pores. Together, they define “Texture.”
According to Google elaboration, Texture is the feel, appearance, or consistency of a surface or a substance. If the concept is not clear yet, stay with us and follow the activities.
The Process
Image Separation from the background is challenging work in Photoshop. Working on the Frequency Separation process is a little tricky at the beginning. But don’t worry. After completing the tutorial, you will understand it well enough. It is the skin editing Photoshop operation.
You need to have Adobe Photoshop for the procedure. Open the program then open the image that you want to perform Frequency Separation.
Part 1: Remove Spots and Blemishes
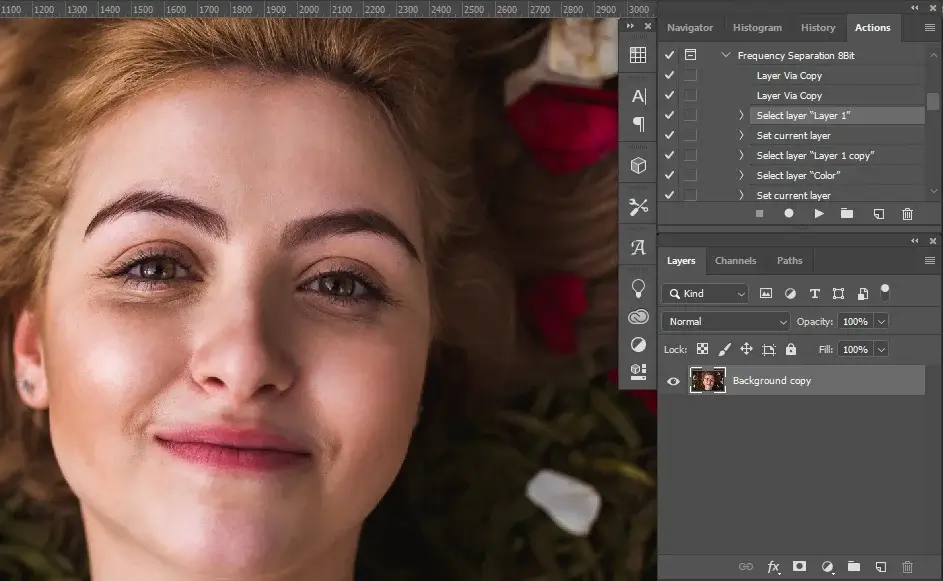
Copy the background layer to keep the main image intact. There are several ways to copy a layer. Select the layer and press Ctrl+J for Win or Command+J for Mac to make a copy. This is the easiest and fastest way. You can also click and drag the background layer with the mouse and drop it over the new layer.
Delete the ‘Background’ layer. Before we go for the Frequency Separation, we need to remove the blemishes or spots. If you want, you can do it later but isn’t it better to solve the small problems before the big ones?
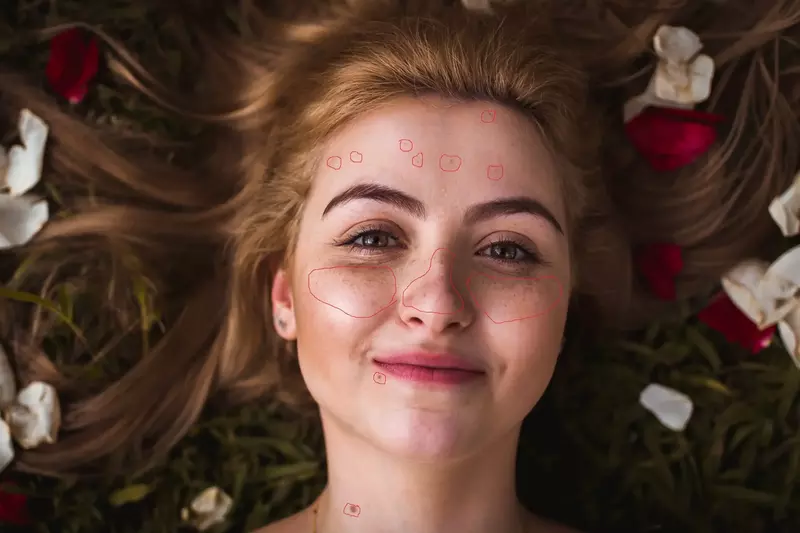
Select the ‘Healing Brush’ tool. Take a sample from a clean area near the blemishes and paint over the spots. Just make sure the ‘Sample’ is current & below and the ‘Blend Mode’ is normal.
Zoom in a little to see the spots properly and paint over them. Continue the same for all the blemishes. Stop when all are gone. And do not heal the texture of the image may ruin the natural look.
Part 2: Frequency Separation
Intro Of Frequency Separation Process
Let’s go with Portrait Photography Frequency Separation. For the Frequency Separation process, we will use an action. I have already taken action for you. You can download it from the net. Then you need to load the action in your Photoshop.
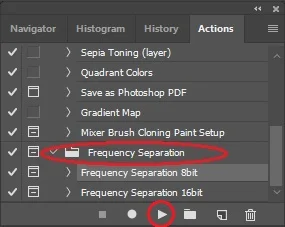
So, open the ‘Action’ window from the Photoshop menu ‘Window’ and select ‘Actions’. Loading the Frequency Separation Action will minimize the labor for each image. Hence, no need to make copies of the background or modify them. This is the easy Frequency Separation option for you.
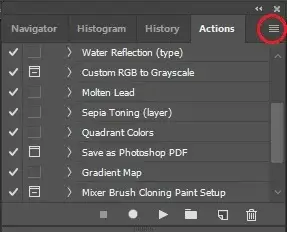
The ‘Actions’ window will open. Now, click on the grid located in the upper-right corner of this window.
Load Actions
Select ‘Load Actions’. Locate the Action from your hard drive and open it. You will see your selected action in the list. If your image is 8-bit, select the ‘Frequency Separation 8bit’ or if the image is 16-bit, select the ‘Frequency Separation 16bit’.
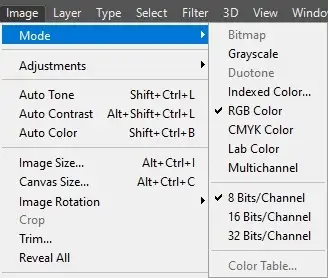
To know if your image is 8-bit or 16-bit, go to the menu ‘Image’ and then ‘Mode’ and see which one is checked. We will not go for the details of frequency separation 8-bit vs 16-bit here.
Select The Background Layer
Hit the play button and you will get all the settings in the layer. At the same time, make sure you press the play button to select the background layer.
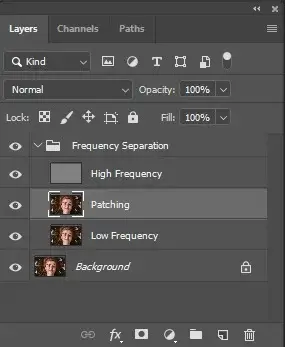
You will see the Frequency Separation Action creates some layers automatically in a group and adds them in the window. Then the Action will ask for the ‘Gaussian Blur’ level that needs adjustment. You can say this one is a Frequency Separation surface blur.
For the image, I am keeping the bar to 4 pixels. Well, this adjustment is important to blur all the texture from the ‘Low-Frequency Layer’. If you turn off the group of layers and turn it on again, you will see no difference. This is because the Frequency Separation action divides the image into two parts. The Low Frequency and the High Frequency.
Together they complete the whole image. Indeed, they are the Frequency Separation Photoshop elements. If it happens, that means the process is successful. Otherwise, you will not see them inserted properly.
Now we have the frequencies separated, we can work on them individually. You can also create the Frequency Separation layer if you want. Just follow the Action step by step and you will get it.
Part 3: Patching
Select The Patch Tool
At first, we will select the ‘Low Frequency’ layer and make a copy. You can rename it ‘Patching’. In order to rename, double-click on the layer text and write the name.
As you know, it is not important to rename the layers. But is for your own convenience. This is the frequency separation smooth skin activity layer.
Select the Patch tool. If you cannot see it in the tools panel, click and hold on to the ‘Spot Healing Brush Tool’ and you will see five options popped out to the right. Now select the ‘Patch Tool’ from there. Before we start using the Patch Tool, make sure the ‘Patch’ is normal, the ‘Source’ is selected, and the ‘Diffusion’ is at 5.

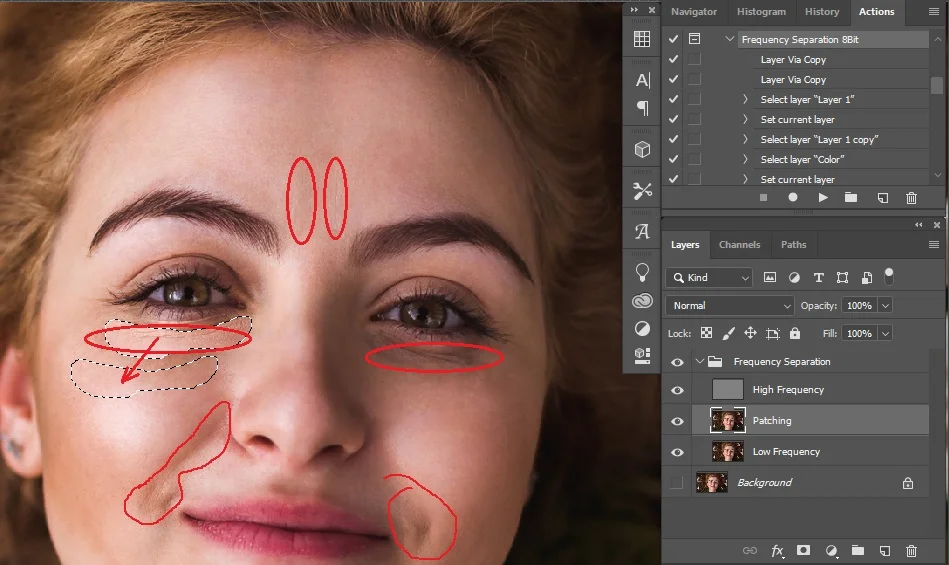
We will go for the big details only. For example, shades and darkness of the eye bags, wrinkles, etc. You can hide the ‘High Frequency’ layer, the view will be unclear, but you can see the big impurities. Or you can work without hiding any layer.
The choice is up to your convenience. Select an area that you want to correct, click, and drag over the skin where you want the sample from.
Working On The ‘Patching’ Layer
Continue patching until all the big impurities vanish. Keep in mind, that you are working on the ‘Patching’ layer and only the color. For the textures like wrinkles, eye bags, etc. we will work on them later.
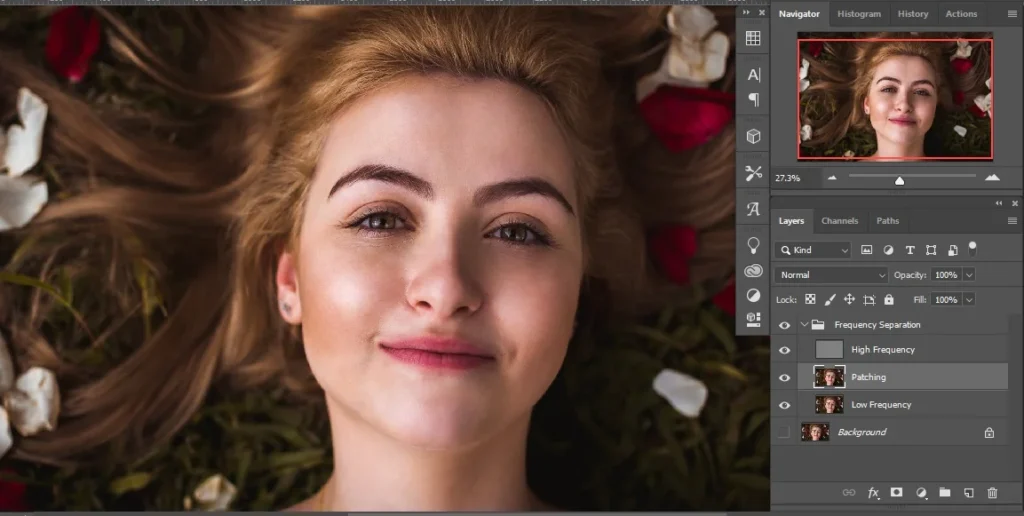
We have done the job (See the image above). I have left some areas untouched beside the lips to keep the natural beauty. Also If you want, you can patch them and decrease the opacity a little. The result may be smooth. But I like them for keeping the smile intact for now.
If it is good for you, you can skip any further steps. That depends on the image and your satisfaction. We are going further though. You can also see the Frequency Separation affinity photo on the web. Check them for better comparison.
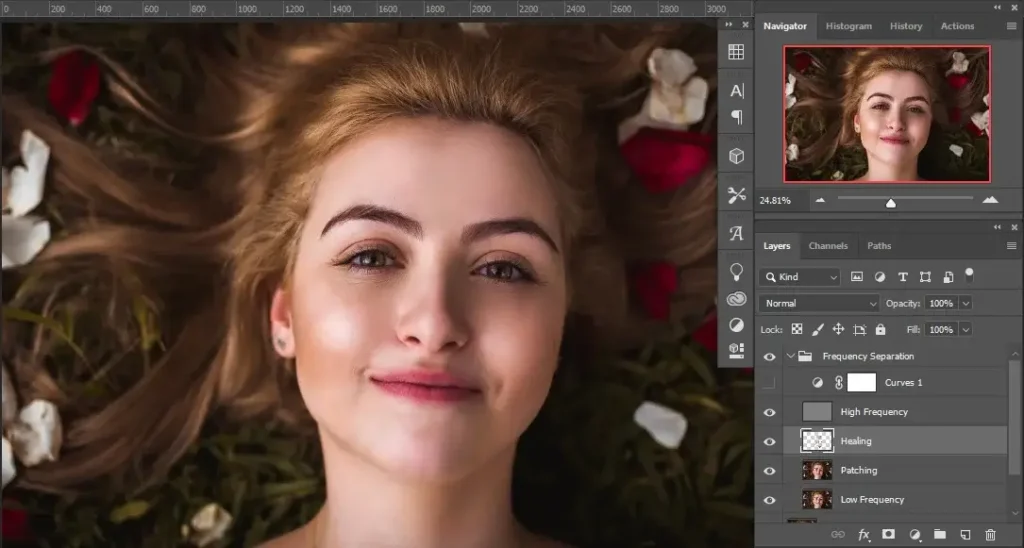
Part 4: Healing
Normal Blending Mode Setup
In order to perform ‘Healing’, you need to take a new layer over the ‘Patching’ Layer and below the ‘High Frequency’ layer. You need to click on the new layer button. The button is on the bottom-right of the ‘Layers’ window just before the delete icon.
Remember, all we are doing is between the ‘High Frequency’ and the ‘Low Frequency’ in the ‘Frequency Separation’ group. I am naming the new layer ‘Healing’. This time, we will use the ‘Healing Brush Tool’ and target the small details. Click and hold on to the ‘Patch Tool’ and you will see the menu and select the ‘Healing Brush Tool’.
As we are going to work on a new layer, make sure ‘Blend Mode’ is ‘Normal’ and ‘Sample’ is ‘Current & Below’.
‘Curves’ Adjustment Layer
To make your working method easier, you can turn off the ‘High Frequency’ layer and add a ‘Curves’ adjustment layer above the ‘High Frequency’ layer.
You need to make the shadows a little darker so that you can see the small impurities. You can delete the ‘Curves’ adjustment layer later. This is just to see the details better.
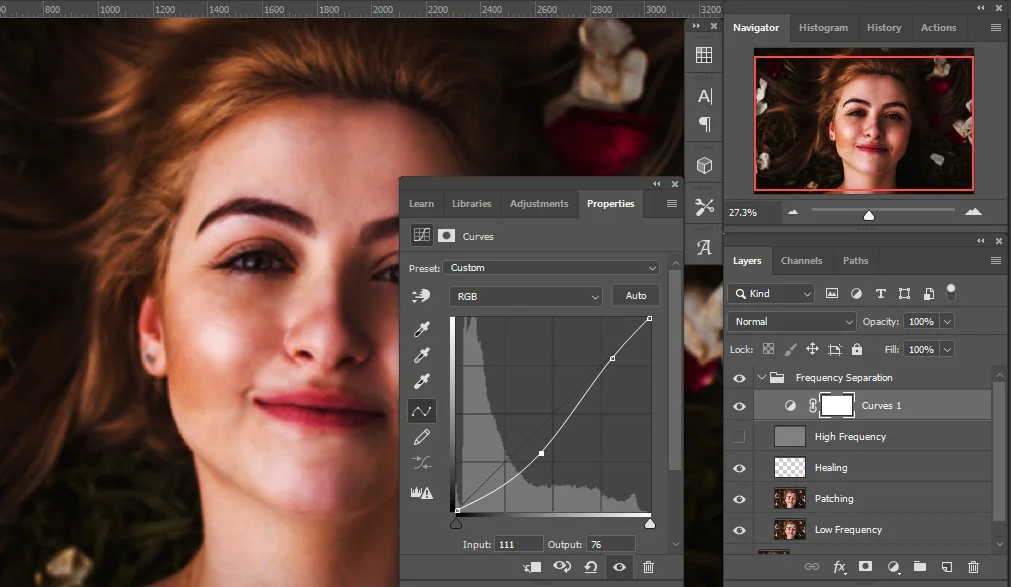
Select the ‘Healing’ layer and press & hold Alt for Win or Option for Mac and pick up a sample from a clean area. Now draw over the impurities to make them look matched. Also if you make a mistake and notice it instantly, you can press Ctrl+Z for Win or Command+Z for Mac to undo it.
But if you find the mistake later, use the ‘Eraser Tool’ to correct it. As it is in a different layer, nothing to worry about with the other works. This will not harm any. From time to time turn on the ‘High Frequency’ layer and turn off the ‘Curves’ adjustment layer to check for the accuracy of the work.
If the work is not good enough, you can delete the ‘Healing’ layer and start again creating another one. I have done the healing process and here is the result.
If you want you can decrease the opacity of the layer to maintain the natural look. For this image, it is not necessary.
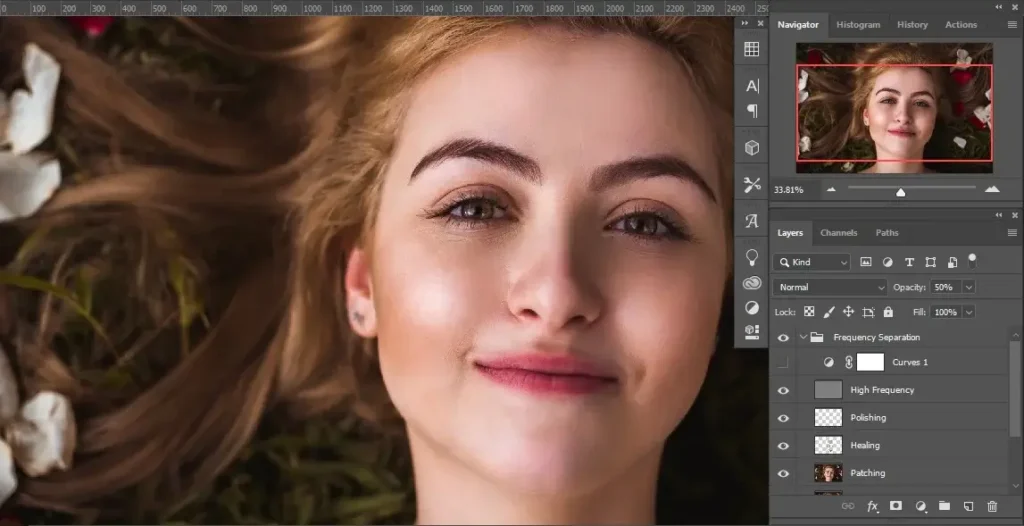
Part 5: Polishing
This is the final step of the Frequency Separation operation. For this, you need to add a layer above the ‘Healing’ layer and use the ‘Brush Tool’. Before brushing over the layer, select the ‘Eye Dropper Tool’.
Select the ‘Sample Size’ ‘5 by 5 Average’ and ‘Sample’ ‘Current & Below’. This is, in fact, the Frequency Separation brush effect on the image.
Brush with 100% opacity and low flow. And, I am using the flow at 13% for the image and going for the small impurities. After completing, the result is as below. A very minor difference you will see with the part but helps to make it perfect.
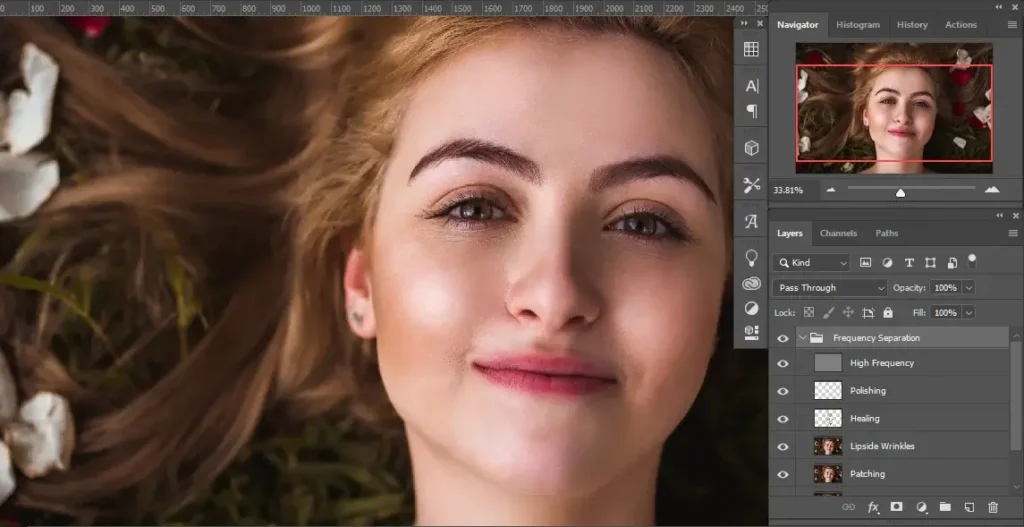
Part 6: Additional Patching
Before finishing the process, I think we should take care of the wrinkles beside the lips a little. So I have copied the ‘Patching’ layer and worked on that with the ‘Patch Tool’. It’s a very short process, so it did not take long.
Now, I will change the opacity to 50% to keep the natural look. And, I will delete the ‘Curves’ adjustment layer now. It is not necessary.
See the below Photoshop Frequency Separation before and after images. Massive difference.
Before

After
Conclusion | Photoshop Frequency Separation
I hope the tutorial is helpful. Try with other images that require similar kinds of editing and get the best out of it. There are other ways to get flawless image editing, but this is the most convenient one.
Separating the frequencies you can work independently on any layer, and it will not harm the texture. So the natural texture is intact. However, check out our other activities from Clipping World and allow us to support you.
Read Our Latest Articles
- How Big Is A 5×7 Photo? (Pixels, Mm, Cm & Inches)
- Midjourney AI Software Review
- 61+ HD & Free Aesthetic Wallpapers For Professionals
FAQs
What is Photoshop Frequency Separation?
Photoshop Frequency Separation is an action that helps to correct an image without any destruction. This process separates the image into ‘High Frequency’ and ‘Low Frequency’. Combining both of them you will get the full image but with separate layers.
How Does Frequency Separation Work?
Frequency Separation works in a group. By dividing the image into two layers, it separates the color and the texture to their own level. So, if you work on one, the other will not be affected. Together you will see the changes.
What is the Cost of Frequency Separation editing?
The price is variable depending on the image quality and the complication of the editing. Clipping World offers you industry bottom price starting at $1.2 per image only. Also, we have up to 50% discount on bulk considering the number of files.