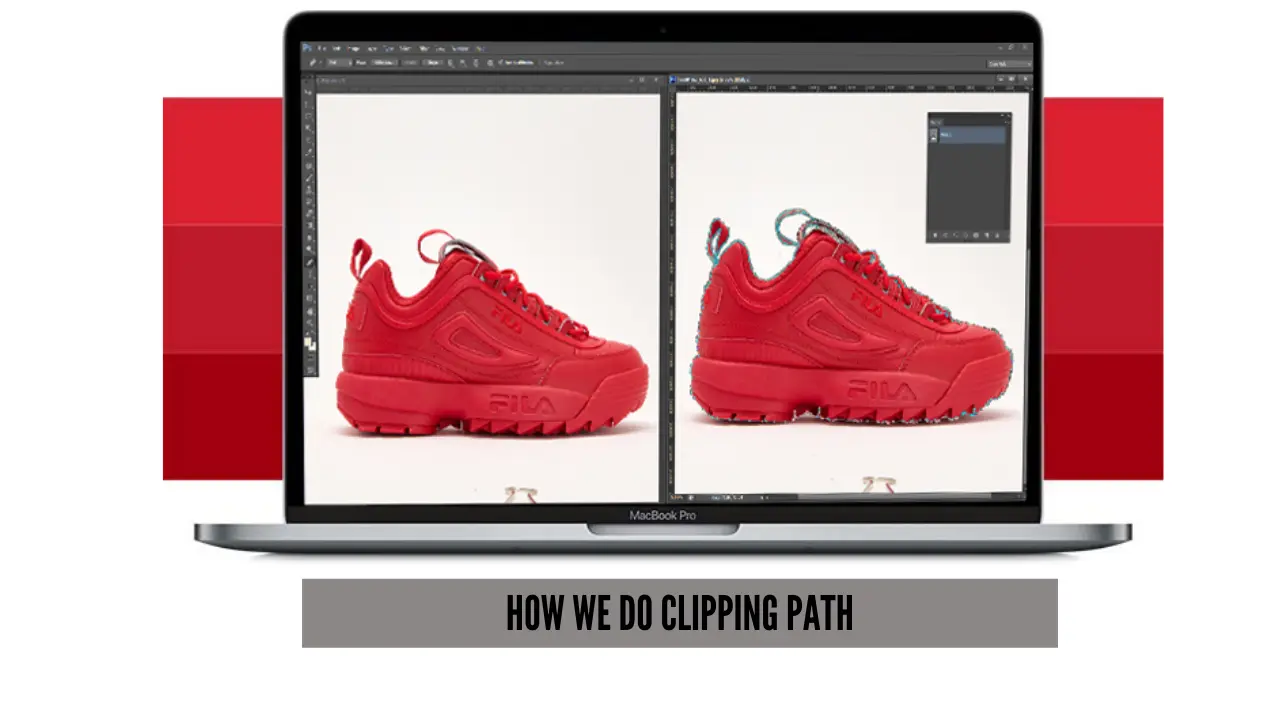
Learning how to do clipping path in Photoshop is a fundamental skill for creating clean, professional-quality images. By using a manual clipping path, you gain full control over background removal, object isolation, and precise color correction.
This step-by-step tutorial will show you how to create accurate clipping paths using the Pen Tool, helping you produce polished visuals for eCommerce, marketing, and design projects.
What Is a Clipping Path and Why Do You Need It
The clipping path is a type of vector outline that is used to select a particular part of an image within a raster image. It’s widely used for:
- Background removal
- Color correction
- Removing unwanted elements
Since clipping paths are not resolution-dependent, they remain sharp and precise no matter what size they are. This makes them ideal for e-commerce images, product photography, and professional visual content.
If you want a deeper explanation of this technique, understanding what a clipping path is will help you apply it correctly in Photoshop.
Tools You’ll Need for Clipping Path in Photoshop
The most common tool for creating clipping paths is the Pen Tool, which allows precise control over curves and angles. Other tools you can use include:
- Lasso Tool: Freehand selection for rough shapes
- Magnetic Lasso Tool: Snaps to edges automatically
- Magic Wand Tool: Selects areas of similar color
- Quick Selection Tool: Fast selection with brush-like precision
Step-by-Step Guide: How to Do Clipping Path
Now it is time to create the clipping path. Before starting the practice, get an image from the internet or select one from your device. This workflow is also used in Photoshop CC, where the Pen Tool remains the standard method for creating precise clipping paths.
Step 1: Open Your Image in Photoshop
Launch Photoshop on your computer and import the selected image. You can open the file by navigating File > Open. Also, you can simply drag and drop the image into Photoshop.
Step 2: Select the Pen Tool
Now you have to select the pen tool to draw a line around the image. You can select the tool from the Photoshop toolbar panel, which is on the left side of the program.
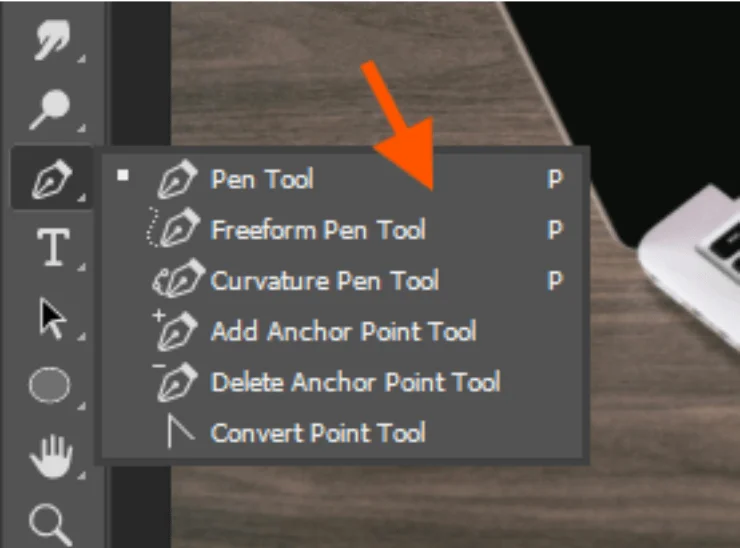
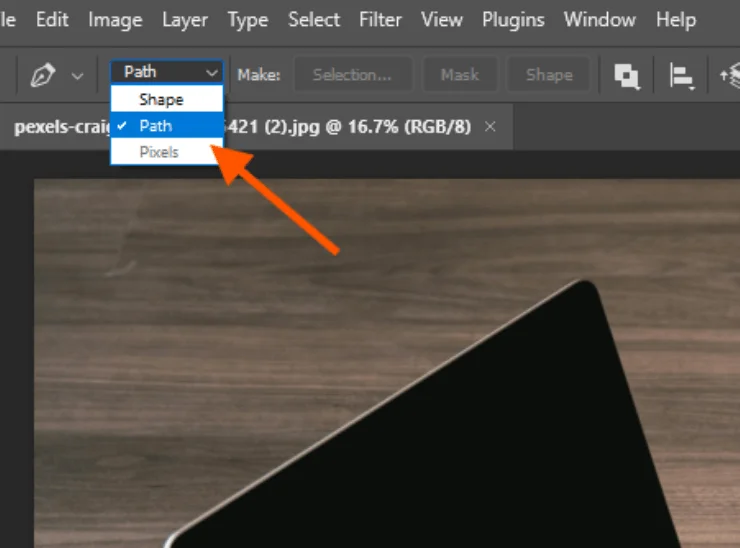
Before drawing the path, make sure that the Pen Tool is set to “Path” mode in the top menu. It means you are creating a path and not a shape layer.
Step 3: Draw the Path
Now it is time to draw the path. To create a perfect path, you have to select the edges of the subject so carefully. Zoom in on the object to work with greater precision. Press Ctrl + “+” (Command + “+” on Mac) to zoom in or Ctrl + “-” (Command + “-” on Mac) to zoom out.
To create the first anchor point, click on the starting point of the subject. Then click another edge that is in the straight line to the first anchor point. Thus, you can create straight lines.

For curves, click and drag when placing an anchor point. A direction angle will appear. It controls the curve of the path. If the curve is not suitable, you can adjust it by using the direction handles. Click and hold Ctrl and click on one of the direction handles. Thus, you can adjust its position without moving the anchor point itself.
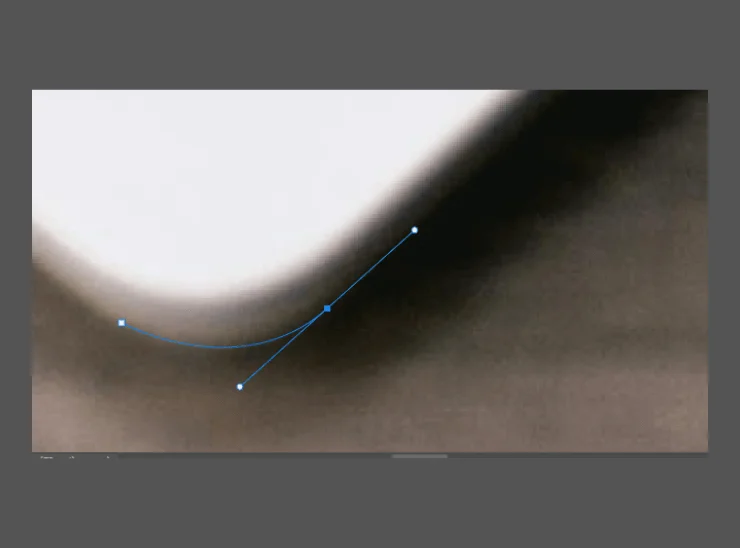
You can move the handles to the inner direction or outer direction to create a wider curve. However, if you misplace the anchor point, you can refine its position by holding the Ctrl button and clicking on the point to adjust its position.
Moreover, you can remove an anchor point by pressing Alt and hovering over the anchor point. You will see a minus sign ( – ). Then, click on it to remove the point. To add the anchor point, hover over the path between two points and press a plus sign ( + ) while holding Alt.
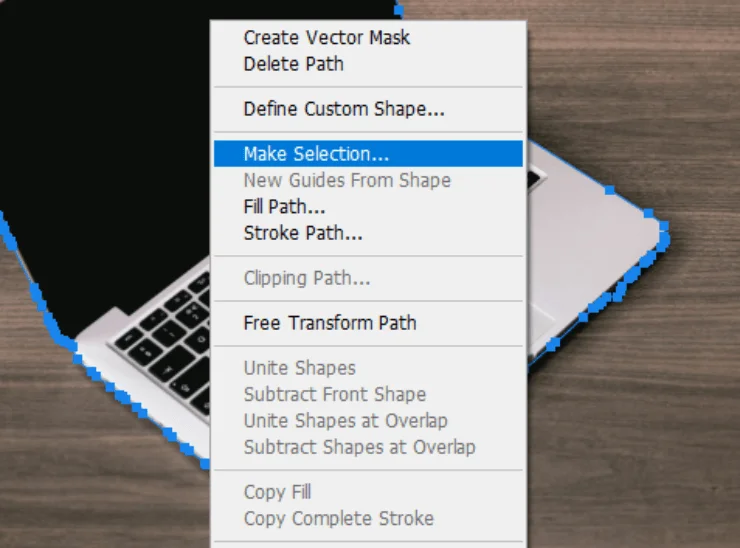
Step 4: Convert the Path into a Selection
After creating the path, it is time to convert the path into a selection. So, right-click inside the path area to choose “Make Selection” from the appeared menu. A dialog box will appear. Here you can adjust the feather radius. If you are satisfied with the selection, click OK.
Step 5: Remove the Background or Create a Mask
To create a mask, go to the Layers panel and click the Add Layer Mask button. Thus you can remove the background non destructively.

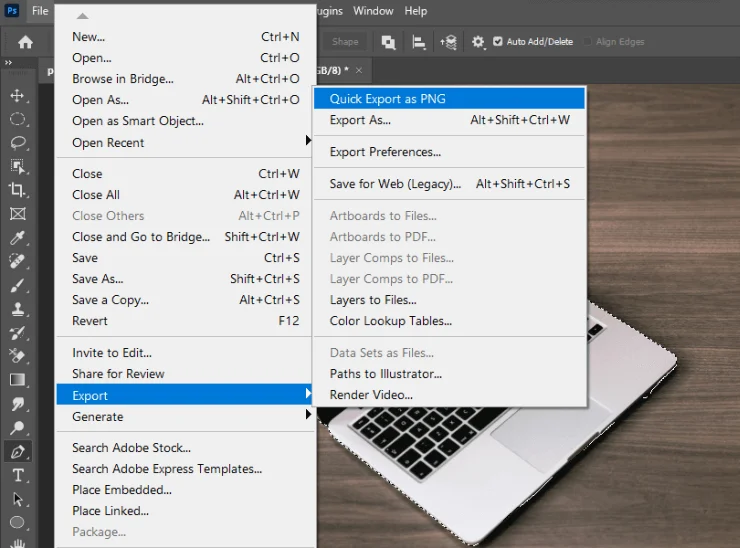
Step 6: Save and Export the Clipping Path
In the Paths panel (found next to the Layers panel), double-click the “Work Path” and save it with a name. This way, you can reuse the path or edit it later.
FAQs About How to Do Clipping Path
The cost of a clipping path service varies with the complexity of the images. However, the pricing of the clipping path starts at $0.29 per image at Clipping World. You will also get a discount on the bulk order. For images with soft or transparent edges, knowing the difference between image masking and clipping paths helps you choose the right editing method.
To remove a background from an image, first, select the subject using an image selection tool. Then press Ctrl+J to take the selected subject to a new transparent background layer.
Final Thoughts
Creating a perfect clipping path in Photoshop takes practice, but mastering it can elevate your images to a professional standard. For beginners, following this step-by-step guide will help you gain confidence and precision. Want to save time on large projects? Hire a professional clipping path service to edit bulk images quickly and accurately.