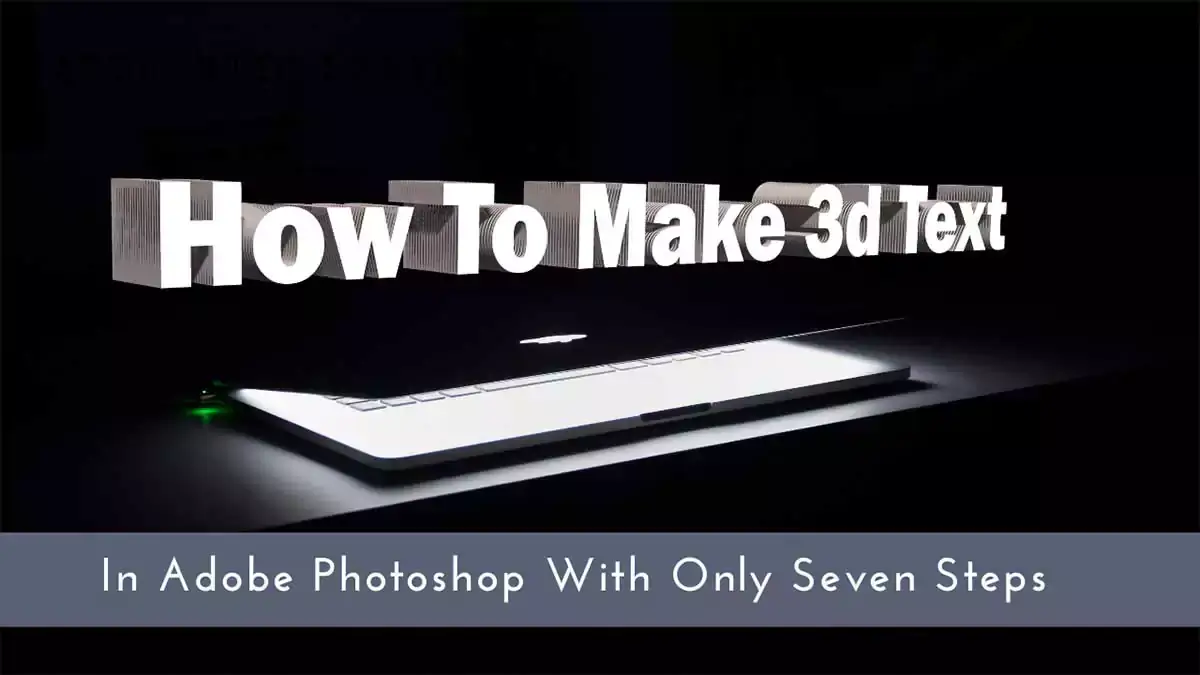
In this article, I’ll teach you how to make 3D text in Photoshop with only seven steps. If you’re interested in the text effects that Photoshop has to offer, keep reading.
We are going to make some modifications to its shape, configure the light sources, develop the material, and finally render the entire scene. Just keep in mind that to do 3D text in Photoshop, you need Photoshop CC or CS6 Extended at the very least.
3d Text Photoshop Tutorial
Whether you’re creating logos, posters, or social media graphics, 3D text can make your designs more engaging and full of personality. We’ll guide you step-by-step through the process of transforming ordinary text into 3D. Let’s dive in and bring your text to life!
Step 01: Open Photoshop
First, open your Photoshop programs then go to the upper bar and click the file option.
Step 02: Choose Photographs
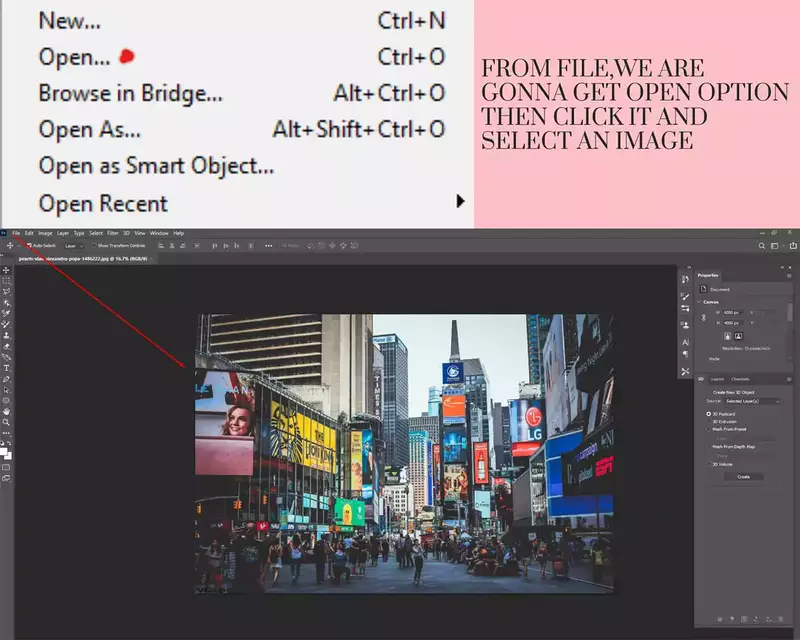
The next step is to choose any photographs of a city from your desktop PC; alternatively, you can select any images from your computer. In this lesson, we are going to make a 3D urban text. Because of this, we will be choosing pictures of urban environments.
Step 03: Adjust Colors in The Image
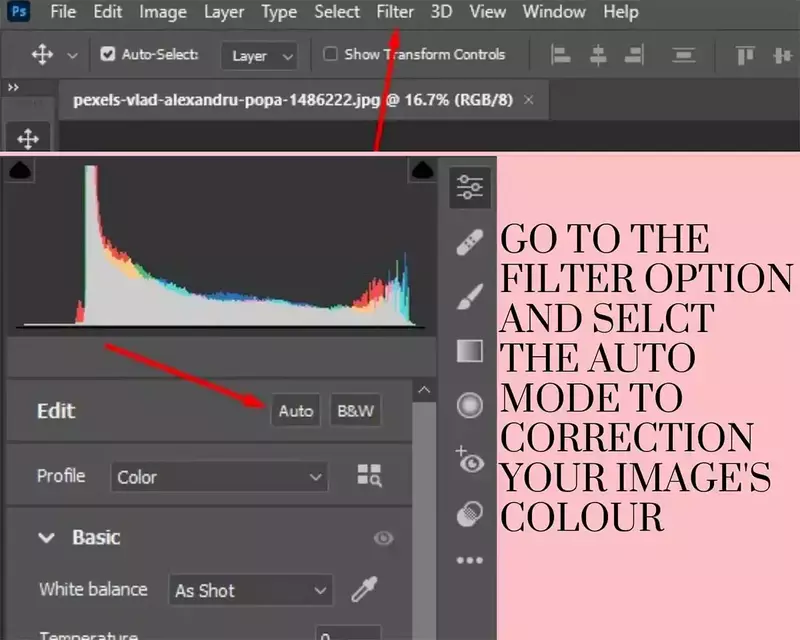
After that, pick the filter option from the menu that appears at the top of Adobe Photoshop, and when it does, you should see the camera raw filter. Click on it, and Adobe Photoshop will automatically adjust the colors in the image for you.
Step 04: Text Tool
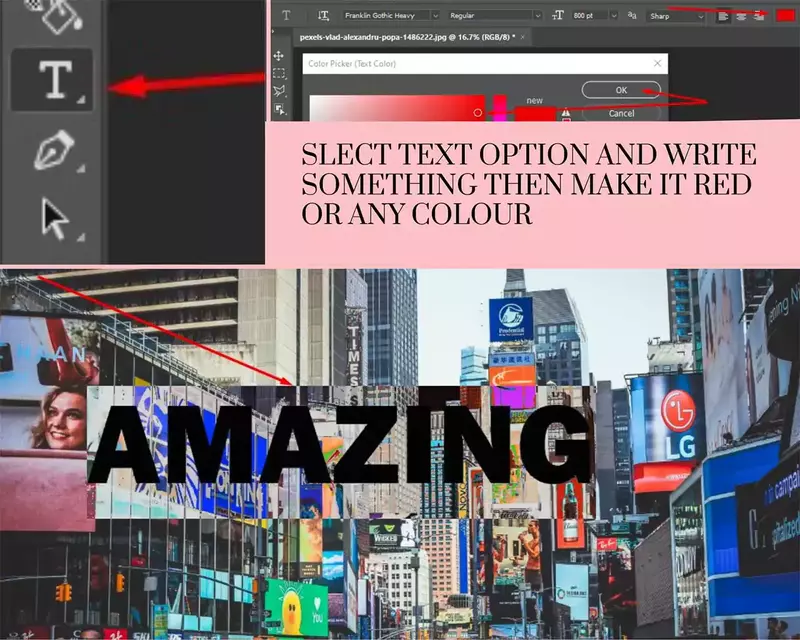
Now seems to be the time to choose the text tool, choose a text font according to your preferences, then type something over the image, and lastly save your work. Increasing the size of the image from 500 to 800 pixels is the perfect proportion for creating 3D text.
Step 05: Select 3D Option
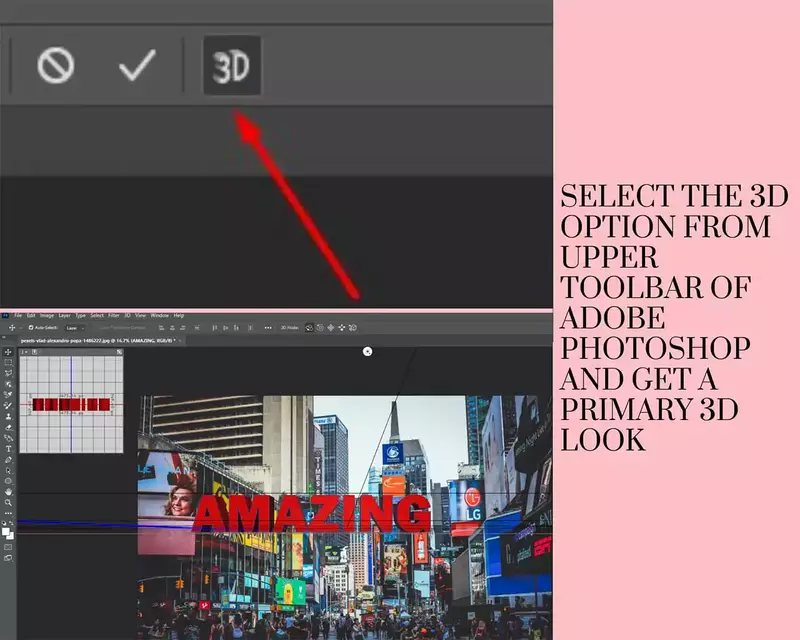
Next, in the menu bar of your Adobe Photoshop program, select the 3D option. This will give you a new look for your Adobe Photoshop program, and it will also give you primary 3D text.
Step 06: Make Adjustment
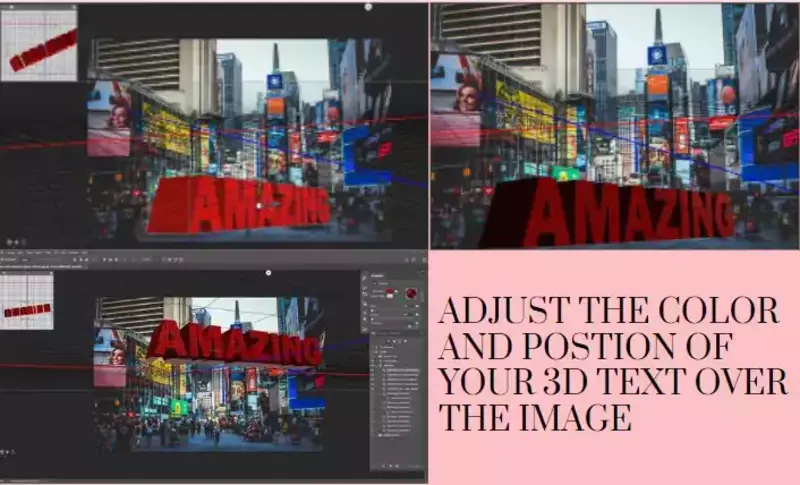
Now would be the time to show off your creative side; all you need to do is click in the middle of the 3D text, and you’ll receive a third-dimensional vector plot with three axes labeled X, Y, and Z. Use your mouse to make adjustments to your picture until it provides the perfect look as 3d text.
Step 07: Save as PNG

The completed appearance of your 3D text is as shown here. Browse to the file, and make sure it’s saved as a PNG or jpg.
Great Work!
You should now be familiar with the process of creating 3D text in Photoshop. Take a look at the following tutorials if you want to learn more about making 3D text effects in a variety of styles:
Related Tutorials
- How to outline text in Photoshop
- How to create an X-ray effect in Photoshop
- How to create a hair transplant in Photoshop
FAQ | 3D Text in Photoshop
How To Make 3D Block Letters in Photoshop?
First, select all of the letters and then go to Object > Group (Ctrl/Cmd + G) to combine them into a single shape. This will ensure that the letters do not separate into their distinct 3D forms when we transform our text into a three-dimensional object. After that, select Effect > 3D > Extrude & Bevel from the menu bar. This will cause an Options dialogue box to pop up.
What Effect Gives the Text A 3D Look?
The text-shadow property is used to make the 3D text animation effect. The reason to use multiple text shadows is to give the word a 3D look because if we only use one text-shadow, it will be the same for all the letters in the word.
How Do I Make 3D Letters?
Draw a triangle as your first step.
- Make the letter A’s top part.
- Draw the left diagonal line of the letter A.
- Fill out the letter A’s left side.
- Now, draw a line down the middle of the bottom.
- Then draw the bottom line on the right side.