Old photographs are more than just paper and pixels. They hold special memories of family, history, and important moments. But as time passes and the photos fade, restoring them becomes essential. Whether you use an app or edit by hand, it’s easy to make mistakes that can spoil the restored photo.
In this post, we will explore the 10 most common photo restoration mistakes and guide you on how to avoid them. So that you can keep your memories safe and preserve them accurately. And if DIY doesn’t work, professional photo restoration services like Clipping World can help bring your photos back to life.
10 Most Common Photo Restoration Mistakes
Restoring photos might seem easy with today’s tools and apps. But even small mistakes can damage the quality forever. Let’s take a deep dive into the most common mistakes people make when restoring old images and how to fix them.
1. Overusing AI Filters or Auto Tools

With free photo restoration apps like Remini or Fotor, it is easy to use one-click tools to fix your damaged photos. These tools are quick and easy, but they often make photos look less natural and lose details.
What Goes Wrong
- Faces can look too smooth or like cartoons.
- AI might add or remove facial details that aren’t there.
- The restored photo loses its authenticity.
- Automatic tools apply blanket changes that ignore the unique characteristics of each photo.
How to Fix This Mistake
- Use AI filters to start, but don’t rely on them to finish the job.
- Use a little AI help, then fix details by hand with programs like Photoshop or Snapseed.
- For valuable or badly damaged photos, professional manual restoration is the safest and best option.
2. Scanning Photos at Low Resolution
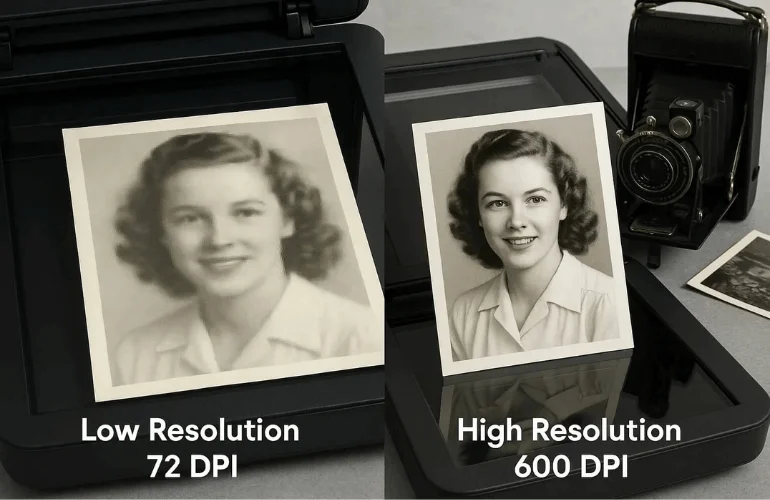
The restoration process starts with digitization. Many people scan old photos at low quality or use phone cameras, which leads to poor results.
What Goes Wrong
- Low-resolution scans make it hard to fix or bring back photo details.
- Blurry or pixelated images make it hard to retouch fine textures or faces.
- Enlarging low-res photos introduces grain and distortion.
How to Fix This Mistake
- Scan your photos at a minimum of 300 DPI, ideally 600 DPI or higher.
- Use a flatbed scanner for sharp, even scans.
- Only use your phone to photograph a photo if you don’t have a scanner. If you do, keep your hand steady and use good lighting.
📚 Pro Tip: Learn how DPI affects image quality with this DPI guide from Epson.
3. Incorrect Color Correction
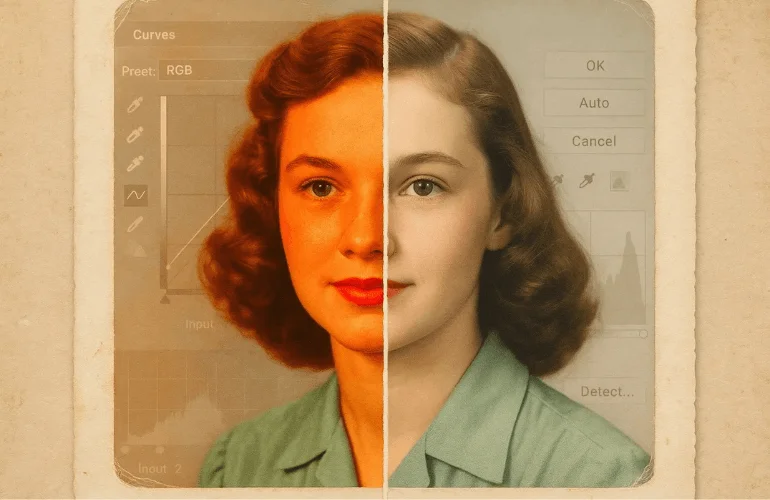
Many restored photos suffer from poor color correction. Especially when trying to fix faded or yellowed prints. Inexperienced editors often use too much color or rely on auto tools that create unnatural tones.
What Goes Wrong
- Colors become too bright, unnatural, or mismatched.
- Skin tones look orange, red, or washed-out.
- The photo loses its original look and feel after editing.
How to Fix This Mistake
- Use tools like Levels, Curves, and Selective Color in Photoshop for gradual adjustments.
- Pay close attention to skin tones and background colors—they should look soft and realistic.
- Calibrate your screen (see Mistake #9) to ensure you’re seeing true colors.
4. Excessive Noise Reduction or Sharpening
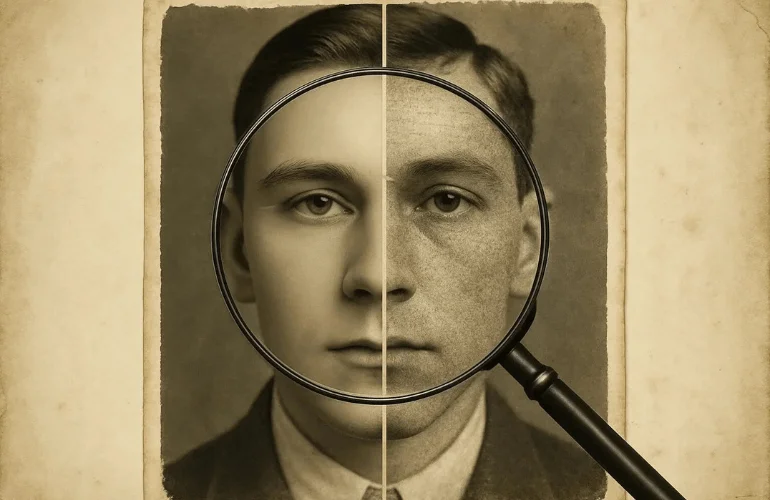
To “clean up” old photos, many people overdo sharpening or noise reduction. These tools are powerful—but without careful control, they can ruin an image’s texture and depth.
What Goes Wrong
- Faces and skin appear overly smooth or plastic.
- Background textures look unnatural or lose their grain.
- Sharpening can make edges look too sharp or create glowing halos around them.
How to Fix This Mistake
- Use selective noise reduction tools to apply smoothing only where needed.
- Use sharpening carefully and apply it on a copy layer so you can change or hide parts if needed.
- When possible, focus on restoring original detail instead of forcing clarity.
5. Cloning Over Facial Features or Key Details
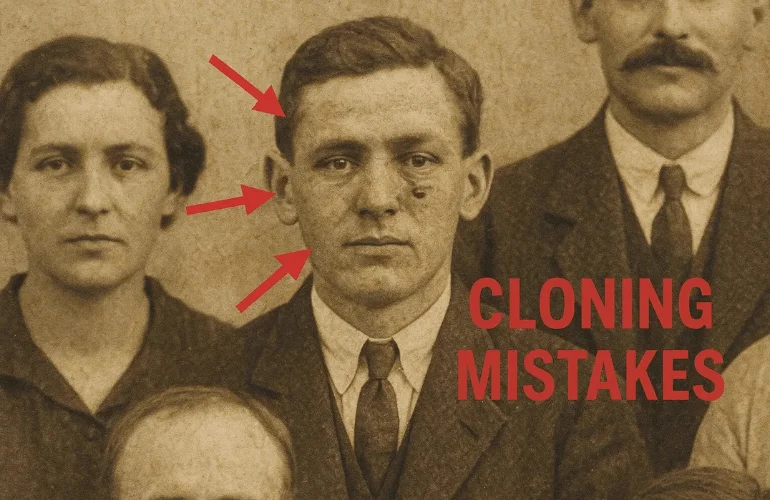
The clone stamp and healing brush tools can fix scratches and tears. But you need to be very careful when using them. Especially on faces and important parts of the photo.
What Goes Wrong
- Misused cloning can erase or distort key parts of the image—like eyes, smiles, or hands.
- Repeating patterns become visible, making the image look obviously edited.
- The photo may lose emotional value if unique features are altered.
How to Fix This Mistake
- Zoom in and fix small areas carefully, making sure to match the photo’s natural texture and lighting.
- Use frequency separation techniques to separate tone and texture for safer edits.
- For important restorations, such as family portraits, it’s best to rely on a professional service with expert editing skills.
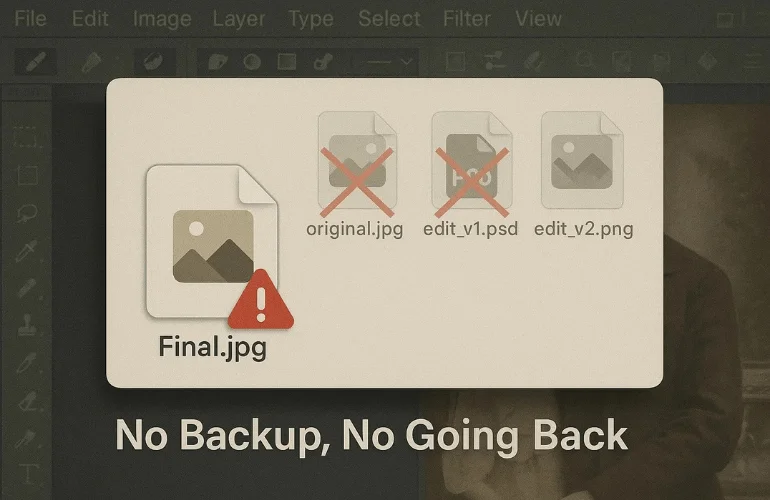
6. Saving Over the Original File
One of the most common and irreversible mistakes is saving your restoration work directly over the original photo file. Once you overwrite the original, there’s no going back if something goes wrong during editing.
What Goes Wrong
- You lose the untouched version of your image forever.
- It limits your ability to try different editing techniques.
- Mistakes become permanent, especially with flattened layers.
How to Fix This Mistake
- Always create a duplicate of the original file before editing.
- Save working files as PSD to preserve layers.
- Save versions incrementally (e.g., photo_edit_v1, photo_edit_final) to keep backups.
7. Ignoring Background Damage
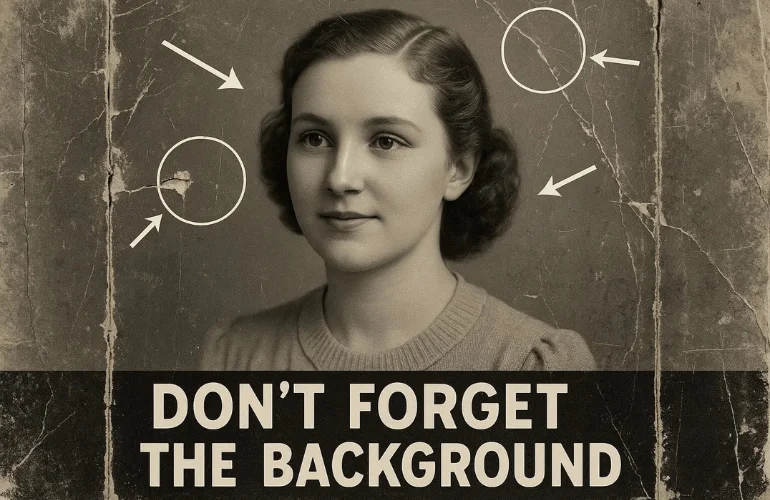
Many DIY editors focus solely on the subject—usually a person or face—while completely overlooking the background. However, stains, scratches, and tears in the background can make the restored photo look incomplete or unnatural.
What Goes Wrong
- The contrast between a clean subject and a damaged background looks unbalanced.
- Background flaws can distract from the subject.
- It diminishes the overall value and quality of the restoration.
How to Fix This Mistake
- Use healing and cloning tools to repair background textures.
- For large background issues, recreate missing sections using nearby textures or patterns.
- If the background is beyond repair, consider replacing it with a soft blur or complementary tone that doesn’t overpower the subject.
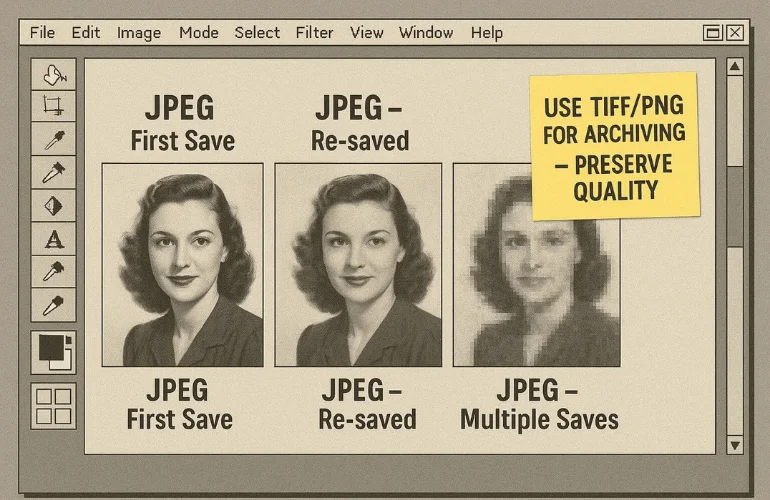
8. Using the Wrong File Format
The way you save your restored photo affects its quality and how long it lasts. Saving as a compressed format like JPEG can lower the details and cause image problems, especially if you edit it many times.
What Goes Wrong
- Saving as low-quality JPEGs for convenience or file size.
- Saving the same JPEG file again and again makes its quality get worse each time.
How to Fix This Mistake
- Use TIFF or PNG for high-quality, lossless results.
- Save your working files in PSD format (if using Photoshop) to preserve layers and edit history.
- Only use JPEG for web use or sharing—never for archiving restored photos.
9. Not Calibrating Your Screen for Editing
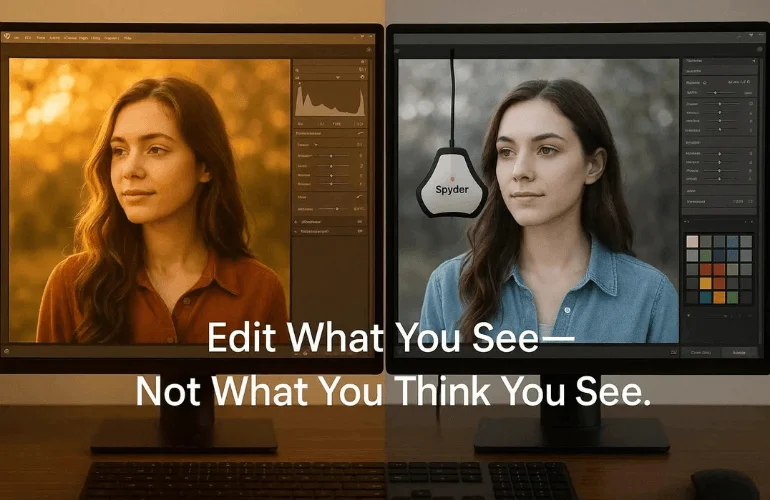
Photo editing depends heavily on accurate visual feedback. If your screen’s brightness, contrast, or color temperature is off, your edits may look completely different on other devices or in print.
What Goes Wrong
- A photo that looks good on your screen might look faded or too yellow when you see it in real life
- Uncalibrated screens can lead to poor color correction and inconsistent tonal balance.
How to Fix This Mistake
- Calibrate your monitor using built-in tools or external calibration devices like the Datacolor Spyder.
- Adjust your display’s color profile to match industry standards (sRGB or AdobeRGB).
- Work in consistent lighting conditions to avoid visual discrepancies.
10. Applying the Same Fixes to Every Photo

No two damaged photos are the same—each has a unique texture, age, lighting, and type of damage. Applying the same filter, preset, or auto-enhancement to every image can do more harm than good.
What Goes Wrong
- Loss of photo identity—images look “edited” instead of authentic.
- Inappropriate corrections may worsen the damage or make it look artificial.
- Batch processing tools often fail to address specific restoration needs.
How to Fix This Mistake
- Analyze each image individually before editing.
- Use customized adjustments for color, sharpness, and damage repair.
- When in doubt, consider professional restoration for images that require detailed or artistic recovery.

Get Your Free Photo Restoration Mistakes Checklist
If you’re unsure whether to fix a photo yourself or hire an expert, our guide comparing free apps vs professional photo restoration methods can help you decide.
When to Consider Professional Photo Restoration Services
Restoring photos yourself can be fun and satisfying, but some pictures need special skills that only we have. If your photo is very old, badly damaged, or means a lot to you, it’s best to let us at Clipping World take care of it.
We use advanced tools and have years of experience to fix photos carefully. We can save you time and help avoid mistakes that can’t be undone. By choosing our professional restoration, you make sure your photos stay looking real and beautiful, and you can feel confident that your precious memories are safe with us.
Conclusion | Photo Restoration Mistakes
Photo restoration is a powerful way to preserve memories—but doing it wrong can damage them forever. Whether you use an app or edit by hand, it’s important to avoid these photo repair mistakes. If your photo is valuable, damaged, or emotionally important, trust professionals. We, Clipping World, offer expert manual photo restoration that brings memories back to life—safely, beautifully, and affordably.
Frequently Asked Questions
The most common mistakes include over-editing, ignoring color balance, neglecting image resolution, removing important details, and failing to use proper backup copies. Avoiding these ensures your restored photo looks natural and preserves its original charm.
To prevent color distortion, always work in a calibrated color workspace, use soft color corrections, and compare your edits to the original image regularly. Avoid drastic hue changes and maintain natural skin tones and background colors.
Over-restoring can remove essential details and texture, making the photo look artificial or flat. The goal of restoration is to preserve the photo’s original character while fixing damage—not to create a new image from scratch.
Yes, disregarding the photo’s original era and style can lead to inappropriate colorization or editing choices. Research the photo’s background to restore it faithfully, respecting its time period and purpose.
Backing up originals is crucial. Mistakes during editing can permanently alter or damage the image file. Always work on copies to preserve the original photo for future use or different restoration attempts.