The invisible ghost mannequin effect makes it look like a real person is wearing the garment. However, mannequins, being human-shaped dummies, lack realism. So we need to remove them using graphic editing to make the image look professional.
The main challenge is that removing the mannequin can make the garment look incomplete. The back part, hidden behind the mannequin, is not visible, creating gaps in the design. To fix this, the missing parts of the garment must be added during the editing process.
To create the ghost mannequin effect, the garment is photographed from multiple angles. Such as the front, back, sleeves, and neck. The mannequin is removed, and the images are merged to create a smooth, hollow & natural look.
Photoshop Tools & Techniques for the Operation
Adobe Photoshop is the most effective program for ghost mannequin Photoshop editing or any kind of image manipulation. Well, there are other programs you may find. But none of them can perform as Photoshop can. So, we will work with the program that works best.
You will find multiple tools for the operation. Also, you can use techniques to utilize the tools better. The Photoshop tools we need for ghost mannequin effects are given below.
- The Pen Tool
- The Quick Selection Tool
- The Lasso Tool
- Select & Mask Tool
- Layer Mask
- Transform Tool
- Brush Tool
- Eraser Tool
Work Procedure | Invisible Ghost Mannequin Effect
To start working on the ghost mannequin Photoshop operation, we need all the photographs. The photographs should have all the parts required to complete the apparel photo. Then we go for the isolation of the parts from the background. After that, we go for adding the back parts to the front part. So, let’s open Photoshop and add the apparel parts photos in that.
Step 1: Align The Image
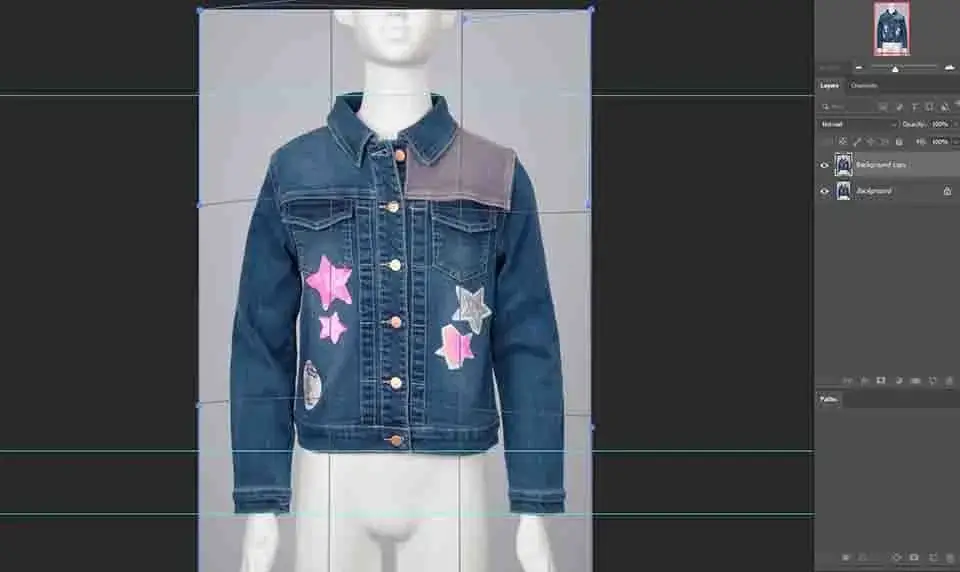
The first task is to align the image before doing any editing. Alignment is quite important for the ghost effect. Any photographs we take cannot be perfectly aligned with our eyes. If the photographs are for direct presentations, you can ignore them.
But, for the ghost mannequin effect, you must do it for a presentable view. So, we take the front part of the apparel and make the necessary changes with the help of the ‘Warp’ option.
To do so, first, we make a copy of the layer and create some temporary lines that we will follow. To create lines, simply click on the ruler and drag it to the point you need to set. Then we go for the transform tool by pressing Ctrl/Command+T for Win/MAC. After that, we right-click on the image and select ‘Warp’. After making the necessary changes by click & drag we apply that.
Step 2: Clipping Path
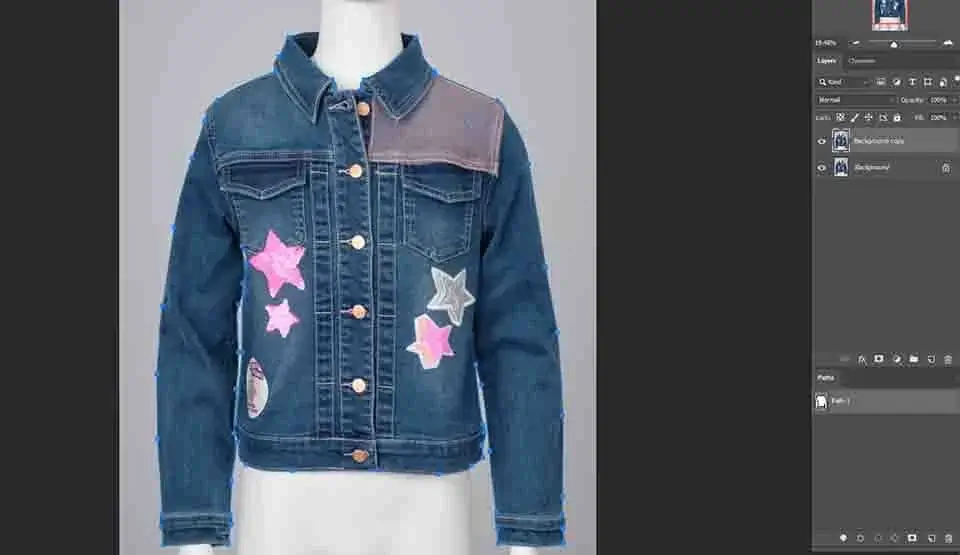
Now it is time to create a path. So, we take the Pen Tool and start from a point on the edge. To know more about Clipping Path, please follow our blog on Understanding and Mastering the Pen Tool in Photoshop. Here we have created the path for your convenience.
We renamed the path to save it. To rename, just double-click on the path and input the name you want. We are leaving the name ‘Path 1’, which is by default.
Step 3: Copy the Pathed Area to a New Layer
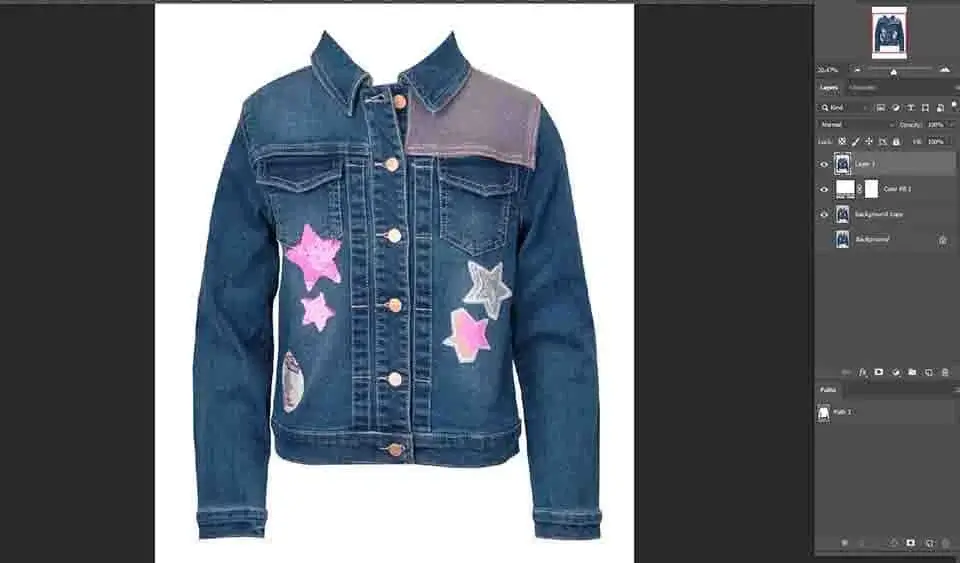
As we are done creating the path, we need to copy the area to a new layer. Press and hold Ctrl/Command for Windows/MAC and click on the path to make a selection. Press Ctrl/Command+J for Win/MAC to copy the selection to a new layer. Also, we added a solid color layer right below the copied path.
Step 4: Liquify
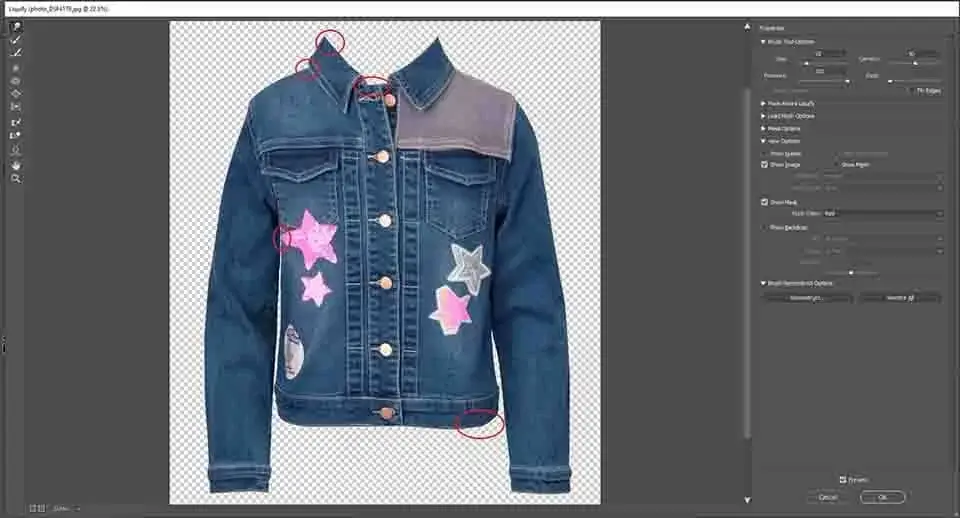
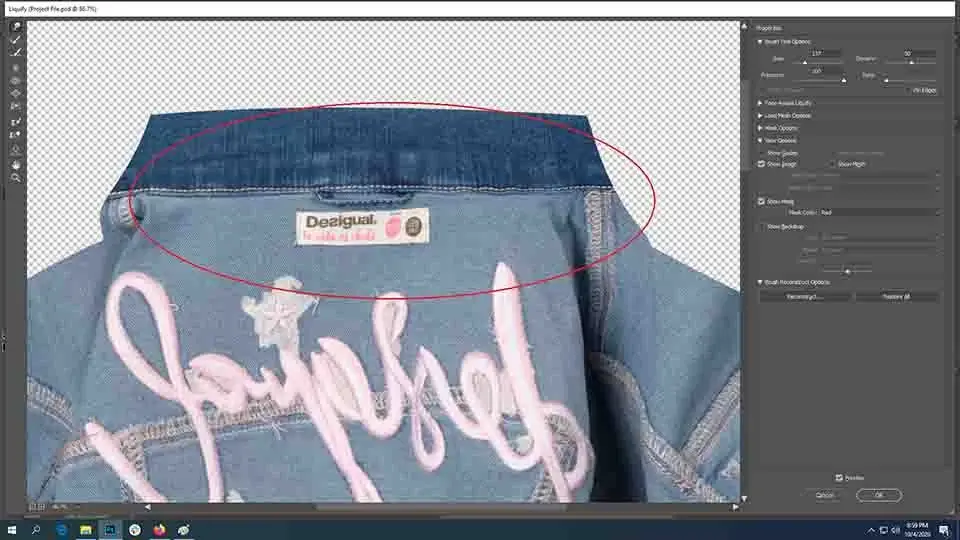
We do Liquify to cover up spaces that may look incomplete. For apparel, we need to apply this technique to achieve better output. To enter the option, go to ‘Filter’ and then ‘Liquify’. You will have the image in another window in Photoshop. We have made some changes that you can see in the image below. When done, press ‘OK’ to continue.
Step 5: Ironing
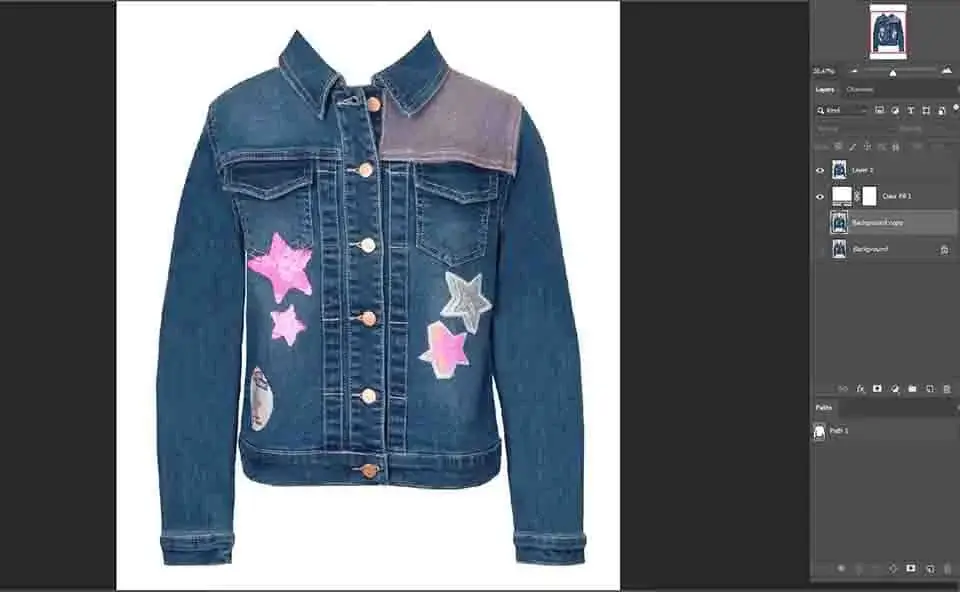
Ironing makes the apparel look polished. You may have apparel with wrinkles and shade variations here and there. So, you need to do graphical ironing over the apparel. Here we will use the Clone Stamp Tool to correct the imperfections. Well, this is a retouching method.
So, you need to do the editing according to the areas nearby. To use the tool, you need to press and hold Alt/Option for Windows/MAC and click for a sample. Then, release and move the pointer to the improper area and click & move. Remember, you need to take a sample multiple times from clean areas.
Otherwise, the process will not give satisfactory results.
Step 6: Adding Back Part
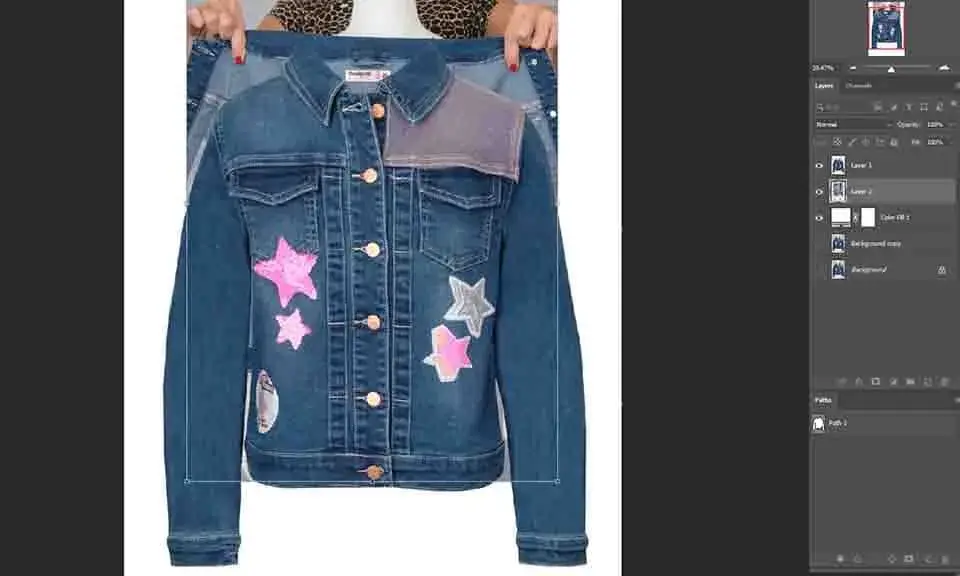
Adding the back part is another important step for creating the Invisible Ghost Mannequin Effect. You can select only the required part or add the whole directly. Here, we will add the whole and cut off unnecessary areas along the path.
So, we add the back part over the front part and then place it below the front part. The operation is easy. The addition of the back part takes the top layer automatically. We just need to click and drag the part below the front part layer.
Step 7: Placing Back Part
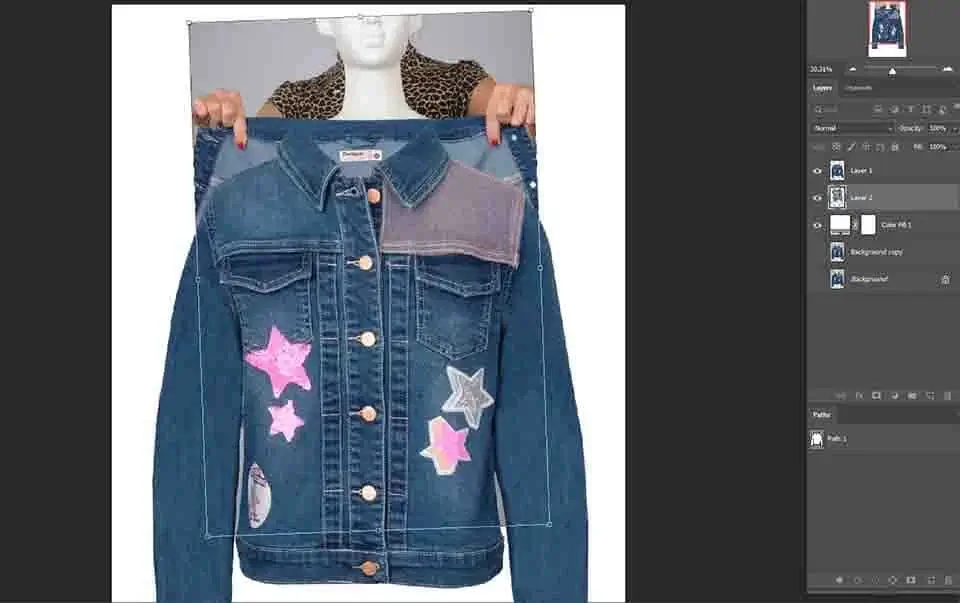
Placing the back part according to the front part is a technical matter. We use the Transform tool to do it properly. So, we resize, rotate, and match the front part according to our image. When we are done placing, we press Enter/Return for Win/MAC to apply.
Step 8: Clipping the Back Part
To clip the back part, we use a copy of the path that we made for the front part. To make a copy of the existing path, click and drag the path to the new path icon. Then, rename the path as ‘Path 2’.
Press & hold Alt/Option for Win/MAC and click on the path. This will show the anchor points to work on. Press & hold Ctrl/Command for Win/MAC and click & drag to select the anchor points you need to remove.
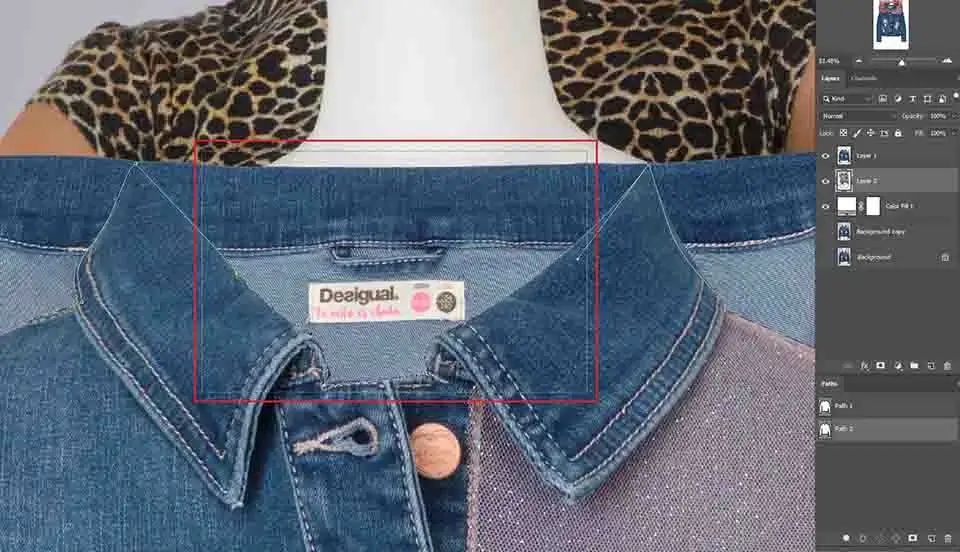
Use the delete button to remove the anchor points. Then, click on the anchor point at the end to work with. After that, click on the other anchor point to complete the path according to the back part.
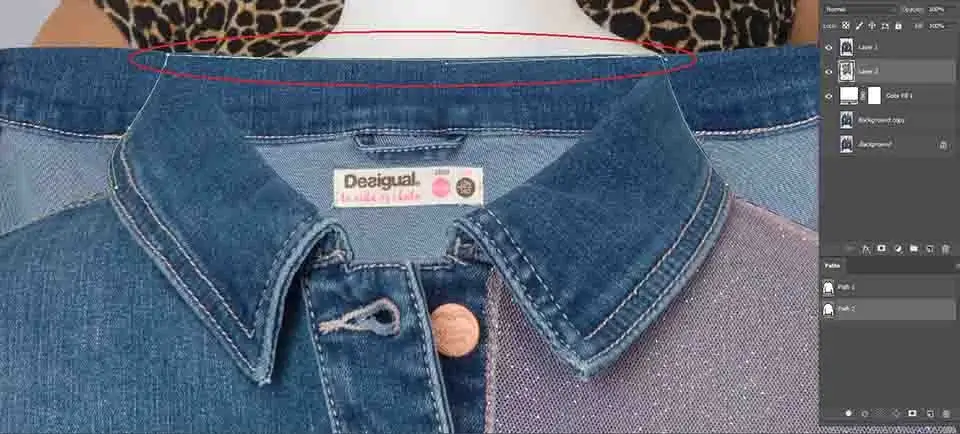
Step 9: Editing The Back Part
As we are done making the path, we press and hold Ctrl/Command for Win/MAC to make a selection. But this time we will invert the selection to remove unwanted areas. To invert the selection, use Ctrl/Command+Shift+I for Windows/MAC. Now, press Delete to remove unwanted areas. Use Ctrl/Command+D for Windows/MAC to deselect.
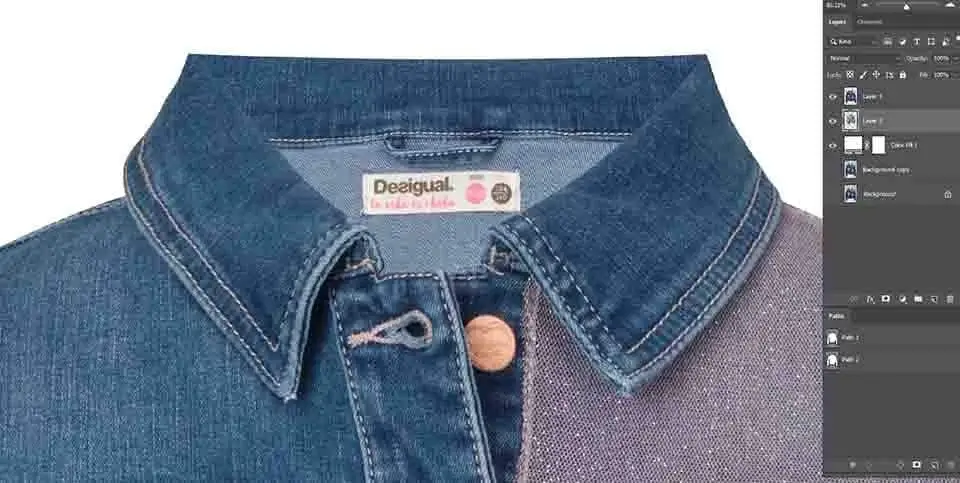
Now, we use the ‘Warp’ option on this part and make a curve at the neck point. But the area does not look good. So, we will liquefy after applying the warp.
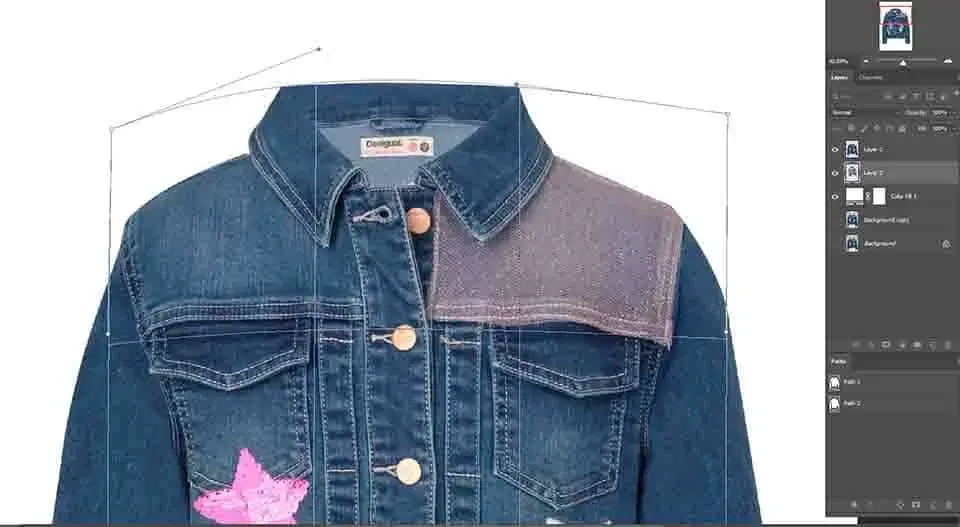
Now we use Liquify to make the back part resemble the front part. So, we hide the top layer, select the back part layer, and go to Liquify. Does the liquefication match the texture? So, be very precise with the moves you make. However, if your image does not contain any labels, the operation will be easier. Press OK to continue.
Step 10: Adding Shadow
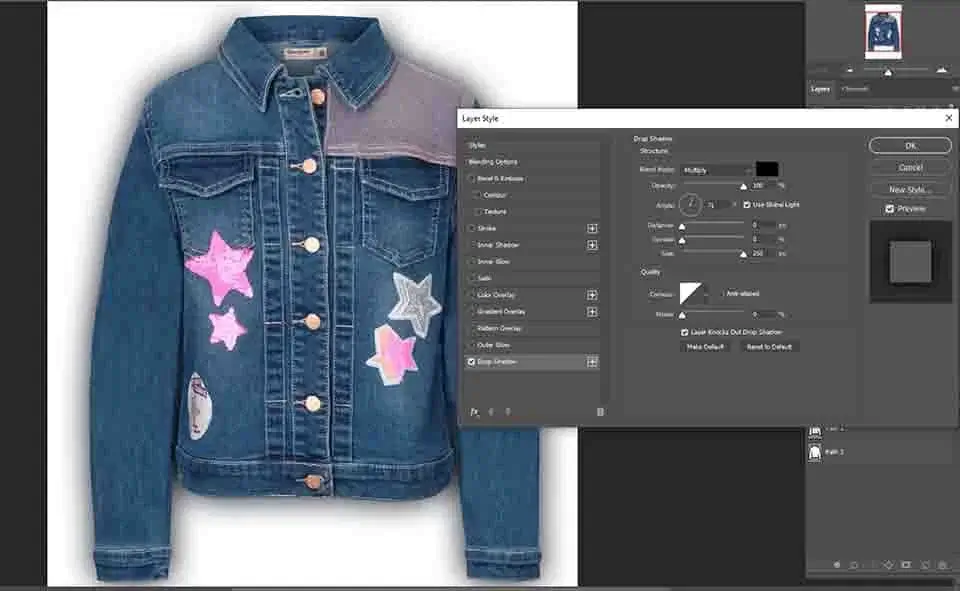
Adding a shadow below the front panel makes the effect realistic. So, we will add a shadow. For the apparel, we will use a Drop Shadow. We double-click on the front part layer and select Drop Shadow. We make changes to the settings as below. Press OK to continue. You can stop at this point or go on to remove the shadows outside of the apparel.
Step 11: Removing Outer Shadow
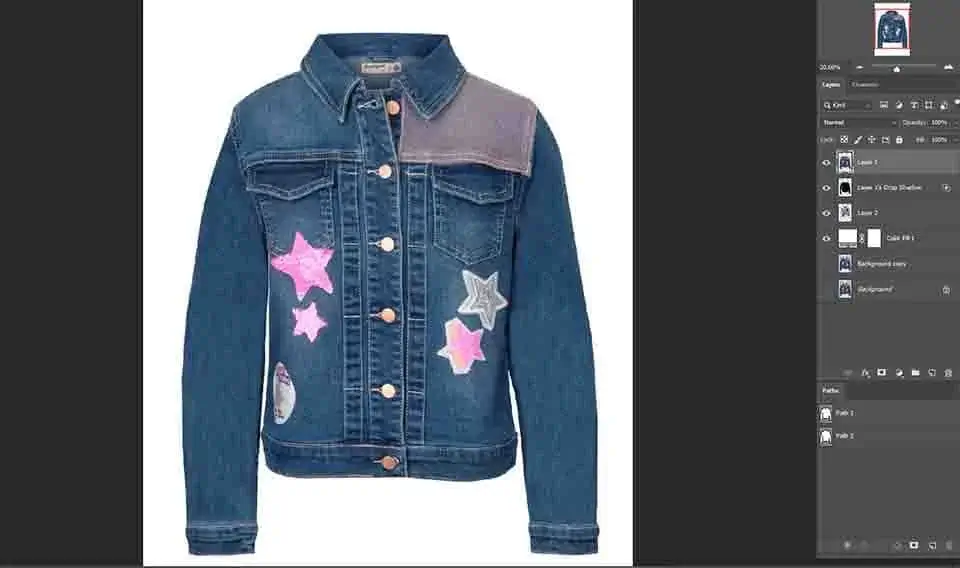
To remove the outer shadow, first, you need to separate the Drop Shadow from the layer. Right-click on the Drop Shadow and select ‘Create Layer’.Select this layer, press and hold Ctrl/Command for Win/MAC, and click on the ‘Path 2’.
This will make a selection. Use Ctrl/Command+Shift+I for Windows/MAC to make an inverse selection. Press Delete to remove the outer shadow. Use Ctrl/Command+D for Windows/MAC to deselect.
Step 12: Save
When you are done with all the steps above, it’s time to save the image. Before saving, check the whole image one more time. If any impurities are found, correct them following the steps.
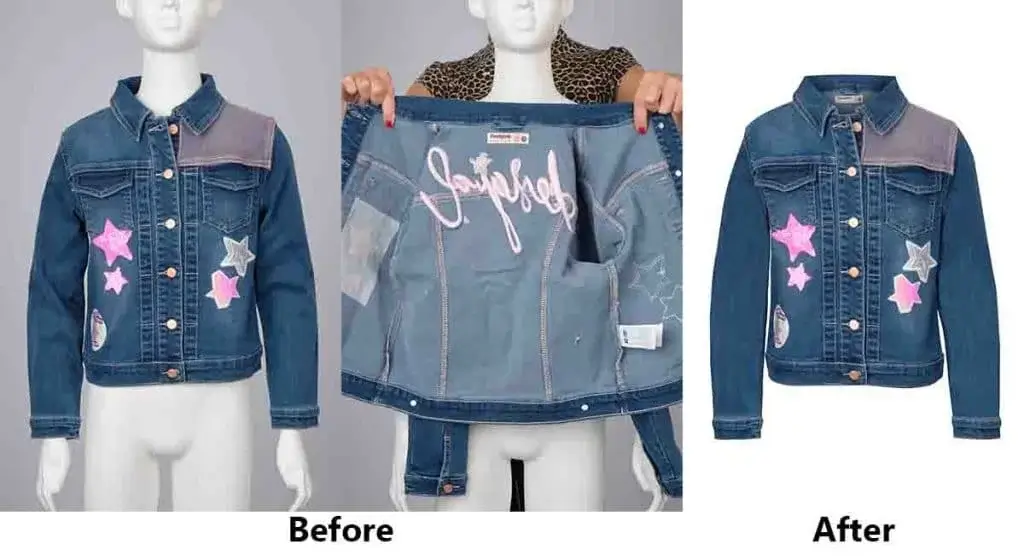
Then, save the file in “PSD” format for further editing if required. You can also select the TIFF format. This format also contains all the layers and paths. Let’s see the before and after images.
Conclusion| Mannequin Photoshop Tutorial
Invisible Ghost Mannequin Effect opens up the opportunity for an amazing apparel presentation. Well, this doesn’t mean that there is no other way to do so. But, doing it by effect gives your apparel a smart look.
You can also save enough money by not using live models. But, still, live models are important for advertisements. And it is good for business. So, if you have a business of garments or apparel, you will need both live models and Ghost Effects.
Frequently Asked Questions
To get the Ghost Mannequin Effect, we remove the mannequin for a starter. Then, we add the back part of the apparel and create a shadow to give that an original look.
The ghost Mannequin Effect is important for the apparel presentation. In fact, this operation is an alternative to real humans. The most important part is the cost. The ghost Mannequin Effect is quite cost-saving compared to human models.
For the best Ghost Mannequin service, join Clipping World. We provide 100% quality, affordable low prices, and quick turnaround for all projects.

