
Welcome to today’s blog! At Clipping World. We’re diving deep into one of the most powerful and essential tools in Adobe Photoshop: the Pen Tool. The Photoshop Pen Tool is widely used for creating precise selections and professional clipping paths in commercial image editing projects.
Because of its accuracy and flexibility, it is a must-have skill for graphic designers and photo editors alike. To help you master it properly, we’ve divided this guide into clear, step-by-step sections. Before we begin, make sure you’re using Adobe Photoshop CS6 or later.
What Is the Pen Tool in Photoshop?
The Pen Tool in Photoshop allows you to draw smooth, accurate vector paths. Unlike the Brush or Pencil tools, which work with pixels, the Pen Tool creates paths that remain sharp even when resized.
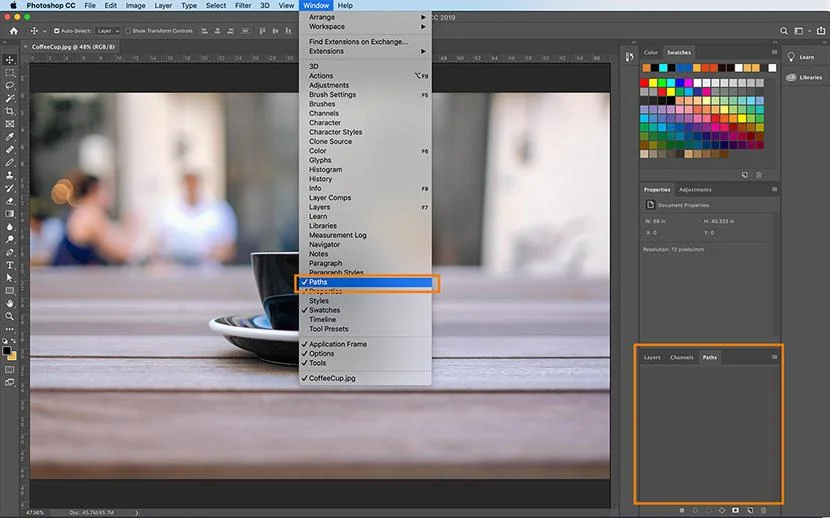
To fully understand how the Pen Tool works in real-world projects, it helps to know what a clipping path is and why it matters in professional Photoshop editing. You can view and manage all paths through the Paths Panel, located next to the Layers Panel.
Where to Find the Pen Tool
You’ll find the Pen Tool in the Photoshop Toolbar (usually on the left). Simply press P on your keyboard to select it quickly.
How to Use the Pen Tool in Photoshop
01. Creating a New Path
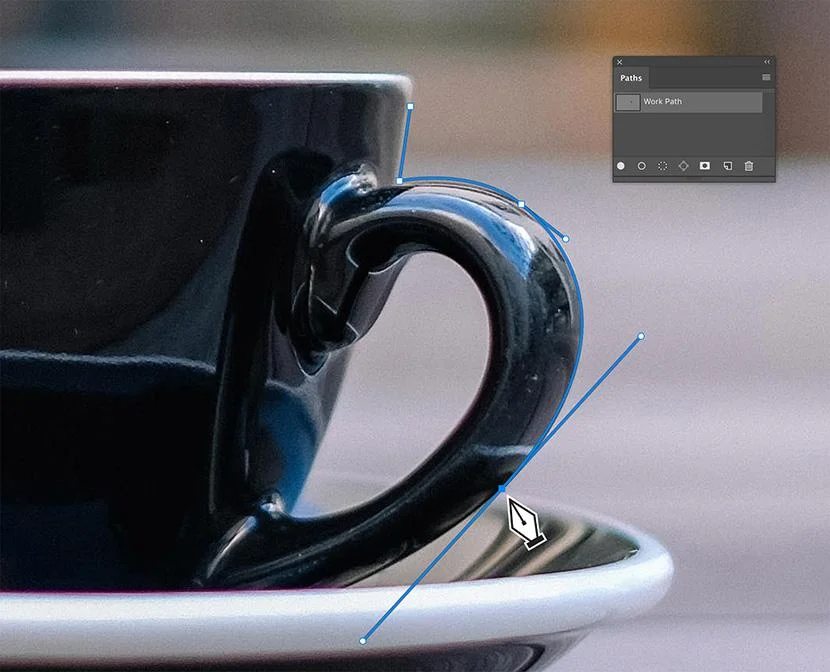
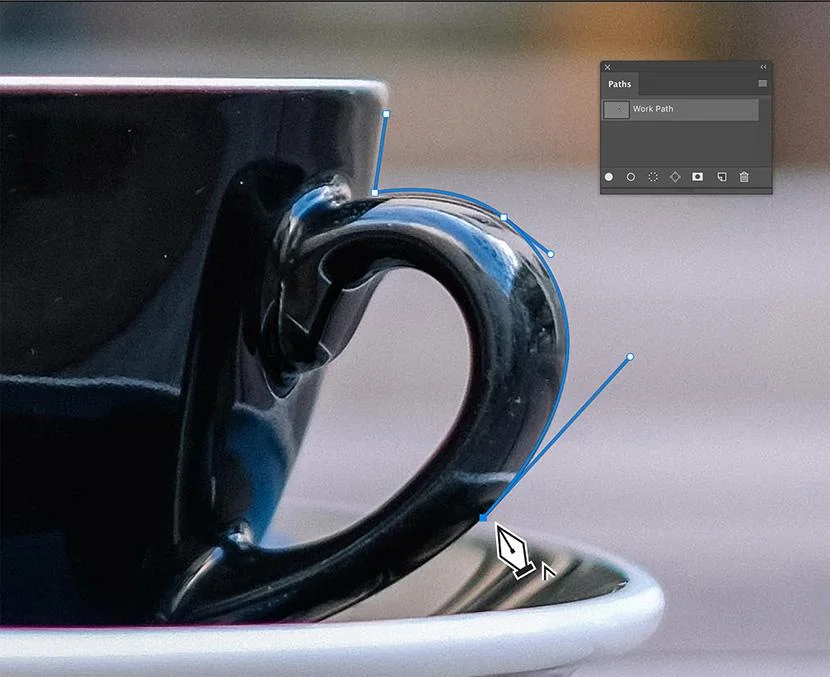
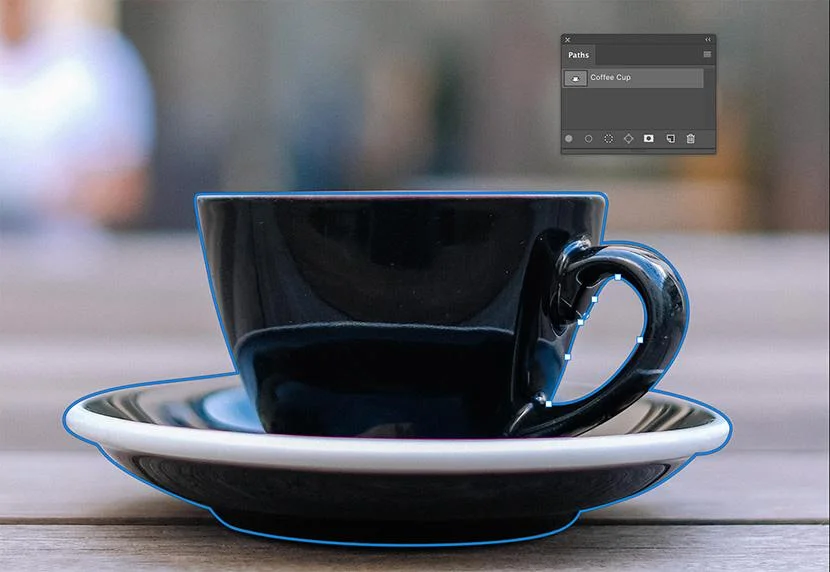
Basically, graphic designers use Photoshop pen tools for making the clipping path. To start your path, click your picture with the mouse to start your path. To keep things simple, select a point of departure at the edge of a straight line, such as the edge of the coffee cup in the picture.

Click again to draw the first segment of your path along the edge of your object using the pen tool. You should see a straight line now. Also, note that a work path appears in the path panel as soon as the second point is placed.
02. Creating A Curved Path Segment with the Pen Tool
Click to the next point and drag with the Pen Tool before you release the mouse button to create a curve with the standard Pen Tool. You’ll see lines appearing, called handles. These handles are tangential to the path’s curve. The movement of the mouse adjusts the handles, which adjust the curvature of the line. Release the mouse button when you are satisfied with the curve shape.
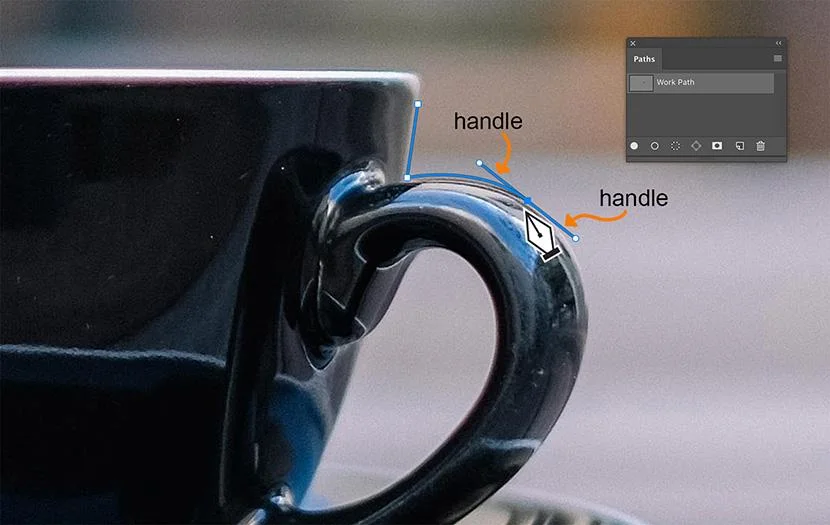
Note that before and after the point, the handles formed from the curved line appear. The next part of the path you draw after you have created a curved line will follow the trajectory of the handle from the last point.
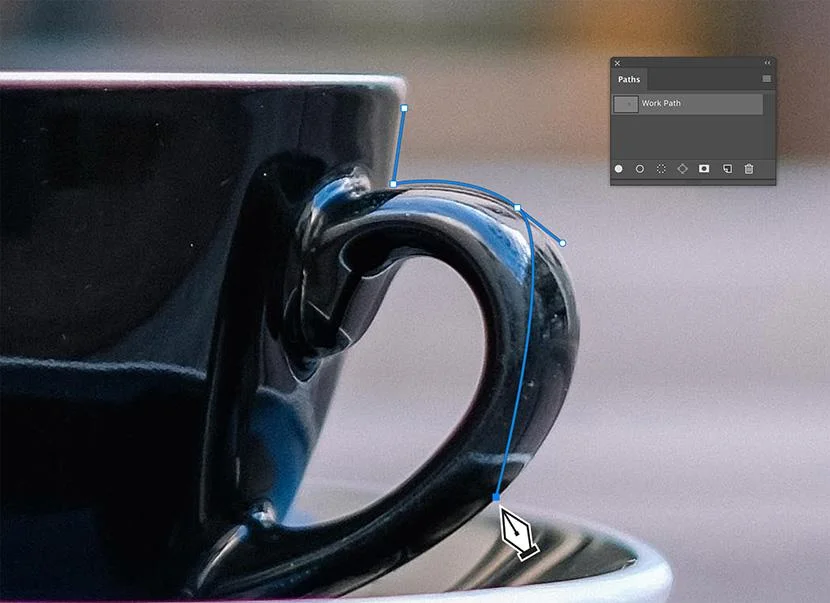
Drag the mouse to create new handles and change the curve that appears with your new point when you click on the next point.
03. Creating A Straight Path Segment
You can “corner” the point by clicking on the point with the mouse while typing ALT if you want to prevent the next segment of your path from curving along with the handle of your last point. The second handle will vanish.
The next point you set won’t be affected by the curve.
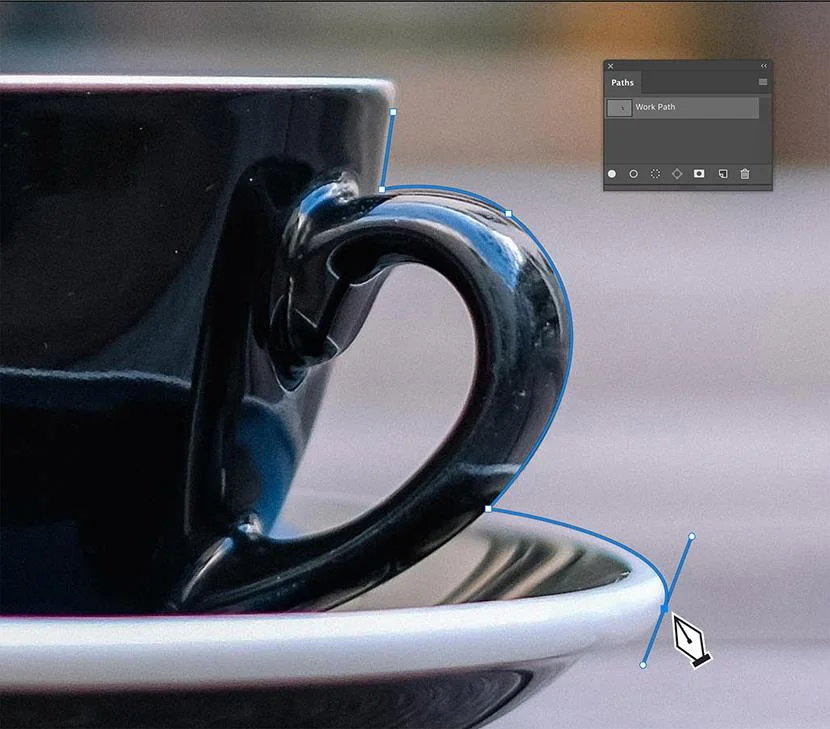
04. Closing Your Path with The Pen Tool
When your path is complete, close your path by switching over the first point you have set. Click on the point when you see a small circle appearing on the right side of the pen tool. Your path will now be closed.
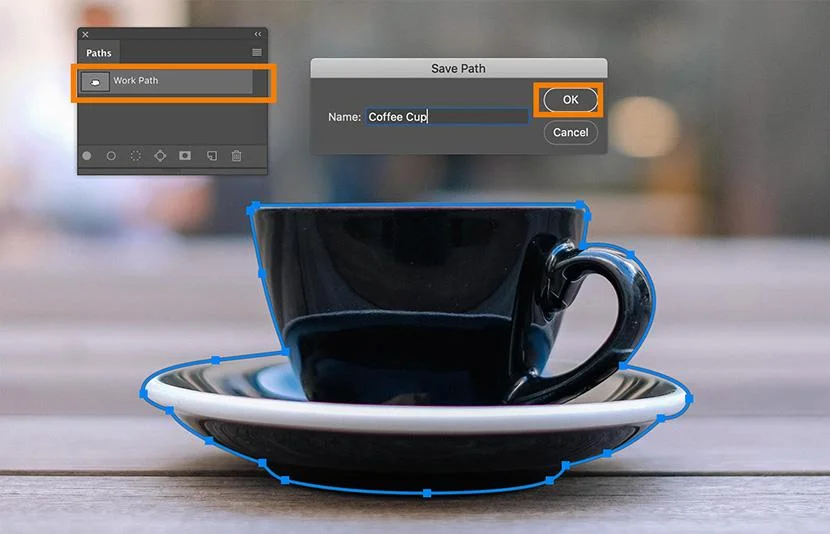
05. How To Save Your Path
Saving your path is extremely important. If you don’t save it, Photoshop may overwrite it when you create a new one. To save: Go to the Paths Panel. Double-click Work Path. Then, rename and save it. After saving your path, you can follow the same process to create detailed clipping paths in Photoshop CC for professional image editing tasks.
How To Modify an Existing Path with the Pen Tool
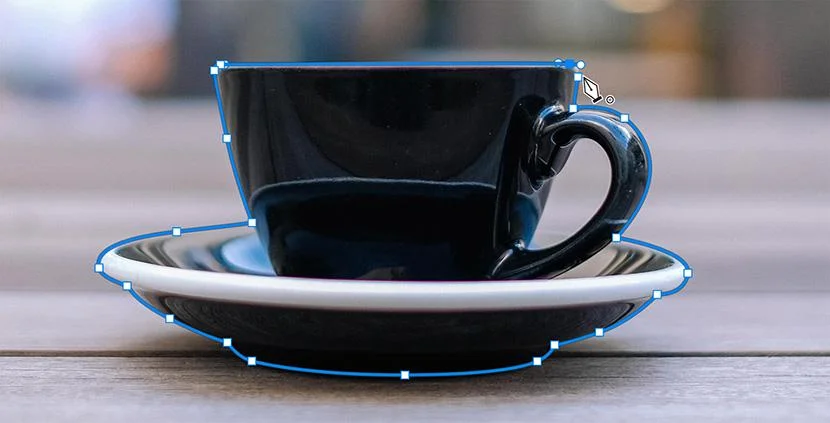
After you have created your path, you can change any areas that need to be tweaked. It is useful to zoom in on different areas of your path. If you don’t see your path in your image, click on the path’s name in the Paths Panel. The path will appear in your image, and you’ll be able to adjust it as necessary.
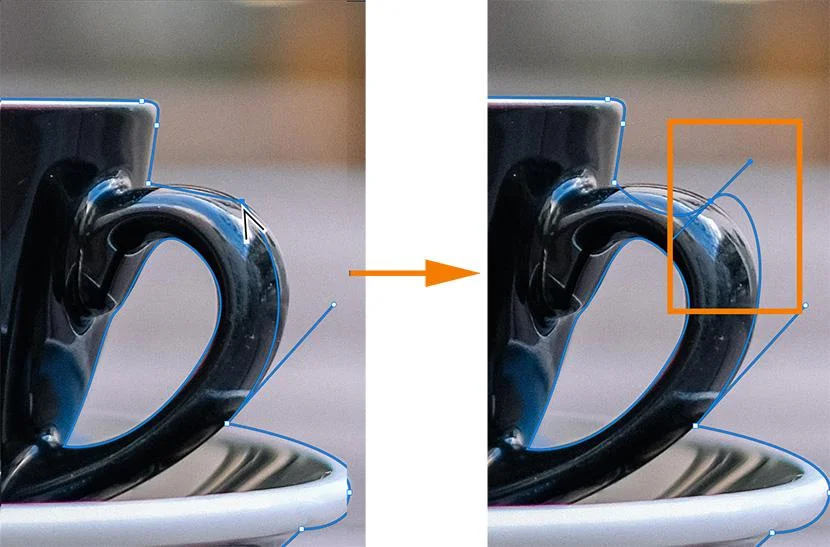
01. How To Add Additional Paths to an Existing Path
In our example of a coffee cup, there is a way out of the cup. However, in order to isolate the cup from the background, we must also create a path around the inside of the handle. Select the Pen Tool from the Toolbar with the path selected in the Paths panel.
Click on the icon that looks like two small overlapping squares in the options bar at the top of the screen and select Exclude overlapping shapes. While the current path is still visible, start drawing the area you want to exclude with the pen tool from your selection. When you’re done, close the path.
When we make a selection from our path later, the area created with this new path will be cut out from the rest of the selection.
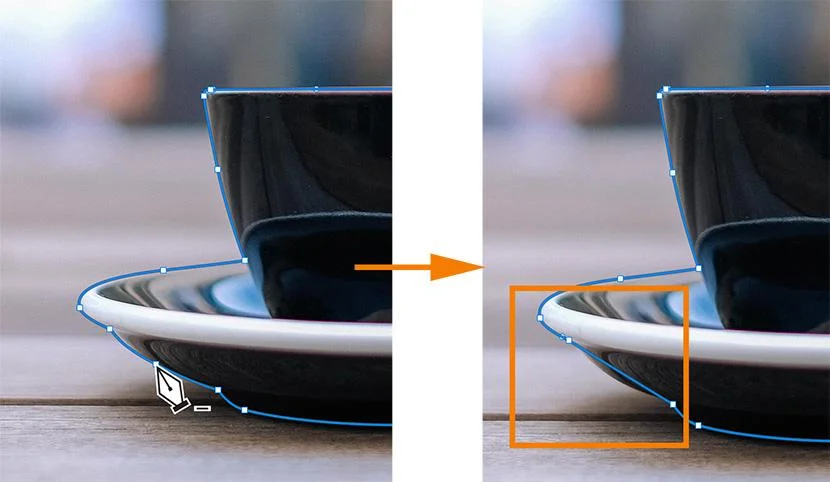
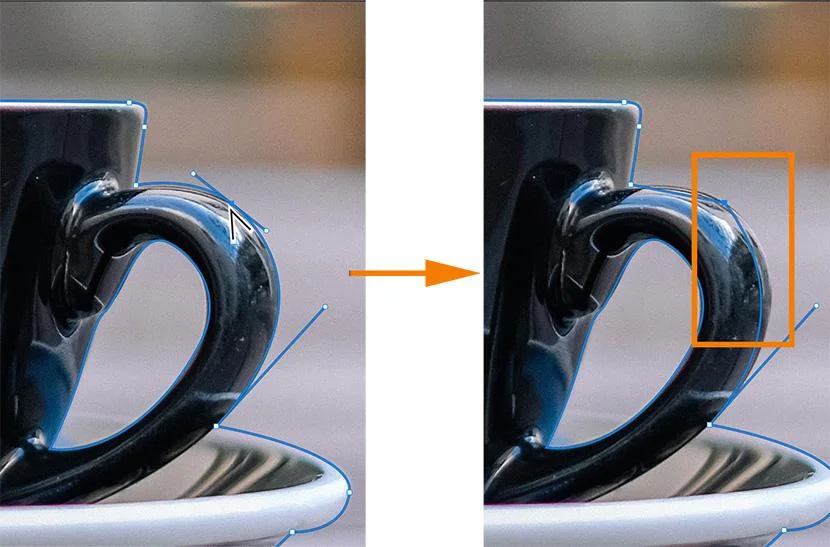
02. How To Modify Existing Points and Curves Along a Path
You can find the path selection tools in the toolbar to change an existing point or handle on a path. These tools each look like an arrow and are located in the toolbar under the Type Tool. You will see options when you click on the visible Path Selection tool. Select the tool for direct selection that looks like a white arrow.
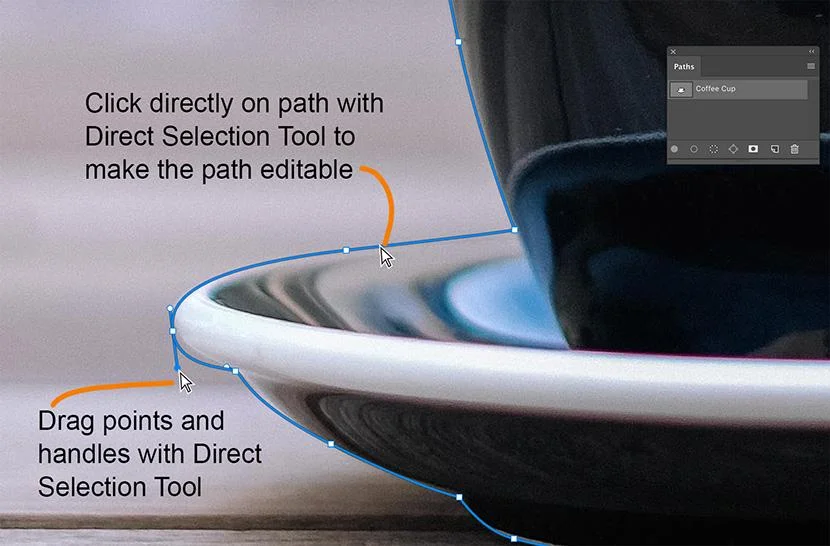
With the ‘Direct Selection Tool’, clicking directly on a path segment will reveal all points as white boxes together with the handles of the selected segment. The Direct Selection Tool can be used to drag visible handles to adjust segment curves or to move existing points.
03. How To Add New Points to a Path

The ‘Add Anchor Point Tool’, accessible by clicking and holding on to the Pen Tool in the Toolbar, will add extra points along the path. With the Add Anchor Point Tool selected, hover over the path and click to create a new point. Once you have set the new point, you can change the location of the point or its handles using the Direct Selection tool.
04. How To Remove Points from a Path
The ‘Delete Anchor Point Tool’, also accessible by clicking and holding on to the Pen Tool in the Toolbar, removes existing points from the path. If you select the delete anchor point tool, switch over to an existing point until the tool is visible, and click. The point is gone, and the surrounding track segments are joined into one segment.
Advanced Techniques with the Pen Tool
Advanced Pen Tool techniques are widely used in professional workflows, including the common uses of clipping paths in Photoshop, such as product photography, eCommerce images, and advertising visuals.
01. Convert Point Tool
The ‘Convert Point Tool’, accessed by clicking and holding the Pen Tool, allows you to manipulate exit point handles in the same way that you manipulate handles using the Direct Selection Tool. However, contrary to the Direct Selection Tool, the Convert Point Tool does not allow you to move existing anchor points.
Because the path segments adjacent to the point convert from straight lines to curved lines when you click on a point with the Convert Point Tool and vice versa, when you click on a point with the Convert Point Tool, the handles disappear, and the anchor point becomes an angle. If the anchor points around have handles, these handles will still affect the curve of the adjacent track segments.
If you use the Convert Point Tool to click on an anchor point that has no handles, the point gains a handle on either side and can be manipulated using the Convert Point Tool or the Direct Selection.
02. Creating a Selection from a Path
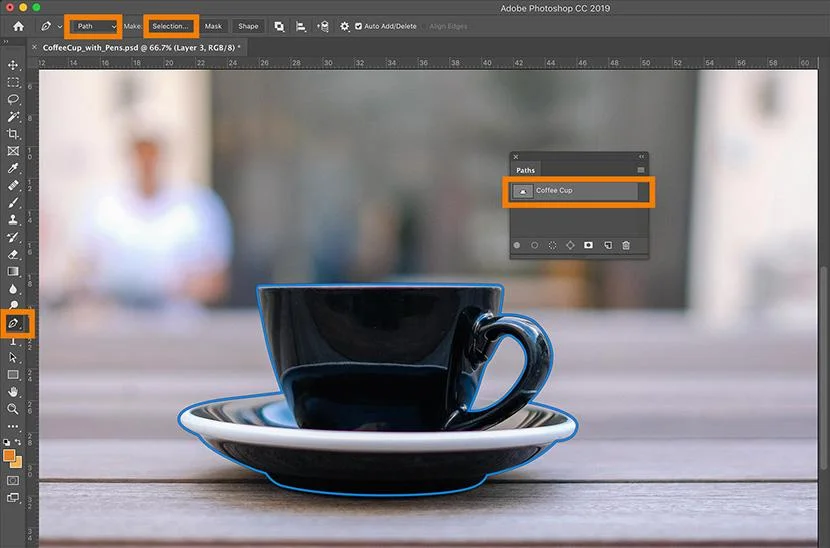
Choose your path in your Paths panel. Then click on the icon at the bottom of the panel, which looks like a circle with a diagram. A selection in the form of your path appears in your picture. You can also use the pen tool to create a selection. Click the Select button next to Make: in the Options bar with the selected path and the selected Pen Tool.
A dialog box will appear that allows you to adjust the selection. If you create a selection to isolate an object from its background, the Feather Radius should be kept at 0, and Anti-aliasing checked. If this is the first choice, the radio button next to New Selection will be selected.
Once you have created your selection, you can change the color of the object or remove the object from its background using the selection.
03. Cutting Out an Object from the Background
After you have created your selection from your path, you can either copy it to another layer or create a layer mask to remove the part of the image from its background. You must be in the layer that contains the image you want to isolate to use any of the following methods.
04. Removing A Background By Copying A Selection
You can copy your selection by pressing CTRL+C (COMMAND+C on a Mac) and then paste CTRL+V (COMMAND+V on a Mac) into the selection. Your selection will appear automatically in a new layer. You can make your original layer invisible to view the isolated object in the layer panel.

05. Removing A Background by Creating a Layer Mask
To create a layer mask, locate the Layer Mask icon. This icon is available in both the Paths panel and the Layers panel at the bottom of the panel and looks like a white rectangle with a circle inside.
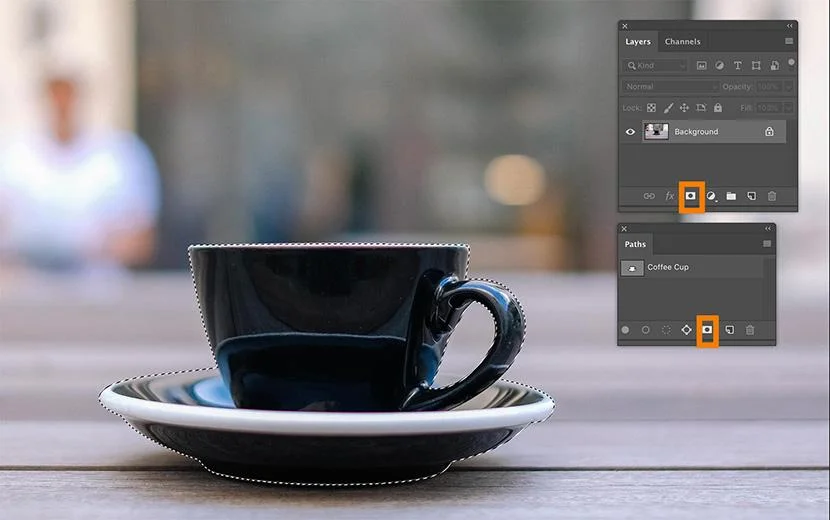
Click on the icon to automatically create a Layer Mask.
06. Creating Shapes with the Pen Tool in Photoshop
You can set a path to a Shape Path before you create the path by choosing Shape from the menu in the Pen Tool options bar. We mentioned this earlier: You can change the color of the shape by double-clicking the color rectangle next to the Fill option next to the shape option.
A color menu appears— the color menu top bar allows you to change the color by selecting no fill (transparent), solid color, gradient color, pattern, or custom color. The bottom part of the menu shows the switches available.
Double-Click Process
You can also change the color of the shape by double-clicking on the color rectangle next to the punch. To adjust the stroke width, change the width in the drop-down menu to the right of the color of the stroke.
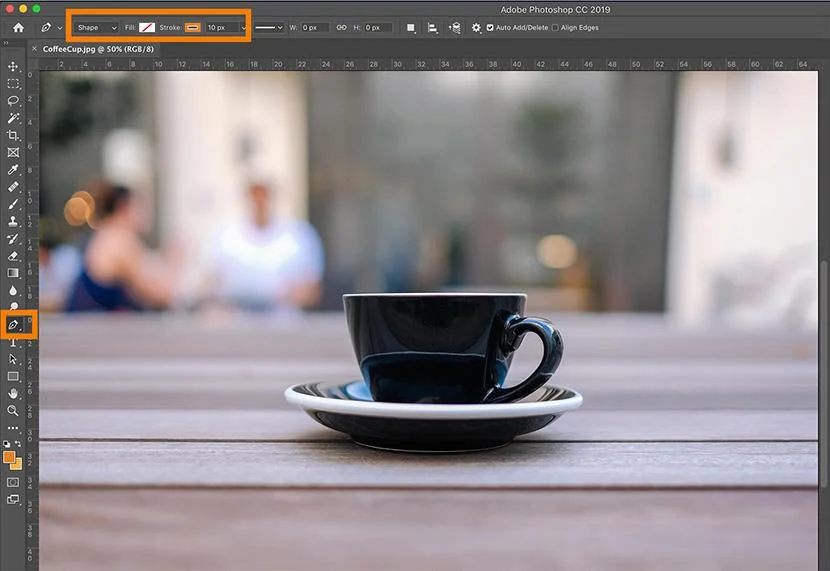
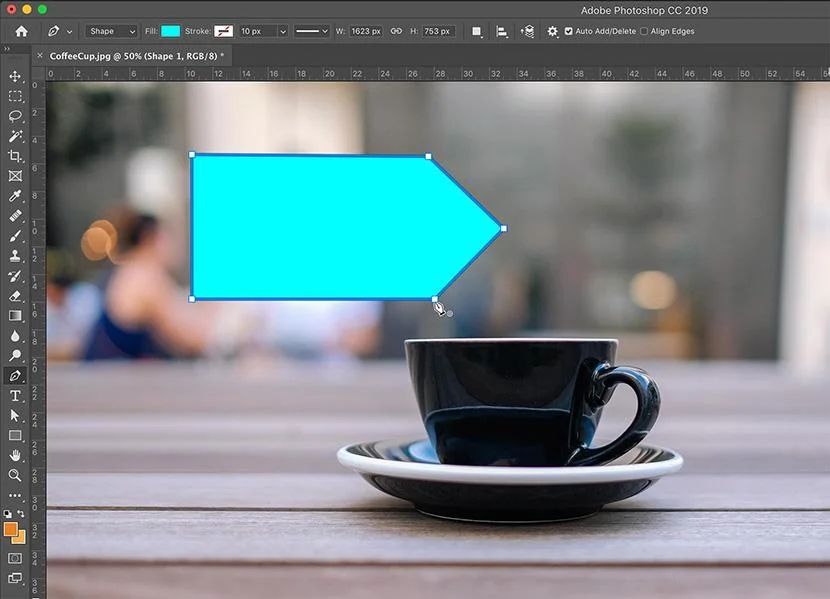
Once you have your Shape Path settings correct, you can draw a shape with the Pen Tool the same way you would draw a regular path.

When you create a shape using the Pen Tool, you automatically create a new layer containing that shape, as well as a Shape Path in your Paths panel.
07. Transforming or Scaling a Shape Path
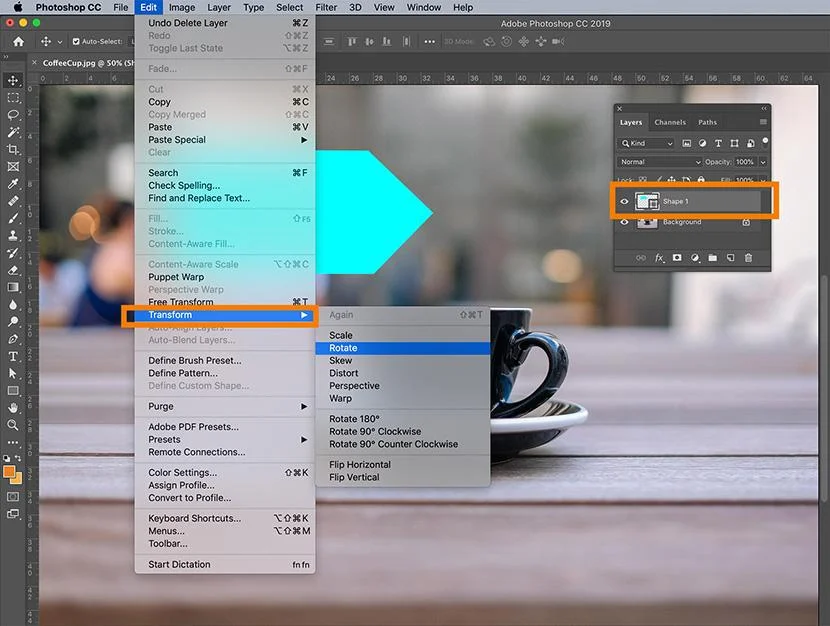
Click the Edit drop-down menu at the top of the screen with the Shape Path selected in your Path panel and select Transform Path to access any of the transform functions. You can also choose Free Transform Path from the Dropdown Edit menu or type Ctrl+T ( Command+T) to scale or rotate your path.
Choosing Between Clipping Path and Masking
For complex edges like hair or fur, designers often compare techniques. Understanding the difference between image masking and clipping paths helps you choose the right method for each image.
Final Thought
Mastering the Pen Tool in Photoshop takes practice, but it’s worth the effort for its precision and versatility. Whether you’re creating clipping paths, isolating objects, or designing custom shapes, the Pen Tool is a must-have skill for any graphic designer.
Feeling overwhelmed? Let us help! At Clipping World, our team of 150+ designers works 24/7 to handle all your image editing needs. We offer a FREE TRIAL to showcase our quality and provide discounts for large projects.