
Adding a festive snowflake shape border to images of loved ones for the holidays or other times of the year can be as simple as following the steps in this Photoshop tutorial. But how can you create a snowflake shape Border In Photoshop?
However, If you don’t know yet, today we will let you know the process of creating a snowflake-shaped border. To begin, we’ll use Photoshop’s sophisticated Brush settings and one of the program’s built-in Custom Shapes to create our custom snowflake brush.
We’ll make a selection for our border, turn the selection into a path, and use Photoshop to paint along the route with our brush. To make sure that everyone can follow along, I go through each step in detail. See our original Snowflake shape border guide for the latest version of Photoshop CS5 and earlier.
Step By Step Guideline | Snowflake Shape Border
Step 1: Create a New Document in Photoshop
While Photoshop includes a built-in snowflake brush, it’s often too small and loses quality when resized. Creating a custom brush ensures sharper results. We’ll use one of Photoshop’s built-in custom shapes to rapidly make our own, larger snowflake brush so that everything looks crisp.

A new Document dialog box appears when this is clicked. The width and height should be 200 pixels, and you should set the Background Contents option to White. Click OK to close the dialog box. In a matter of seconds, you’ll see a new 250×250 pixel document appear.

Step 2: Select the Custom Shape Tool
In Photoshop’s Toolbar, click on the Custom Shape Tool. Make sure you hold down your mouse button for a second or two until you see a fly-out menu appear, then choose the Custom Shape Tool from the drop-down list.

Step 3: Load the Nature Shape Set
Photoshop includes a pre-made snowflake brush, as well as several pre-made snowflake custom shapes that can be used to create our bespoke snowflakes. We only need to add the set that includes these shapes to our collection.
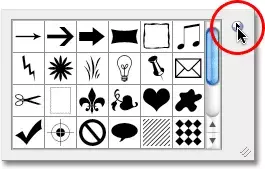
Right-click (Windows) or Control-click (Mac) anywhere in the new document to access the Shape Picker, then click the small arrow in the top right corner of the document to complete this step.
In Photoshop, simply selecting one of the many other shape sets available by clicking on the arrow brings up an additional option. This is the set we’re looking for. To choose it, simply click on it.

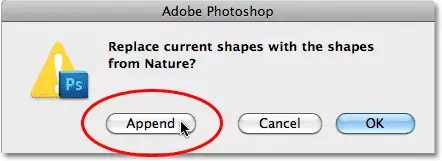
There are two options: You can either choose to replace your current shapes with those from Nature or simply add them to your list. If necessary, use the Append option.
Step 4: Select a Snowflake Shape
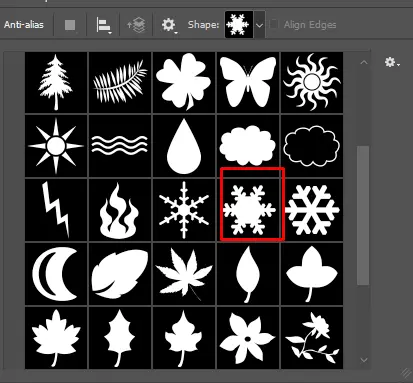
Look through the thumbnails until you find the three snowflake-shaped images. When you hover your cursor over a shape thumbnail in Photoshop’s Preferences, the name of the shape will show if Tool Tips are enabled.
Select the shape you like most by clicking on its thumbnail, then hit Enter (Win) / Return (Mac) to exit the Shape Picker and begin creating your photo border. To begin, I’ll pick the snowflake on the left (the first one).
Step 5: Select the “Fill Pixels” Option
Vector forms, pathways, and pixel-based shapes are all options in Photoshop for creating custom shapes. In the Options Bar, we may toggle between the various kinds.
To make a brush out of the snowflake form, we’ll use pixel-based shapes because brushes are comprised of pixels. Select Fill Pixels from the right side of the Options Bar.
Step 6: Draw the Snowflake Shape onto Your Canvas
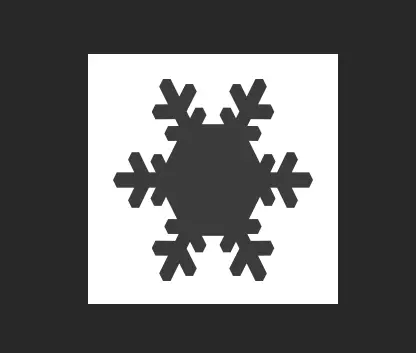
The Foreground color must be adjusted to black by hitting the letter D on your keyboard, which restores Photoshop’s Foreground and Background colors to their default values (black is the default Foreground color). Drag a snowflake form from the top-left corner of the document while holding down the Shift key.
Hold Shift while dragging to keep the snowflake shape proportional and prevent distortion. While sketching a form, you may rearrange it by pressing and holding down the spacebar while dragging the shape with the mouse.
Step 7: Create a Brush from the Shape
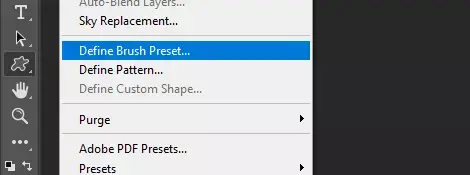
Select Define Brush Preset from the Edit menu at the top of the screen:
When the Brush Name dialog box opens, enter “Snowflake” as the new brush’s name and click OK to close it. Since we no longer require the snowflake shape’s document window (and Photoshop won’t prompt you to save it), you may do so now:
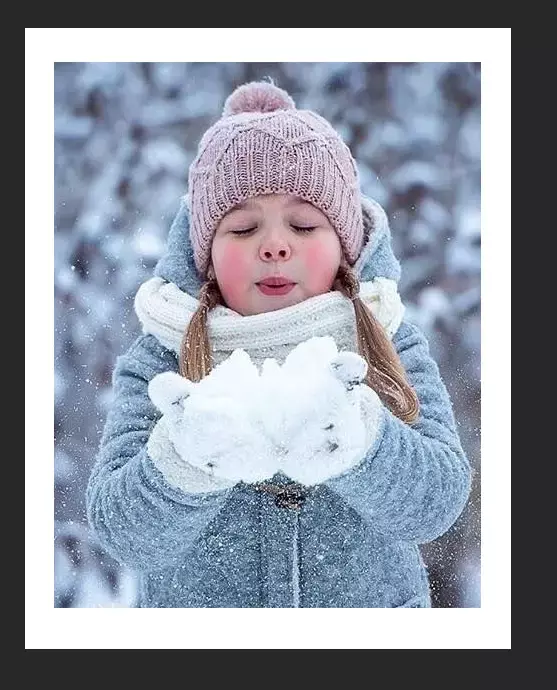
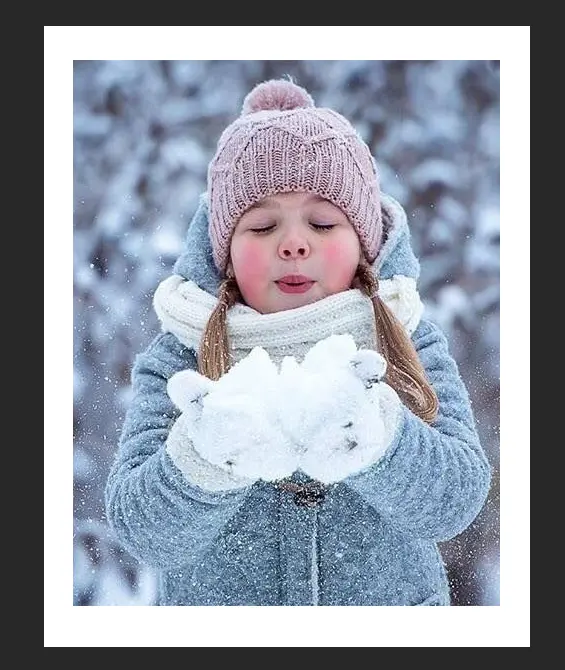
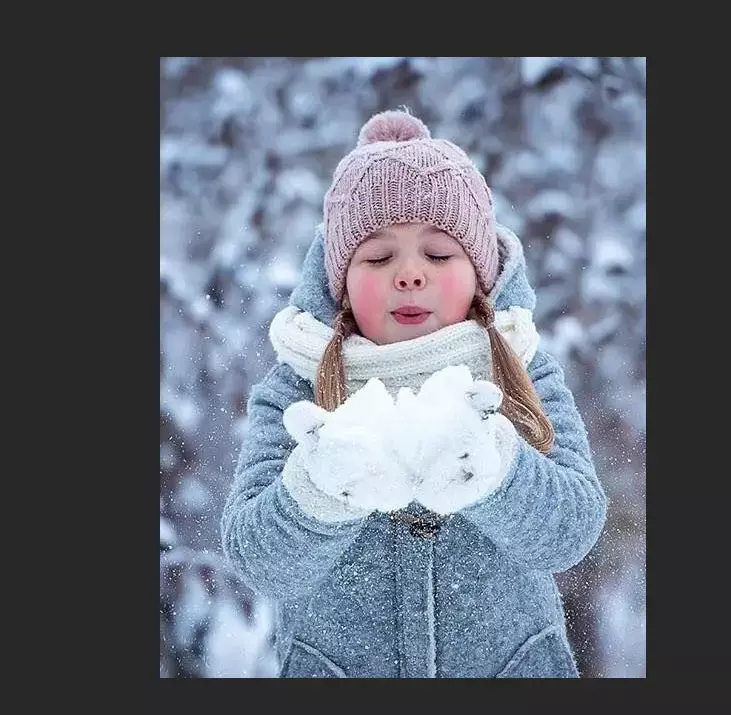
Step 8: Open the Photo
With the snowflake brush ready, open the photo you want to edit.

Step 9: Add a New Blank Layer
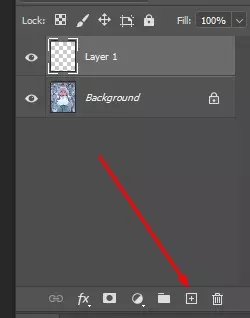
You may create a new blank layer by clicking on the New Layer icon in the Layers window. The new layer is referred to as “Layer 1” in Photoshop.
Step 10: Fill the New Layer with White
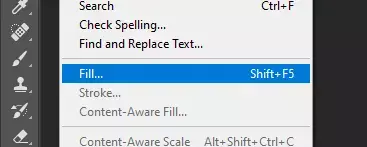
Choose Fill from Edit at the top of the screen:
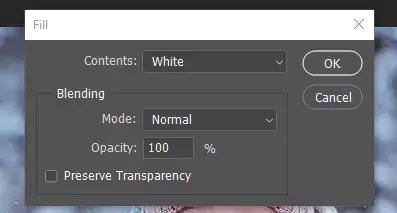
The Fill dialog box appears. Select White as the color and then click OK to exit the dialog box. You’ll see a lot of white on the page:
Step 11: Select the Area Where the Photo Will Appear
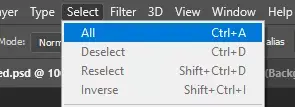
Use the Select menu to select “All.” You can see a selection outline on all four borders now that you’ve done this for the full document.
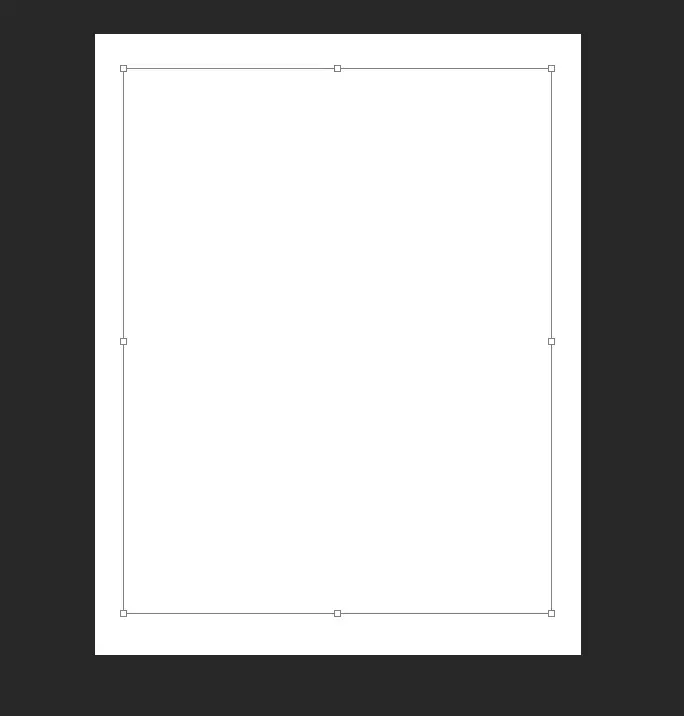
Go back to the Pick menu and select Transform Selection this time, with the document chosen.

For example, if we want the selection outline to change in size, we may use the Transform Selection command to do it without altering anything within the selection itself.
Hold down the Alt (Windows) or Option (Mac) key while dragging the top transform handle (the little square) inward towards the center of the page. The selection outline should have about a half-inch of space between it and the document’s outside edge.
You may resize the selection outline by holding down the Alt / Option key while dragging, which will also cause the bottom transform handle to move at the same time.
Then, hold down Alt / Option and drag the left transform handle inward, leaving the same amount of space between the selection outline and the document’s boundary. At the same moment, the right handle will come in. When you’re ready to accept the modification, hit Enter (Windows) or Return (Mac).
Step 12: Delete the Area Inside the Selection
Press Backspace (Win) / Delete (Mac) on your keyboard to delete the white area inside the selection, revealing the photo underneath. Leave the selection outline active:
Step 13: Expand the Selection
A more substantial selection arc is required. Transform Selection can be used again; however, there’s a more efficient method. To expand the selection, return to the Select menu and select Modify:
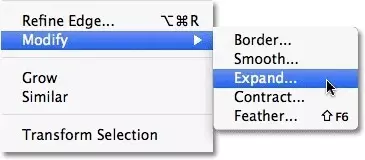
Expand the selection by around 20 pixels when the Expand Selection box appears, then click OK:
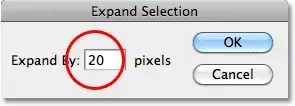
The selection’s boundaries will be pushed outward by 20 pixels as a result. The selection outline’s sharp corners have softened, as you can see in the image below.
The Expand Selection command has this downside, which is why it’s not usually the ideal option for expanding selection outlines, but in this case, the rounded edges aren’t a problem:
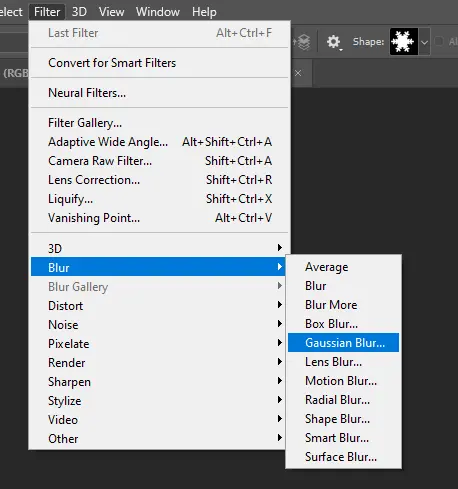
Step 14: Apply the Gaussian Blur Filter
Next, blur the photo border to create a smooth transition between the border and the image in the middle (the border, not the image). Then select Gaussian Blur from the Blur menu at the top of the screen.
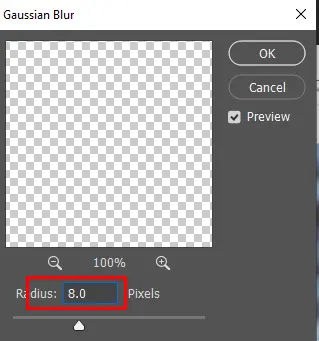
Click OK to exit the dialog box after setting the blur radius to 8 pixels. This should soften the border’s edges beautifully.
The edges of the border are now more rounded. As a reminder, the selection outline should remain active. Select the Brush Tool from the Tools panel:
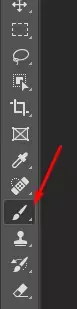
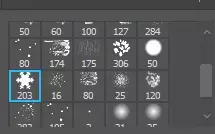
Step 15: Select the Snowflake Brush
While using the Brush Tool, you can access the Brush Picker by right-clicking (Windows) or control-clicking (Mac) anywhere on the page and then selecting the snowflake brush we just made. Ideally, it should be the last item on the list. To exit the Brush Picker, press Enter (Windows) or Return (Mac) on your keyboard.
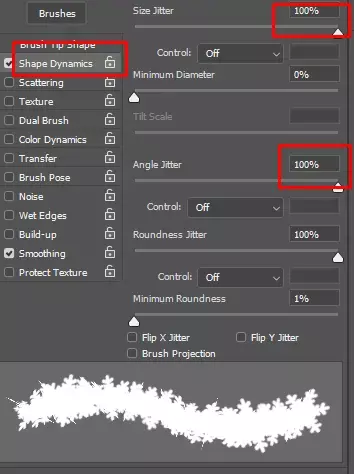
Step 16: Set the Brush Dynamics Options
To rapidly view Photoshop’s entire Brushes panel, use F5 on your keyboard, then click straight on the words Shape Dynamics in the left column of the window. If you click within the checkbox instead of directly on the text, Shape Dynamics will be on, but you won’t be able to access any of its settings.
Assuming that Shape Dynamics is already selected, increase the amount of randomness in the snowflakes’ sizes and rotation angles by setting the Size Jitter and Angle Jitter settings to 100%.
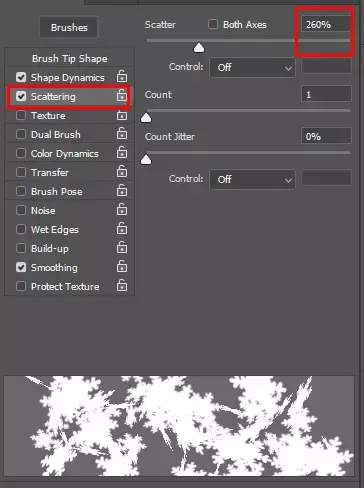
Instead of having the snowflakes all appear in a straight line once you’ve finished configuring Shape Dynamics, they’ll be dispersed at random when you click directly on Scattering in the Brushes panel’s left column. Press F5 one more time to exit the Brushes panel when you’re finished.
Step 17: Convert the Selection Outline into a Path
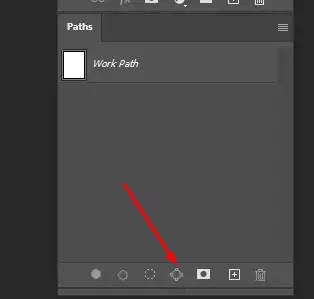
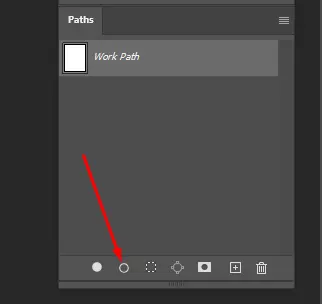
Select the Paths panel, which is paired with the Layers and Channels panels in your CS6 editing workspace (click on the name tabs at the top to switch between the panels). At the bottom of Paths, select the Make Work Path from the Selection icon.
The chosen outline will be converted to a path in Photoshop, and a new Work Path will be added to the Paths panel. As the name implies, a “work path” is just a temporary route. We could save the trail and make it permanent, but why bother?
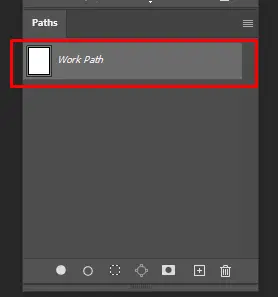
Our path is now a thin, solid line visible in the document window, in place of the original selection outline:
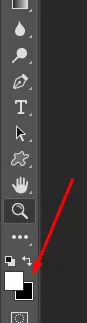
Step 18: Set the Foreground Color to White
Photoshop’s Foreground and Background colors can be swapped by pressing the X key, which turns the Foreground color white (Photoshop paints with the current Foreground color).
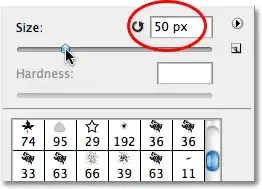
The default size of our snowflake brush is too huge for our photo border effect; therefore, reduce the size of the brush to roughly 50 px (pixels) by right-clicking (Windows) / Control-clicking (Mac) anywhere in the document. Close the Brush Picker by pressing Enter (Win) or Return (Mac):
Step 19: Stroke the Path with the Snowflake Brush
Finally, in the Paths panel, click the Stroke Path With Brush icon:
The first snowflakes appear around the image, scattered along the path:

The right bracket (]) and left bracket ([) keys can be used to make the brush smaller and larger, respectively. Click the Stroke Path with Brush icon again once you’ve resized your brush. If you’re having trouble, try experimenting with different brush sizes.
To add more snowflakes to the border, click the Stroke Path with Brush icon a few more times after you’ve added your first snowflakes. In the Paths panel, click anywhere in the empty gray box below the Work Path to conceal it from display in the document:
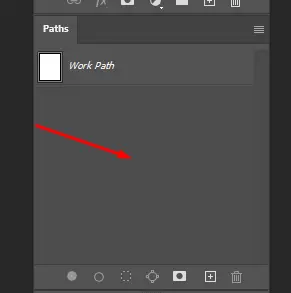
This option is grayed out and unavailable if no path is displayed in your document when you click Stroke Path With Brush. To add more snowflakes, you’ll first need to reopen the path by clicking on its thumbnail in the path panel. A few more snowflakes were added by clicking on the Stroke Path With Brush icon three times.

Finally, we have the answer! How to add a snowflake shape border to a picture using Adobe Photoshop.
Related Adobe Photoshop Tutorials
- Hair Transplant in Adobe Photoshop
- Hair Color Correction in Photoshop
- Turn the Photo into a sketch in Photoshop
FAQ | Snowflake Shape Border
The snowflake border can be represented as a different artwork of snow. In short, we can call them artistic designs for visitors. Thousands of snowflake borders are available, and their fronts look fantastic.
A border that goes all around the image that contains the snowflake design is called the snowflake shape border. As a user, you can enjoy the variety of designs and colors that will mesmerize you.