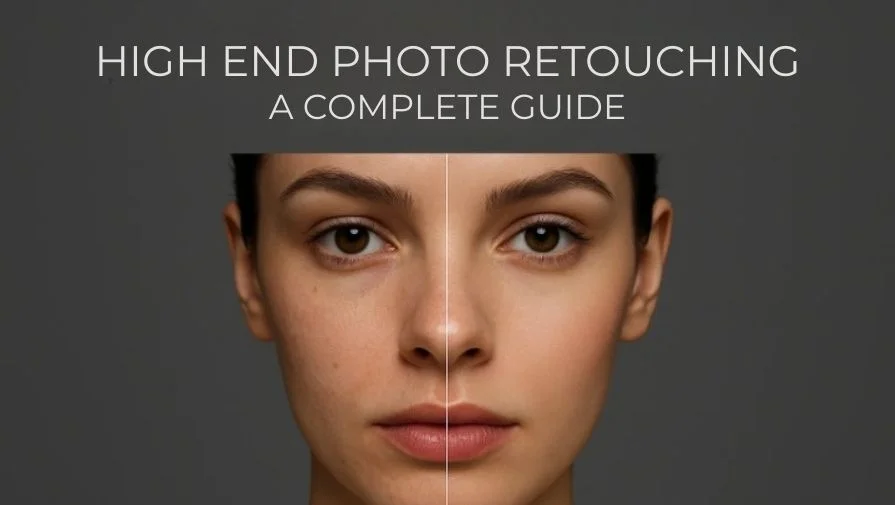
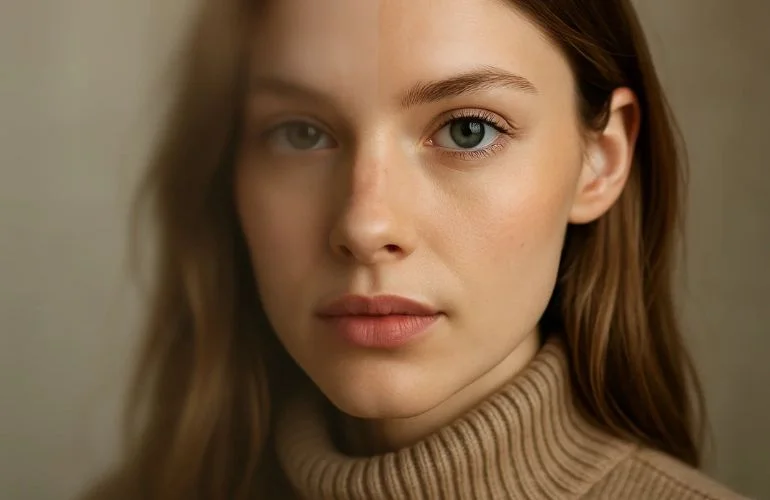
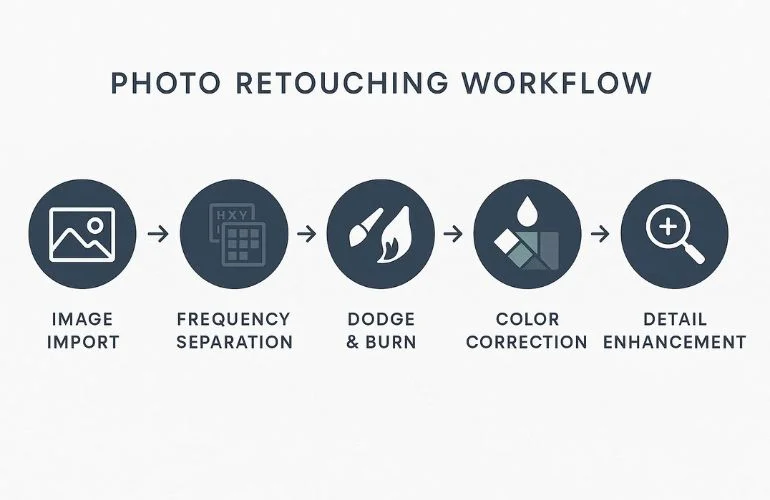
High-end photo retouching techniques are a professional way of editing images to make them look polished and natural. It goes beyond basic editing by using advanced methods like frequency separation, dodge and burn, and color correction to enhance details while keeping the image realistic.
These techniques are widely used by fashion photographers, eCommerce brands, ad agencies, and editorial studios. Whether it’s a magazine cover, product catalog, or portrait shoot, high-end retouching ensures images look clean, sharp, and professional.
In this guide, you’ll learn practical editing techniques, step-by-step workflows, and tips to avoid common mistakes. You’ll also see before-and-after examples that demonstrate how professionals create stunning, polished images. Let’s start with the essential retouching techniques professionals rely on to create clean, natural, and polished images.
Essential Techniques in High-End Photo Retouching
High-end retouching uses advanced editing techniques to make photos look polished and natural. Each technique focuses on a different part of the image, like smoothing skin, fixing colors, adding depth, or enhancing details. Here are the main techniques professionals use to improve photos.
1. Frequency Separation – Smooth Skin While Preserving Texture

This method separates the image into texture and color layers, allowing blemishes or uneven skin tones to be corrected without losing natural pores. Use low-opacity layers to keep skin realistic and avoid a plastic look.
2. Dodge & Burn – Add Depth and Dimension

Dodge (lighten) and burn (darken) help enhance facial features, clothing folds, and product contours. Use a soft brush and low opacity for subtle enhancements that improve depth without overediting. Learn more about proper dodge and burn techniques in Photoshop on the Adobe Help Center. Because these techniques require precision and time, high-end projects typically fall into higher commercial retouching pricing tiers.
3. Color Grading & Correction – Natural, Harmonious Tones
Adjust colors and tones so skin, clothing, and backgrounds look balanced and realistic. Use Curves, Levels, or selective color adjustments. Check skin tones under different lighting for consistency.
4. Removing Blemishes, Wrinkles, and Imperfections
Clean up minor skin flaws, dust, or product imperfections while maintaining realism. Work on a separate layer using the healing brush or clone tool, so edits are non-destructive and easily adjustable.
5. Enhancing Eyes, Teeth, and Hair
Subtle improvements like brightening eyes, slightly whitening teeth, and refining hair strands make portraits and commercial images more striking. Avoid over-brightening; small, natural-looking changes have the biggest impact.
6. Sharpening Details Without Overdoing
Sharpening brings out textures in eyes, hair, and clothing, but too much can create noise or halos. Apply sharpening selectively using masks or high-pass layers for controlled results.
Key Principle Throughout All Techniques
The overarching goal of high-end retouching is enhancement, not perfection. Every adjustment—whether smoothing skin, correcting color, or sharpening details—should preserve realism and make the image look naturally polished.
To bring these techniques to life, professionals depend on powerful tools and software. Here are the essentials used in high-end retouching.
Tools and Software for Professional Retouching
Professional high-end retouching relies on powerful software and tools to achieve polished, realistic results. Here are the most commonly used:
| Tool / Software | Purpose / Use Case | Key Features / Advantages |
| Adobe Photoshop | Advanced retouching and editing | Frequency separation, Dodge & Burn, Masks |
| Adobe Lightroom | Color correction and tone adjustments | Batch edits, Presets, and RAW processing |
| Capture One | RAW processing and color grading | Precise color control, Layers, Masking |
| Affinity Photo | Cost-effective Photoshop alternative | Layers, Masks, Retouching tools |
| Retouching Plugins | Speed up specific tasks | Skin smoothing, eye enhancement, hair retouch |
| Graphics Tablet | Precision editing | Pen control, pressure sensitivity |
Even with the best tools, retouching can go wrong if applied incorrectly. Here are the most common mistakes to avoid.
Common Mistakes in High-End Photo Retouching
Even professional editors sometimes make errors that reduce the quality or realism of their images. Being aware of these mistakes can help you avoid them:
- Over-Smoothing Skin or Objects: Too much smoothing looks fake; keep natural texture intact.
- Color Inconsistencies: Uneven tones look unnatural; keep skin, clothes, and backgrounds balanced.
- Losing Natural Details: Overediting removes realism; preserve fine hair, eye, and texture details.
- Using Too Many Automated Filters: Filters look fake; manual edits give cleaner, professional results.
Now that you know what to avoid, let’s look at some real-world before-and-after examples that show these techniques in action.
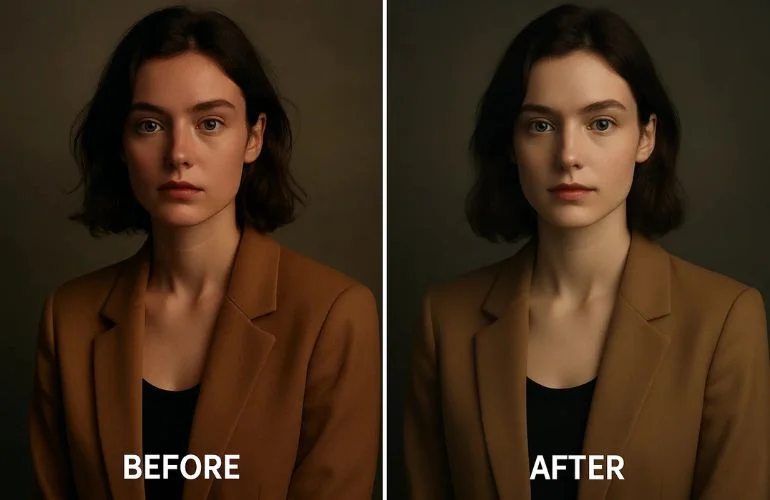
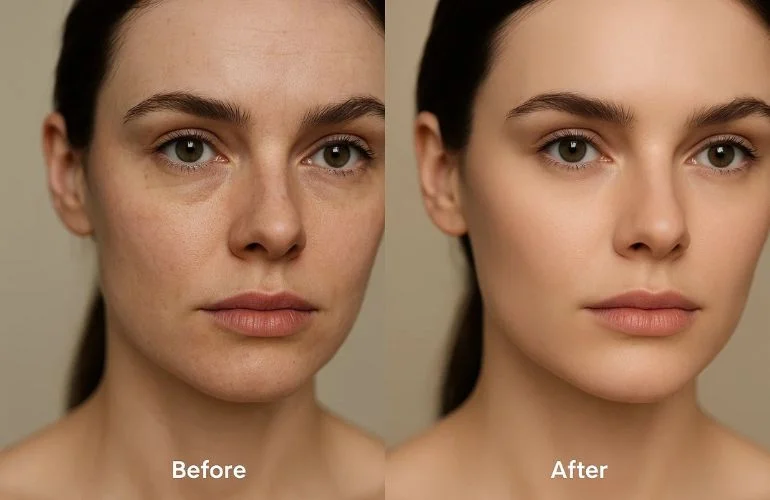
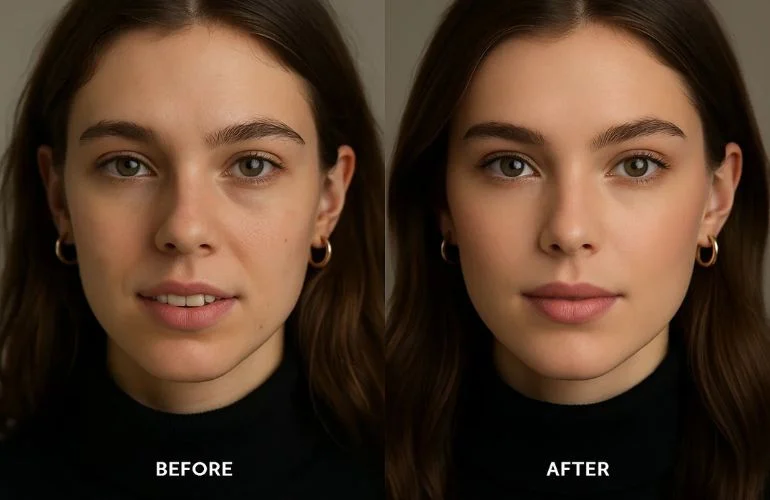
Examples and Before & After Demonstrations
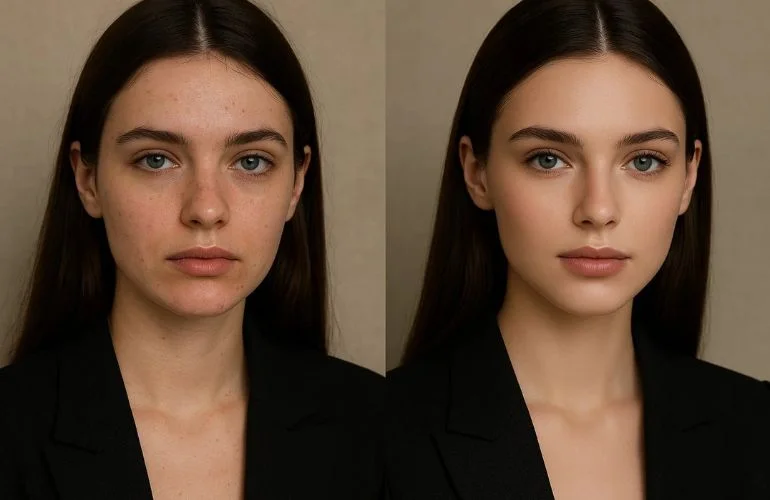
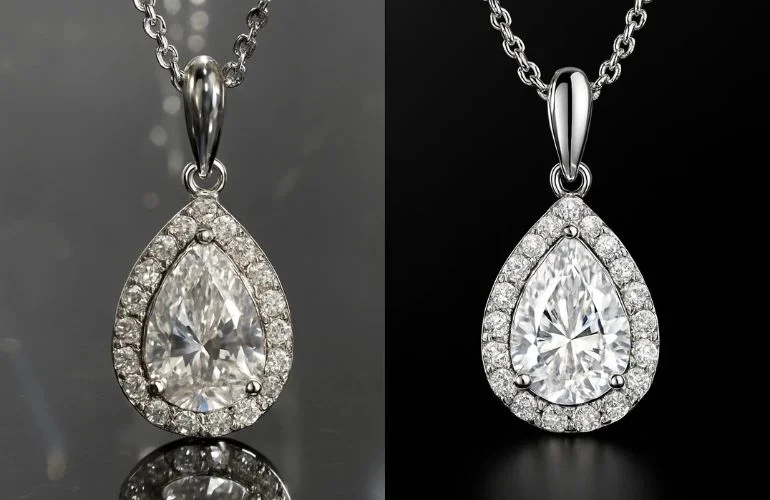
Seeing real examples helps understand how high-end retouching techniques improve images. Below are common types of projects with before-and-after comparisons:
01. Fashion Portrait – Before: Blemishes and uneven tones. After: Smooth skin, enhanced eyes, refined hair.
02. Jewelry Product → Before: distracting reflections. After: corrected shine, clean background.
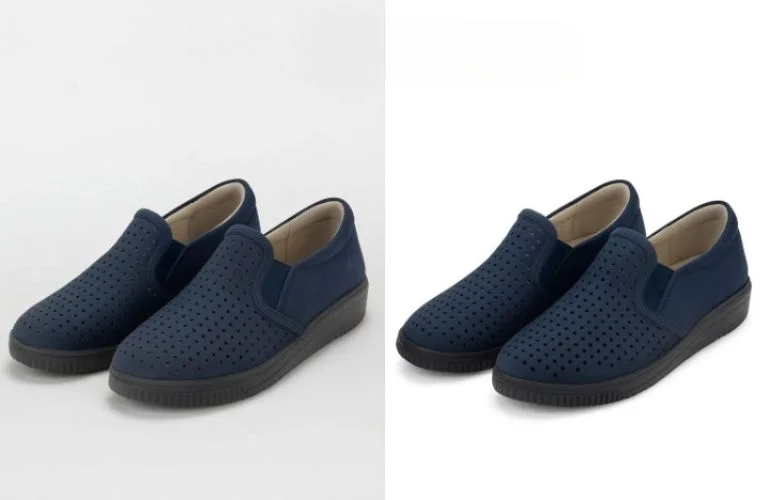
03. eCommerce Product → Before: uneven color and edges. After: color correction, sharp, clean presentation.
Seeing examples is inspiring, but practice is where your skills grow. Here’s how you can continue improving as a retoucher
Learning and Improving Your Skills
High-end photo retouching is a skill that improves with practice and guidance. Here’s how to develop your abilities:
- Take online tutorials from platforms like LinkedIn Learning, and Photoshop Training Channel.
- Practice on personal or client images using frequency separation, dodge & burn, etc.
- Get feedback from experienced professionals to refine your workflow.
Practice consistently and compare your before-and-after results to measure improvement. Even small daily edits build professional skills over time.
Conclusion
High-end photo retouching combines technical skill, attention to detail, and artistic judgment. By mastering techniques like frequency separation, dodge & burn, color grading, and detail enhancement, you can transform raw photos into stunning, professional-quality images.
Frequently Asked Questions
Professionals employ a multi-step approach, starting with exposure adjustments and blemish removal. Advanced methods include frequency separation for skin texture, dodge and burn for tonal adjustments, and precise color grading. They also focus on elements like body shaping, wrinkle removal, and digital makeup to enhance the subject’s appearance.
High-end photo retouching is crucial in industries like fashion, eCommerce, advertising, and real estate. It ensures that product images, fashion editorials, and promotional materials are visually compelling, maintaining brand consistency and appealing to target audiences.
The duration depends on the complexity and volume of the project. For instance, retouching a single image may take several hours, while large-scale projects with hundreds of images can span several days. Professionals often offer rush services for expedited delivery.
Outsourcing high-end retouching can be beneficial for photographers, agencies, and brands looking to maintain high-quality visuals without dedicating extensive time and resources. Professional retouching services offer expertise, efficiency, and consistency, ensuring images meet industry standards.
Get Professional Results with Our Photo Retouching Services
If you want to save time and achieve magazine-quality visuals, our expert team offers professional photo retouching services that guarantees flawless results. Trusted by photographers, brands, and agencies, we provide polished, professional images tailored to your needs.
Start your free trial today to transform your images with expert retouching.