Little bird photography is one of the most exciting forms of wildlife photography. However, photographing small birds can be challenging because they move quickly, stay far from the camera, and rarely remain still for long.
Capturing sharp and beautiful photos of small birds requires the right camera settings, timing, lighting, and patience. With the correct techniques, even beginners can take stunning bird photos in parks, forests, or their own backyard.
In this guide, you will learn 7 proven little bird photography tips, including the best time to shoot, recommended camera settings, essential gear, and expert techniques used by professional wildlife photographers.
Whether you are new to bird photography or looking to improve your skills, these tips will help you capture amazing images of small birds.
What is Little Bird Photography?
Little bird photography is the practice of photographing small bird species using telephoto lenses and fast camera settings to capture sharp images of fast-moving birds in nature.
Quick Camera Settings for Small Bird Photography
If you want a quick answer, these are the best camera settings for photographing small birds.
| Setting | Recommended Value |
|---|---|
| Shutter Speed | 1/1000s – 1/2500s |
| Aperture | f/5.6 – f/8 |
| ISO | 200 – 1600 |
| Focus Mode | Continuous Autofocus |
| Shooting Mode | Burst / Continuous Shooting |
These settings help freeze fast bird movement and produce sharp wildlife photographs.
7 Secrets to Capture Stunning Small Birds
Little bird photography can be exciting but challenging. Small birds move quickly and rarely stay still, making them difficult to photograph. In this guide, you will learn 7 practical tips to capture sharp and beautiful photos of small birds using the right settings, lighting, and techniques.
Secret 1: Understand Small Bird Behavior
One of the most important skills in bird photography is understanding how birds behave. Different bird species have unique habits, feeding patterns, and movement styles. By observing birds carefully, photographers can predict where birds might land, how long they stay on a branch, and when they are likely to fly.
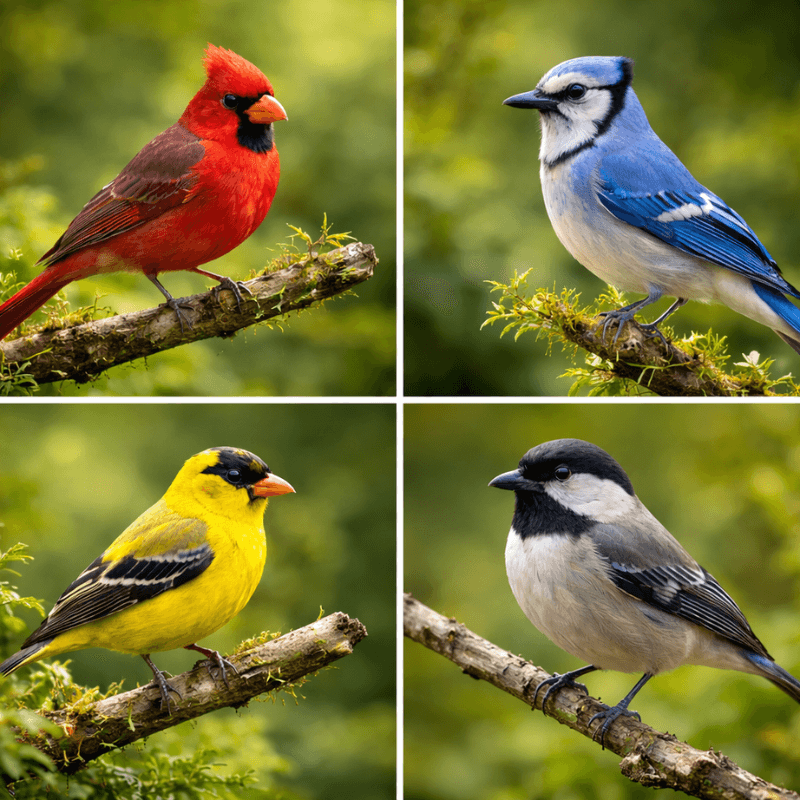
Some common small birds photographers often capture include:
- Northern Cardinal – Known for its bright red feathers and frequent appearances on tree branches.
- Blue Jay – A bold and active bird commonly seen around gardens and feeders.
- Mourning Dove – A calm bird that often sits quietly on fences or power lines.
- American Goldfinch – A bright yellow bird frequently found in gardens and open fields.
- House Sparrow – One of the most common birds found in cities and residential areas.
- Black-capped Chickadee – A curious bird that often hops between branches while searching for food.
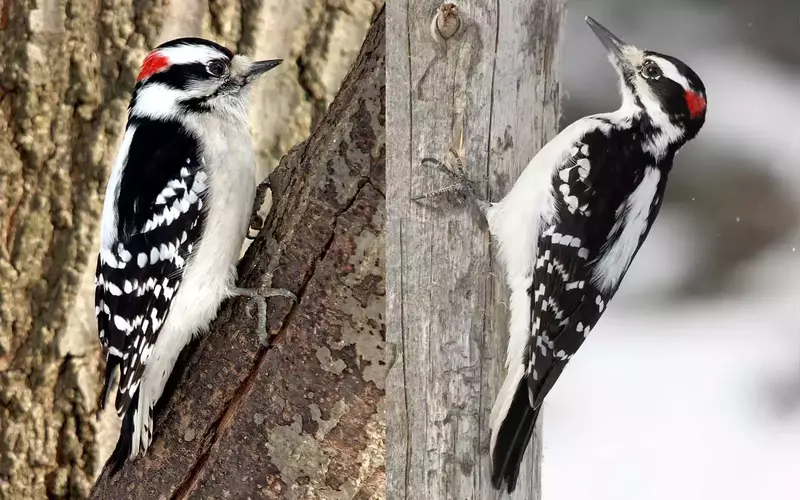
- White-breasted Nuthatch – Known for climbing tree trunks head-first.
- Downy Woodpecker – A small woodpecker that frequently taps on tree bark.
- Bee Hummingbird – The smallest bird in the world with extremely fast wing movement.
Pro Tip: Watch where birds land repeatedly—such as feeders, branches, or fences—and focus your camera on that location before the bird arrives.
Secret 2: Shoot During the Best Lighting Conditions

Lighting plays a huge role in wildlife photography. The best time for bird photography is during early morning or late afternoon.
Best Time to Photograph Birds
- Early Morning (Shortly After Sunrise)
- Late Afternoon (Before Sunset)
During these times:
- Birds are more active while searching for food
- Lighting is soft and warm
- Shadows are less harsh
- Colors appear more natural
Avoid taking photos at noon because the sunlight is very strong. Harsh light can create strong shadows and reduce image quality.
Secret 3: Use the Right Camera for Bird Photography
While skill matters more than expensive equipment, using a capable camera can significantly improve your results.
Bird photographers usually prefer cameras with:
- Fast autofocus systems
- High burst shooting speed
- Strong low-light performance
Popular cameras used for bird photography include:
- Nikon D500
- Sony A7 III
- Fujifilm X-T4
- Canon EOS 5D Mark IV
- Nikon D780
- Panasonic Lumix FZ80
These cameras allow photographers to capture multiple frames per second, increasing the chances of getting a perfect shot when birds move quickly.
Secret 4: Use Fast Camera Settings to Freeze Motion
Small birds move extremely fast, so using the correct camera settings is essential.
Best Shutter Speed for Small Birds
The ideal shutter speed for small bird photography is 1/1000s or faster. This helps freeze wing movement and prevent motion blur.
Recommended shutter speeds:
- Perched birds: 1/800 – 1/1000s
- Active small birds: 1/1000 – 1/1600s
- Birds in flight: 1/2000 – 1/2500s
Aperture
Use a wide aperture such as f/5.6 – f/8. This helps isolate the bird and blur the background.
ISO
Use the lowest ISO possible, but increase it if lighting conditions are poor.
Additional Helpful Settings
Professional bird photographers often use:
- Continuous shooting (burst mode)
- Back-button focus
- Continuous autofocus (AI Servo / AF-C)
These settings help track moving birds more effectively.
After capturing bird photos, photographers often enhance them using professional photo editing services to improve colors, sharpness, and background details.
Secret 5: Use the Right Lens for Bird Photography
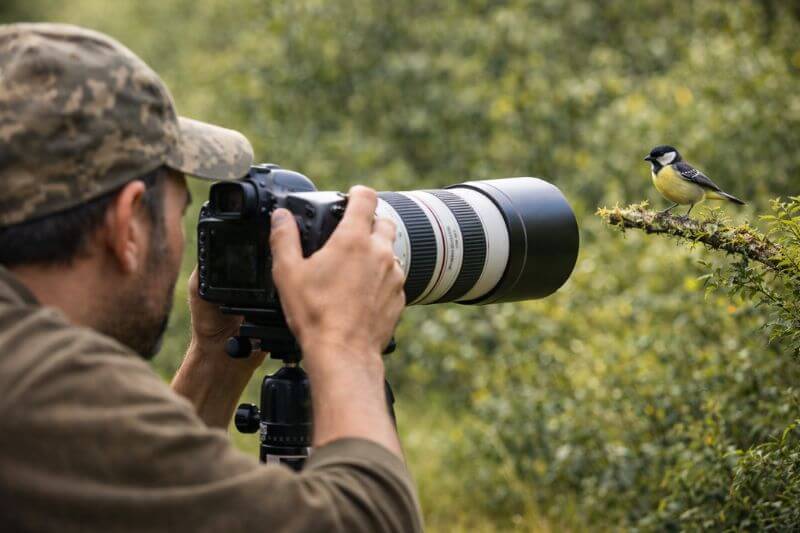
The lens you use is one of the most important factors in bird photography. Birds are usually far away, so photographers rely on telephoto lenses to capture detailed images without disturbing the birds.
Best Lens Range
Most bird photographers use lenses between 300mm and 600mm
Popular examples include:
- Canon 100-400mm
- Nikon 200-500mm
- Sony 200-600mm
A longer focal length allows you to capture birds clearly, even from a distance. After capturing the shot, many wildlife photographers use professional photo retouching services to enhance colors, remove distracting backgrounds, and make their bird photos look more professional.
Secret 6: Use Helpful Bird Photography Accessories
Several accessories can make bird photography easier and improve image quality.
- Tripod or Monopod – Telephoto lenses can be heavy and difficult to hold steady. A tripod or monopod helps stabilize your camera and reduce shaking.
- Teleconverter – A teleconverter increases the zoom range of your lens. It allows you to photograph birds that are farther away.
- Bean Bag – A bean bag helps support your camera on uneven surfaces. It is especially useful when shooting from cars or fences.
- Extra Batteries – Bird photography often involves waiting for the perfect moment. Carrying extra batteries ensures you never miss a great shot.
Secret 7: Practice Patience and Perfect Timing
Patience is one of the most important qualities in wildlife photography. Birds move unpredictably, and sometimes photographers must wait several minutes—or even hours—to capture the perfect shot.
To improve your chances of success:
- Stay quiet and avoid sudden movements
- Observe bird behavior carefully
- Use burst mode to capture multiple shots
- Keep your camera ready at all times
The more time you spend observing birds, the better your photography skills will become.
Final Thoughts on Little Bird Photography
Little bird photography may seem difficult at first, but with the right techniques, anyone can capture beautiful bird photos.
Remember these key tips:
- Learn bird behavior
- Shoot during the best lighting conditions
- Use fast shutter speeds
- Choose the right camera settings
- Use telephoto lenses
- Practice patience and observation
With regular practice and the right equipment, you will be able to capture stunning images of even the smallest birds.
Frequently Asked Questions
The best camera settings for small bird photography include a fast shutter speed of 1/1000s or faster, an aperture between f/5.6 and f/8, and continuous autofocus mode. Using burst shooting also helps capture sharp photos of fast-moving birds.
A telephoto lens between 400mm and 600mm is ideal for photographing small birds. Long focal lengths allow photographers to capture detailed bird images from a distance without disturbing the birds.
The best time to photograph birds is early morning after sunrise or late afternoon before sunset. During these times, birds are more active, and the lighting is softer, which helps create better colors and fewer harsh shadows.
To avoid blurry bird photos, photographers use fast shutter speeds, continuous autofocus, and burst shooting mode. Stabilization tools like tripods or monopods also help reduce camera shake when using long telephoto lenses.