
Photo collages are a fun way to tell stories and save special memories. You can also use them to show products or make creative designs. It doesn’t matter if you’re a photographer, a business owner, or just someone who loves editing pictures — a nice collage can make your photos look amazing.
There are many phone apps for quick edits, including a photo collage maker. But if you want more control and high-quality results, use Photoshop. It lets you design collages for anything — from online stores and social media posts to personal photo albums.
In this guide, we’ll walk you through how to make an amazing photo collage in Photoshop, step by step. By the end, you’ll be able to combine multiple photos into one beautiful layout — perfect for sharing, printing, or marketing.
How to Make a Photo Collage in Photoshop (Step-By-Step)

We’ve broken down the process of making a photo collage in Photoshop into 12 easy steps. Before you start, try to use your creative ideas and explore some online collage tutorials to gather inspiration. In this guide, we’ll show you how to create a collage step by step using Photoshop CC 2019.
Step 01: Open Photoshop

For this tutorial, we’ll use Photoshop, one of the most popular tools for creating photo collages. If you want, you can also try Adobe Illustrator, which is great for designing collages, or GIMP, a free alternative with similar features. But for now, let’s focus on Photoshop. Open Adobe Photoshop to get started!
Step 02: Create A New File
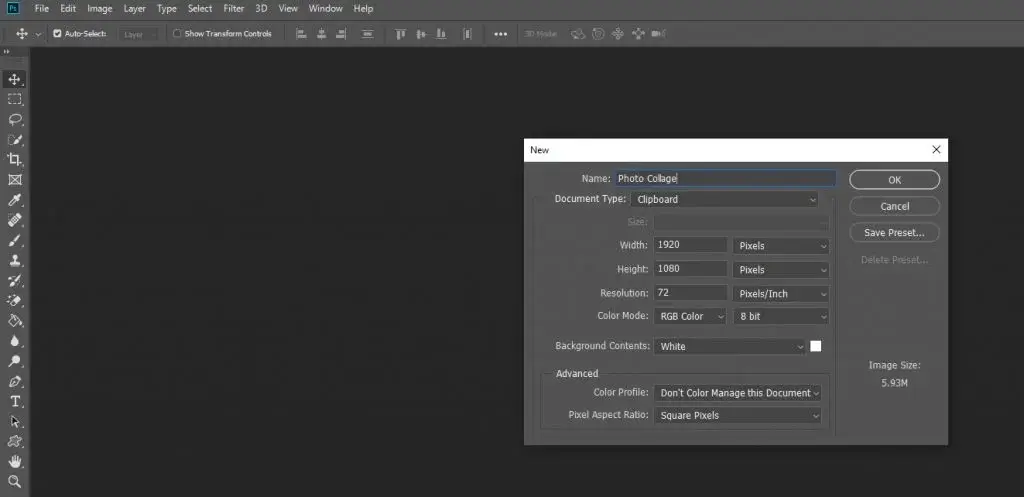
Like most editing programs, Photoshop has a File menu. Click File → New, or use the shortcut Ctrl+N (Windows) or Command+N (Mac). Enter the width and height in pixels, then click OK. You now have a new Photoshop document ready for your collage.
Step 03: Retouch the Images You Want to Add

Before creating your collage, it’s important to retouch your images. Fix any mistakes, adjust colors, and make sure the photos look their best. You don’t always need Clipping Path or Background Removal services, but they can help improve the final collage.
Step 04: Add Images One by One
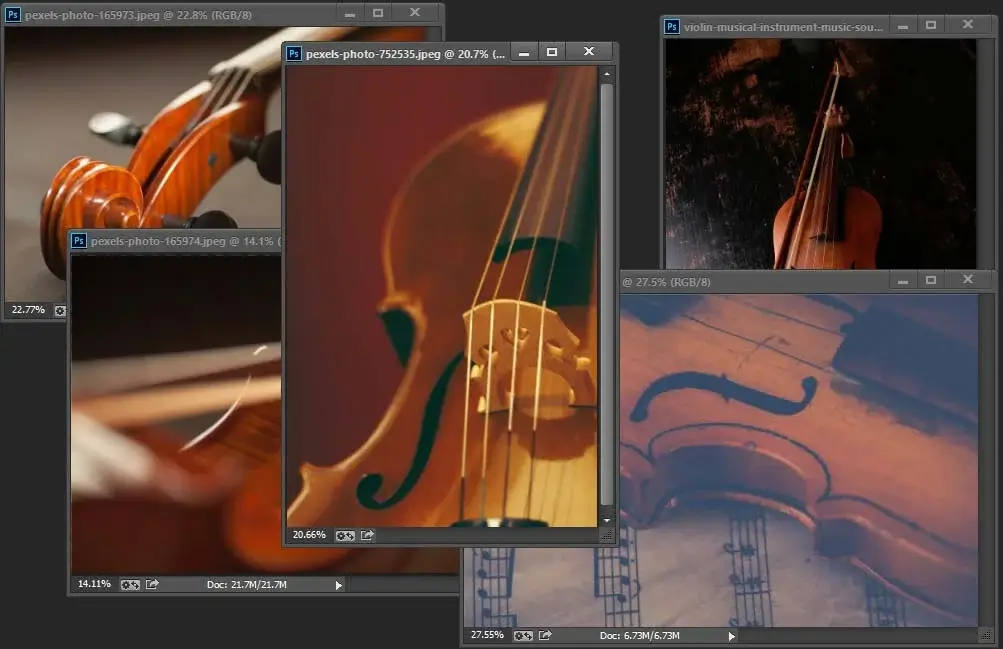
Photoshop doesn’t have a built-in “collage maker,” so you’ll need to create your collage manually. Start by adding one image, then add the next, until all images are in your document.
Although you can open all the images at once, it’s often easier to add them one by one, especially if your photos include a mix of portrait and landscape orientations. This approach makes it simpler to arrange and adjust each image for the best look.
Step 05: Crop Images (If Needed)

Not all images need cropping, but it can help if a photo’s size or shape doesn’t fit your collage layout. To crop, select the Crop Tool, adjust the frame around the part you want to keep, and then press Enter on Windows or Return on Mac. This ensures each image fits neatly into your collage.
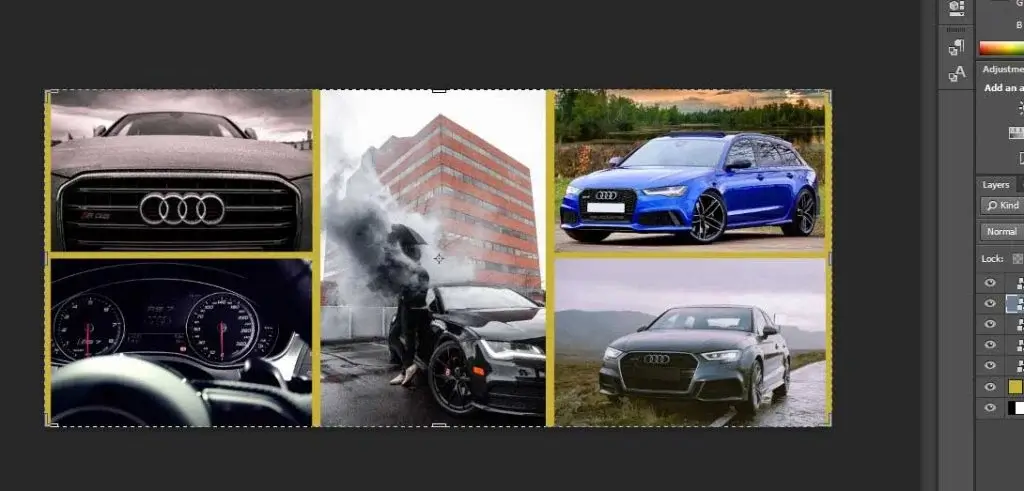
Step 06: Position The Images in the Canvas

Arrange your images in a way that looks balanced and visually pleasing. You can place them on a blank canvas or layer them over a background image, depending on the style you want. Pay attention to spacing and alignment to make sure the collage looks neat and professional.
Step 07: Resize The Images for Matching
To fit your images nicely into the collage, use Ctrl+T (Windows) or Command+T (Mac) to transform them. Resize each image as needed. In older versions of Photoshop, hold Shift to maintain proportions, while in CC2019 and later, proportions are maintained automatically.
Step 08: Adjust Background Color

Choose a background color that complements your images. If you are using a background image, you don’t need extra colors. Solid or gradient backgrounds also work well, as long as they match the style of your collage.
Step-09: Crop The Whole Canvas
Once all your images are in place, use the Crop Tool to trim the canvas if necessary. Be careful not to cut off any important parts of your images.
Step 10: Add Text (Optional)

You can add titles, captions, or event names to your collage. Keep it simple, because too much text can distract from your images.
Step 11: Add Border Around the Canvas (Optional)
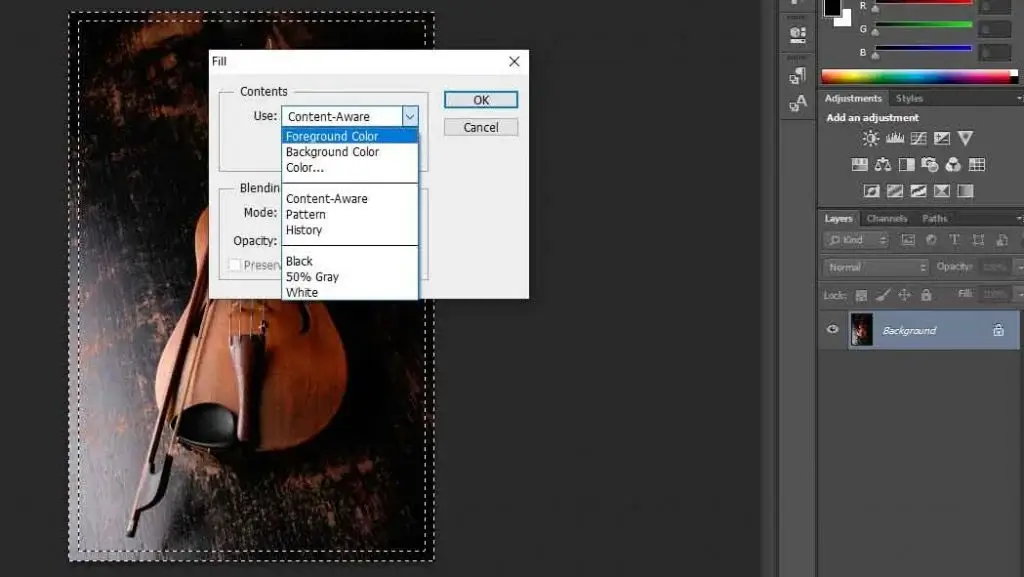
You can add a border around the canvas if you want. Well, this is optional, but you can do this to create a photo frame look. The process is pretty simple. Take the Rectangular Marquee Tool and create a rectangle near the edge of the whole image.
Leave some space so that you can add border effects. Right-click on the selection and choose ‘Select Inverse’. Now you have the selection around the edge. Right-click on the selection and choose ‘Fill’. You will see several options to select and press ‘OK’ to apply.
Step 12: Save in Editable Format

Finally, save your collage in TIFF or PSD format. TIFF preserves high resolution and maximum detail, while PSD keeps all your layers intact for easy edits later.
Final Thought
Creating photo collages in Photoshop is a great way to tell stories, showcase products, or add a professional touch to personal and commercial projects. Want your collage photos professionally edited? Try Clipping World’s expert photo editing services for high-quality results.
FAQ | Collage Photos in Photoshop
To begin, open Photoshop and create a new document by selecting File > New. Set your desired dimensions and resolution, then click OK to open a blank canvas. Next, import your images by going to File > Open and selecting the photos you wish to include. Each image will open in a separate tab; drag them onto your blank canvas to add them as layers.
Yes, Photoshop Elements offers tools to create collages. You can use the Creations workspace to access collage templates or manually arrange images using layers. For more advanced customization, consider using Adobe Photoshop.
Select the layer of the image you want to adjust. Use Ctrl+T (Windows) or Cmd+T (Mac) to activate the Free Transform tool. Drag the corners to resize and reposition the image as needed. Press Enter (Windows) or Return (Mac) to apply the changes.
If images have varying resolutions, they may appear at different sizes in your collage. To maintain consistency, adjust each image’s resolution by selecting Image > Image Size and setting a uniform resolution. Alternatively, resize the images manually using the Free Transform tool.
For high-quality prints, save your collage as a TIFF or PSD file to preserve layers and details. For online sharing, export your collage as a JPEG or PNG by selecting File > Export > Export As. Adjust the quality settings as needed to balance file size and image quality.