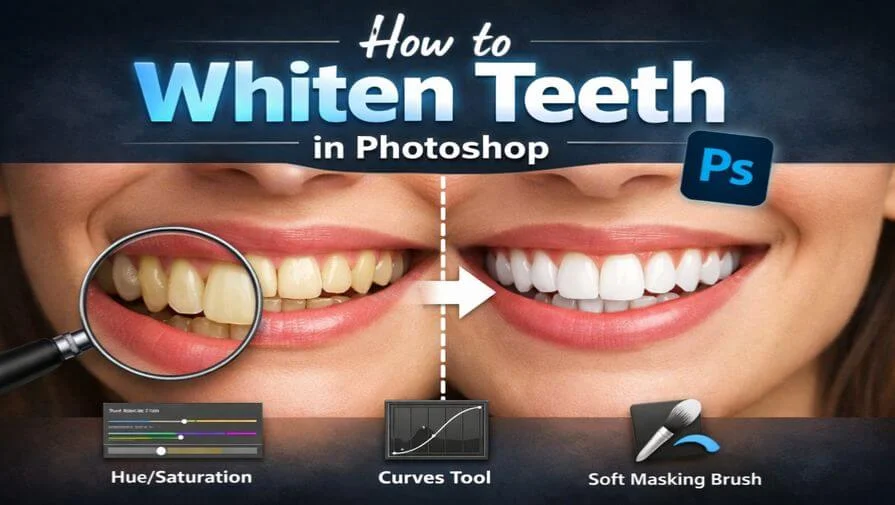
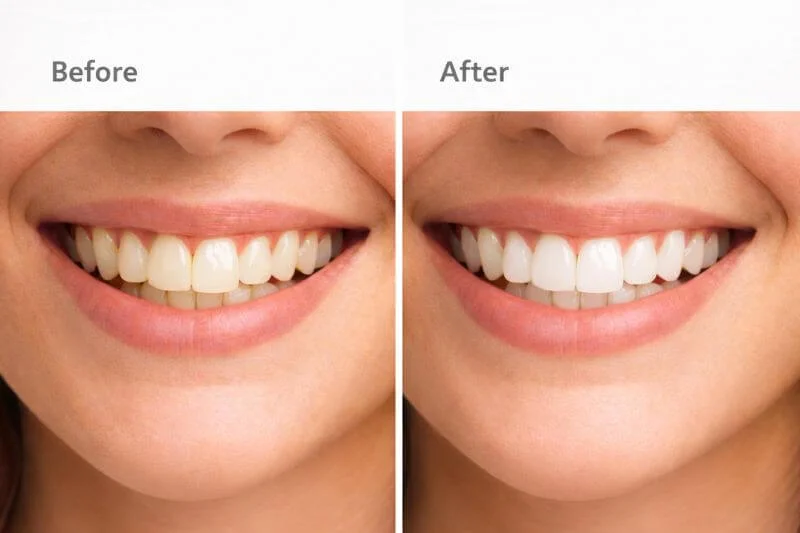
Want to whiten teeth in Photoshop without making them look fake? This step-by-step guide explains how to whiten teeth in Photoshop using safe and natural techniques trusted by professional retouchers. White teeth can instantly improve a portrait. With the right adjustment layers and masking, you can brighten teeth while keeping their natural texture and detail.
How to Whiten Teeth in Photoshop (Quick Answer)
To whiten teeth in Photoshop naturally, add a Hue/Saturation adjustment layer, target the yellow tones, and apply the effect only to the teeth using a mask.
Follow these steps:
- Add a Hue/Saturation adjustment layer
- Select “Yellows” from the dropdown
- Reduce saturation slightly
- Increase lightness carefully
- Invert the layer mask (Ctrl + I / Cmd + I)
- Use a soft white brush to paint over the teeth
- Lower layer opacity for a natural look
This method removes yellow discoloration while preserving natural texture and detail.
Why Teeth Whitening Matters in Photo Retouching
Teeth are often the brightest part of a smile. When they appear yellow, stained, or dull, the entire portrait can feel less polished and less professional. Even small discoloration can distract the viewer and reduce the overall impact of the image.
Subtle whitening improves:
- Wedding portraits
- Corporate headshots
- Fashion photography
- Social media images
The goal is not to make teeth pure white. The goal is to create natural brightness that enhances the smile while preserving realistic texture, soft shadows, and depth.
Method 1 – Hue/Saturation (Most Popular)
This is the most commonly used method to whiten teeth in Photoshop. It gives better control over color and brightness while keeping the edit natural.
Step 1: Zoom In
Zoom in to 100% so you can clearly see the teeth and color changes.
Step 2: Add a Hue/Saturation Adjustment Layer
Go to Layer → New Adjustment Layer → Hue/Saturation.
Step 3: Sample the Teeth Color
Select the hand tool inside the panel. Click directly on the teeth to target the yellow tones automatically.
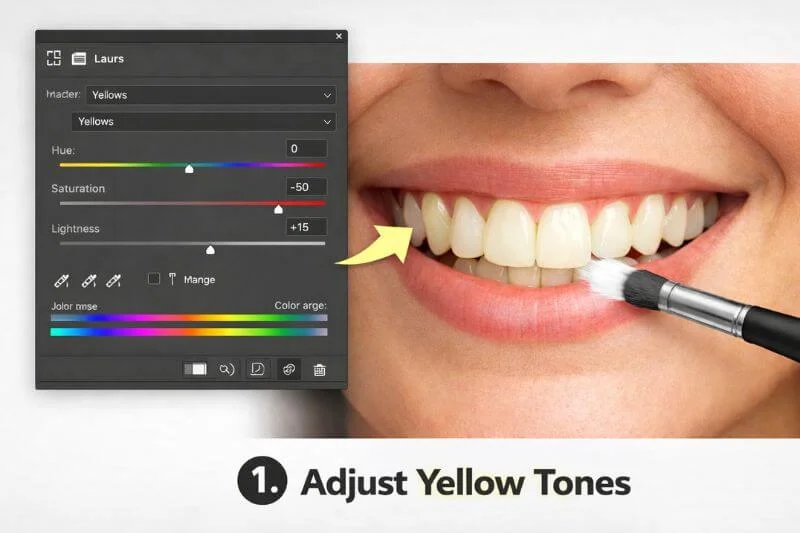
Step 4: Adjust the Color Range
Fine-tune the color range sliders. Make sure only the yellow tones in the teeth are selected.
Step 5: Reduce Saturation
Lower the saturation slowly. Small adjustments give more natural results.
Step 6: Increase Lightness
Increase lightness slightly. Do not over-brighten.
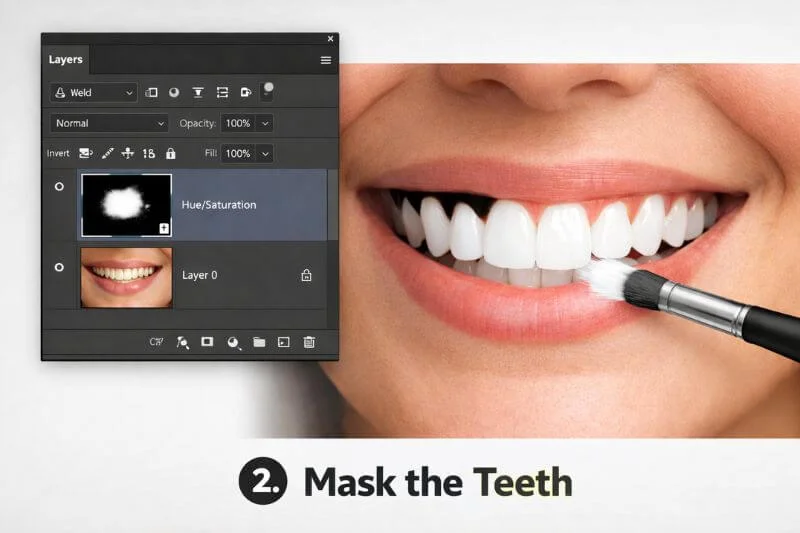
Step 7: Mask the Teeth
Invert the mask (Ctrl + I / Cmd + I). Use a soft white brush to paint only over the teeth.
Pro Tip
Never push lightness too high. Teeth should keep their natural texture and subtle shadows. If the teeth look flat, reduce the adjustment layer opacity.
Method 2 – Curves Adjustment (Professional Control)
Many professional retouchers prefer the Curves adjustment because it offers more precise tonal control. This method produces smoother and more natural results, especially in high-end portraits. This technique is commonly used in commercial and fashion portrait retouching for more refined results.
Step 1: Select the Teeth
Make a clean selection of the teeth using the Lasso Tool or Pen Tool. A soft feather of 1–2 pixels helps blend the edges.
Step 2: Add a Curves Adjustment Layer
With the selection active, add a Curves adjustment layer. Photoshop will automatically create a mask from your selection.
Step 3: Lift the Midtones
Click in the middle of the curve and raise it slightly. This brightens the teeth without affecting deep shadows.
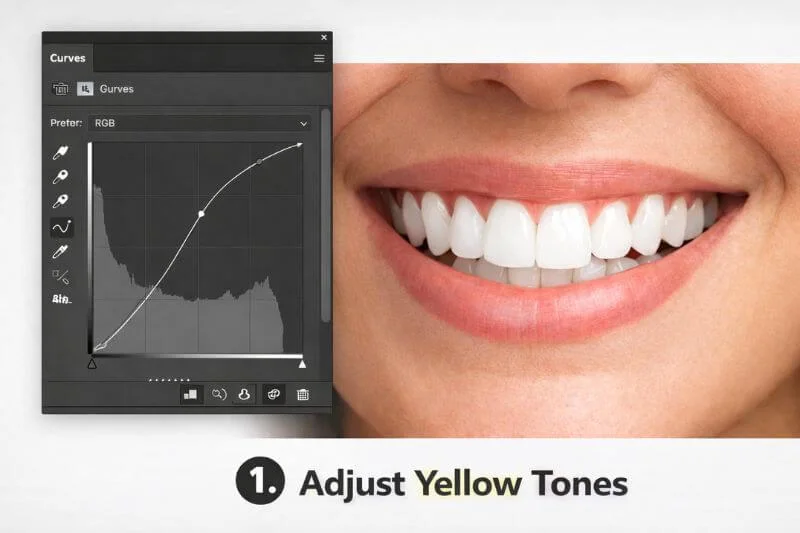
Step 4: Neutralize Warm Tones
If the teeth still look warm, switch to the Blue channel and gently lift the highlights. A small adjustment is enough to reduce the yellow tint. Curves allow better balance between brightness and contrast adjustments. The result looks softer and more refined than basic Hue/Saturation adjustments.
Pro Tip
Make very small adjustments. Large curve changes can flatten texture and remove natural depth.
Method 3 – Dodge & Burn Technique (Advanced)
This method keeps full texture and gives maximum control over brightness. It is commonly used in high-end portrait retouching.
Step 1: Create a New Layer
Create a new blank layer above your image.
Step 2: Fill with 50% Gray
Go to Edit → Fill → 50% Gray.
Step 3: Set Blend Mode
Change the blend mode to Soft Light.
Step 4: Use a Soft Brush
Select a soft, round brush. Set the flow between 2–5% for subtle control.

Step 5: Brighten Dark Areas
Paint with white over darker areas of the teeth. Build up the effect slowly.
Work carefully. Zoom in to 100%. Make small strokes instead of long ones.
How to Select Teeth Properly
Clean selection is the foundation of natural teeth whitening in Photoshop. If the selection is uneven or overlaps the gums and lips, the final result will look artificial.
The same level of precision is essential when correcting acne and skin imperfections. For a detailed step-by-step tutorial, see our How to Remove Blemishes from Photos guide.
You can use any of these tools:
- Lasso Tool – Fast and simple for small edits
- Pen Tool – Best for precise, clean edges
- Quick Selection Tool – Useful for automatic detection in high-contrast images
After selecting the teeth, apply a slight feather (1–2 pixels) to soften the edges and blend the adjustment naturally. Always double-check that the gums and lips are not included in the selection, as even a small overlap can make the whitening look fake.
Pro Tip
Zoom in to 100% while making your selection. Clean edges and careful masking are what separate beginner edits from professional results.
Common Teeth Whitening Mistakes
Avoid these common errors:
- Making teeth pure white – Teeth are not naturally paper white.
- Removing natural shadows – This makes teeth look flat.
- Whitening the gums – Gums should remain pink.
- Making teeth too blue – Too much blue creates an unnatural tone.
- Ignoring uneven lighting – Each tooth reflects light differently.
The goal is natural brightness, not perfect white.
Photoshop vs Lightroom vs Photoshop Express
Different tools can whiten teeth, but the level of control and precision varies. Some are better for quick edits, while others are built for professional retouching. Choosing the right software depends on your workflow and the level of control needed.
| Software | Control Level | Best For | Masking Precision |
|---|---|---|---|
| Photoshop | High | Professional portraits | Advanced |
| Lightroom | Medium | Quick edits | Moderate |
| Photoshop Express | Basic | Mobile edits | Limited |
When to Use Photoshop
Use Photoshop if you need precise masking and full tonal control. It is the best choice for professional portraits.
When to Use Lightroom
Lightroom works well for quick edits. It is faster but offers less control than Photoshop.
When to Use Photoshop Express
Photoshop Express is good for mobile users. It is simple but limited.
Photoshop remains the most powerful option for natural, high-quality teeth whitening.
How to Remove Lipstick or Stains from Teeth
Sometimes, teeth are not just yellow. Lipstick marks or small stains can appear in photos. These need a slightly different approach.
You can fix stains using:
- Hue/Saturation adjustment targeting red tones
- Clone Stamp Tool for small marks
- Brush tool with sampled tooth color
If using Hue/Saturation, select “Reds” and reduce saturation carefully. For small stains, use the Clone Stamp Tool at low opacity. Always use low flow and soft edges. Blend gradually to keep the texture natural.
Pro Tip
Zoom in while editing. Small corrections give more realistic results than heavy brushing.
Before & After Tips
Always compare your result with the original image. Small changes can look stronger than you think. Zoom out and view the full portrait. Then zoom back in to check details. Turn the adjustment layer on and off. The difference should be subtle, not dramatic.
If the whitening looks obvious, reduce the layer opacity. Teeth should still keep their natural texture and soft shadows. Natural edits always look better than extreme changes.
When Should You Outsource Teeth Retouching?
Teeth whitening is simple when you are editing just one photo. But working on dozens or hundreds of images can quickly become time-consuming.
You may want to outsource if you edit:
- Wedding photo batches
- Studio portraits
- eCommerce product images with models
Manual retouching requires careful masking and subtle adjustments to maintain a realistic look. Even small mistakes can make teeth appear overly white, flat, or unnatural.
Professional retouchers ensure:
- Clean and precise masking
- Natural, balanced brightness
- Consistent results across all images
- Fast turnaround time
If you need high-quality results without spending hours editing, outsourcing can save both time and effort. At Clipping World, we provide professional photo retouching with natural, realistic results tailored to your needs.
Frequently Asked Questions
To whiten teeth in Photoshop without making them look fake, use a Hue/Saturation or Curves adjustment layer and reduce yellow tones slightly. Apply the effect with a soft mask and lower the opacity if needed. Keep natural texture and soft shadows visible.
The best way to whiten teeth in Photoshop is to use a Hue/Saturation adjustment layer to target yellow tones. For more control, professional retouchers prefer the Curves method.
Teeth look gray when too much saturation is removed. Reduce saturation gradually and avoid extreme lightness adjustments.
No. Teeth should not be pure white. Natural teeth have soft gradients and subtle shadows. Aim for balanced brightness instead.
Final Thoughts
Now you know how to whiten teeth in Photoshop using both beginner and professional techniques. With the right tools and careful masking, the process is simple and effective.
Do not aim for perfectly white teeth. Aim for natural, balanced brightness that matches the lighting of the portrait. Small adjustments can make a big difference. Clean, realistic edits create professional-looking results.
If you work on large batches or need consistent quality, professional retouching services can save time and ensure flawless results. Professional portrait retouching often includes detailed enhancements like this. See how much professional photo retouching costs today.