
To make the background white in Photoshop, select your subject using the Quick Selection Tool or Pen Tool, apply a Layer Mask to remove the original background, then add a Solid Color layer set to pure white (#ffffff) beneath the subject. Finally, refine edges and confirm the RGB value is 255,255,255 for a true pure white result.
This method works for ecommerce product photos, Amazon listings, and professional product photography where true pure white (#ffffff) is required. If you’re new to background removal, understanding the basics can help you achieve cleaner results.
What Does Pure White Mean in Photoshop?
Pure white in Photoshop means a background with RGB values of 255, 255, 255 or the hex code #ffffff. It represents the brightest possible digital white and meets ecommerce marketplace requirements such as Amazon’s main image guidelines.
Quick Steps to Make Background White in Photoshop
- Open image in Photoshop
- Select the subject
- Remove background using Layer Mask
- Add Solid Color layer (#ffffff)
- Refine edges
- Add shadow for realism
How to Make Background White in Photoshop
Making a pure white background in Photoshop involves just a few straightforward steps. At Clipping World, we make the process easy to follow, even for beginners. While some images may be more challenging depending on the subject or background, you can still achieve professional results with a bit of extra editing.
Step 1: Selecting the Subject
The first step in making the background white in Photoshop is selecting the subject precisely. Accurate selection ensures clean edges and prevents white halos or rough outlines after background removal.
Open your image in Photoshop and choose the most suitable selection tool based on the subject:
- Quick Selection Tool – Best for simple objects with clear contrast
- Select Subject (AI-based) – Fast and effective for most product images
- Pen Tool – Ideal for high-precision, professional results
- Select and Mask Workspace – Recommended for refining soft edges like hair or fabric
Zoom in closely while selecting to avoid cutting into the subject or leaving background residue around edges. The more accurate your selection in this step, the easier it will be to achieve a perfect pure white background (#ffffff) in the next stages.
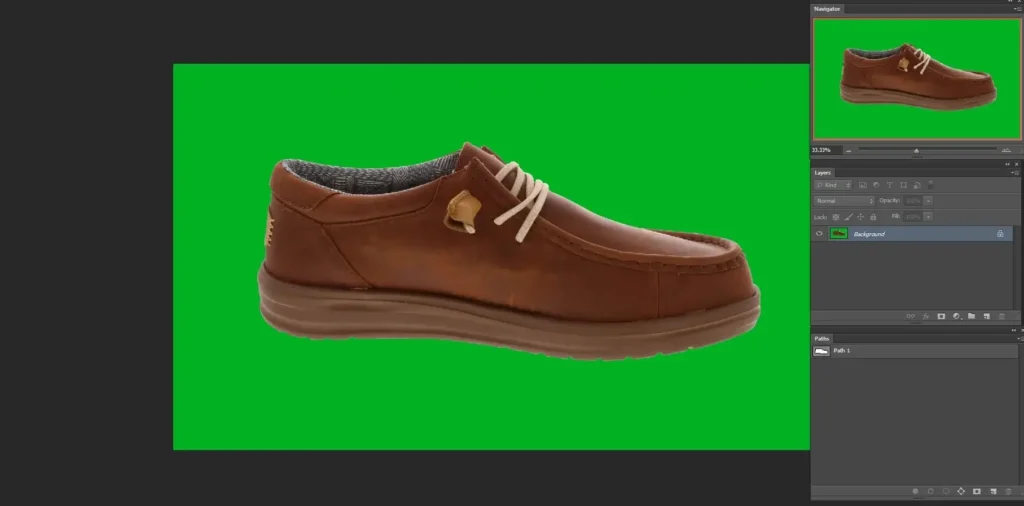
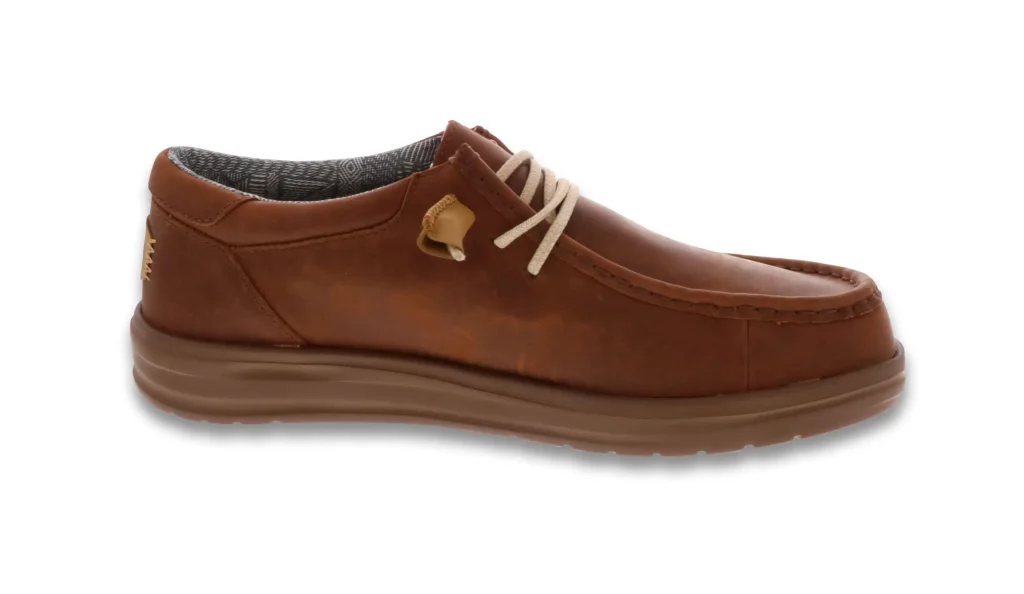
The image we are using is a sneaker with low complexity. Well, this is to make you understand the step only. If you like to learn more about the selection tool, follow our blog, “How to Make the background transparent in Photoshop”.
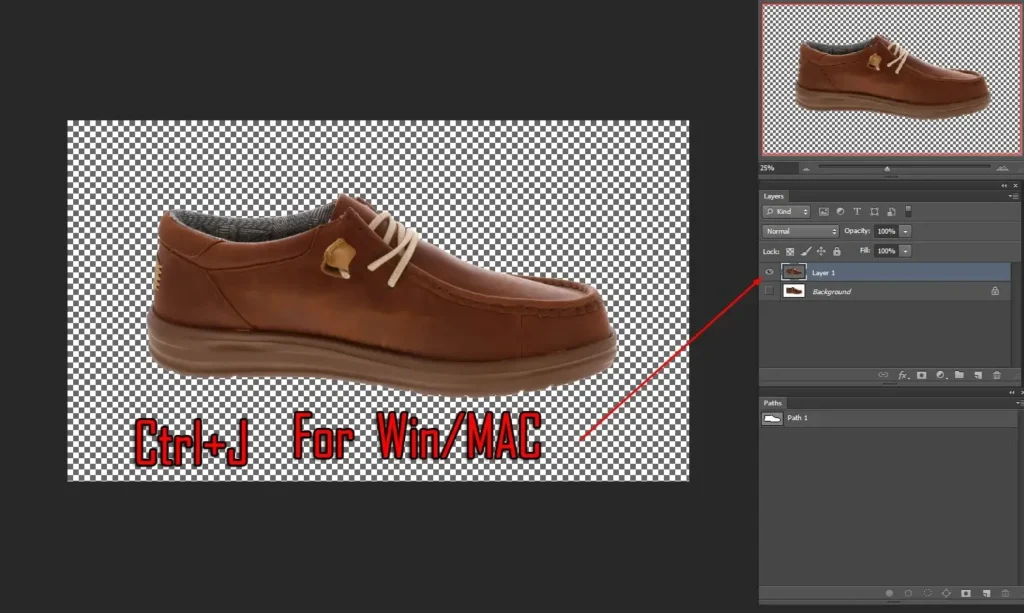
Step 2: Isolate the Subject from the Background
Once your subject is accurately selected, the next step is to separate it from the original background.
The quickest method is to press Ctrl/Command + J (Win/Mac) to duplicate the selected area onto a new layer. This creates a separate layer containing only the subject. After that, hide the original background layer by clicking the eye icon in the Layers panel.
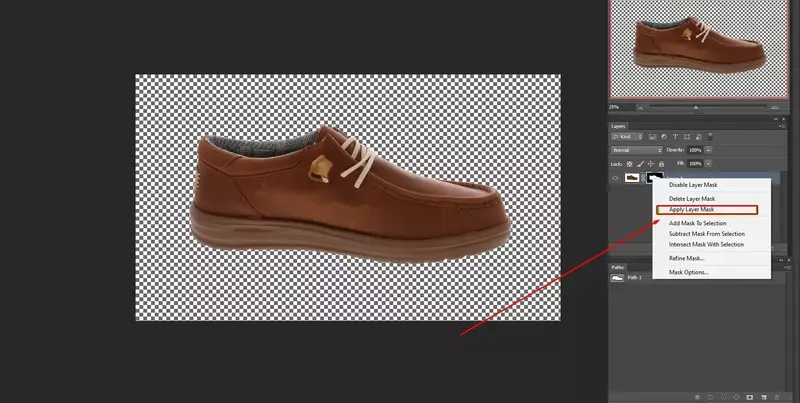
For a more professional and non-destructive approach, use a Layer Mask instead of permanently deleting the background. Click the “Add Layer Mask” icon at the bottom of the Layers panel to hide the background while preserving the original pixels.
Using a layer mask gives you the flexibility to refine edges later, adjust selections, or correct mistakes without damaging the image. This step is essential for achieving a clean and professional pure white background in the final result.
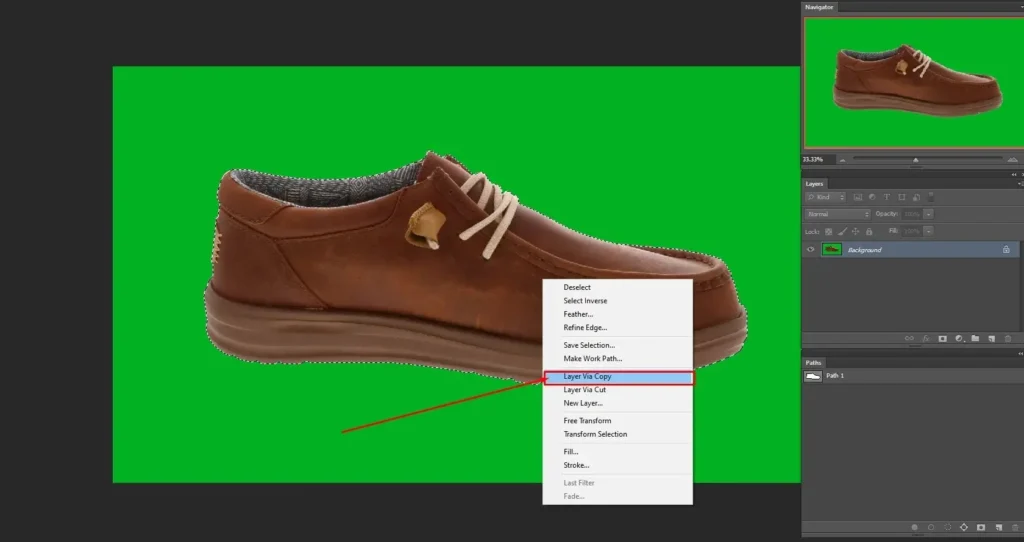
Or select ‘Layer via copy’ by right-clicking the same way on the selection. The selection will create a new layer with the subject selected. Hide the background layer, and you will have the subject without the background. For more complex edges like hair or fabric, consider using advanced image masking in Photoshop techniques.
Step 3: Adding a Pure White Background (#ffffff)
After isolating the subject, the next step is to create a true pure white background. Go to Layer → New Fill Layer → Solid Color (or click the “Create New Fill or Adjustment Layer” icon at the bottom of the Layers panel and select Solid Color).
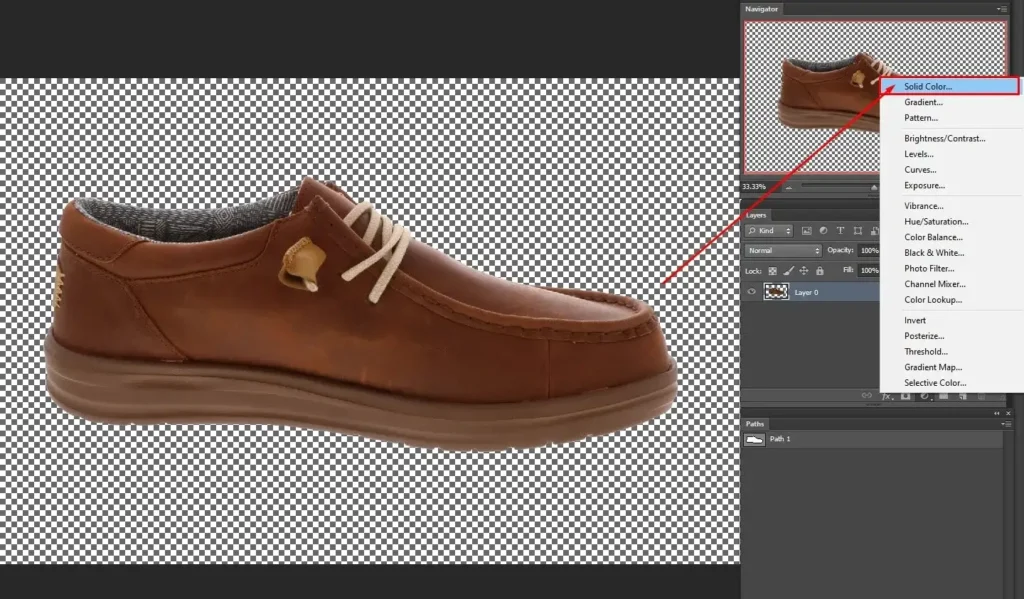
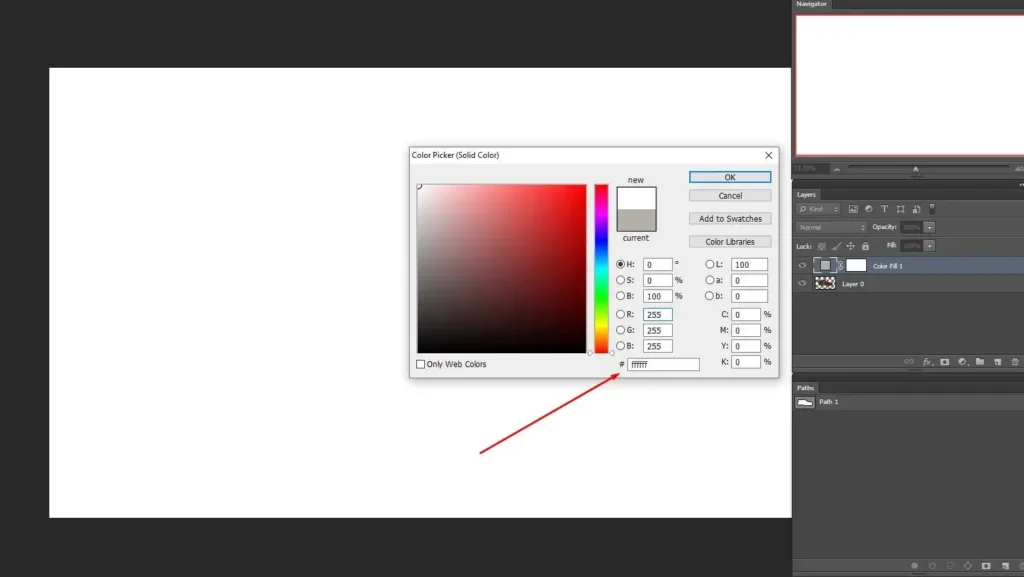
To add a pure white background, we will use the whitest tone from the color panel. You can use the mouse’s left-click to place the color picker at the peak, as in the image below. Or you can use the color code ‘#ffffff’ for the bright white color selection.
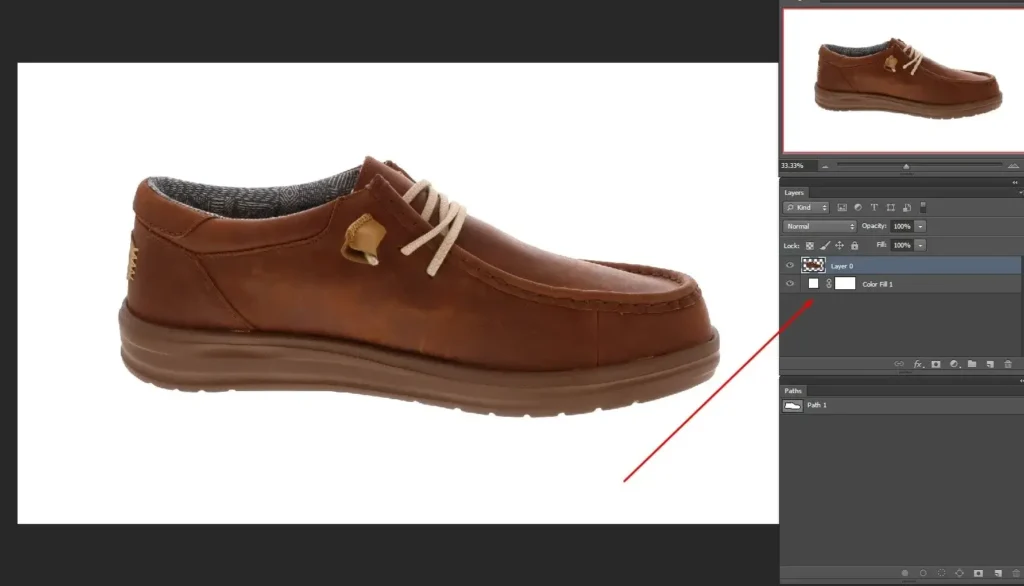
Now move the solid-colored layer below the subject layer. And, you will have a bright white background. You will now have a clean, bright, pure white background behind your isolated subject.
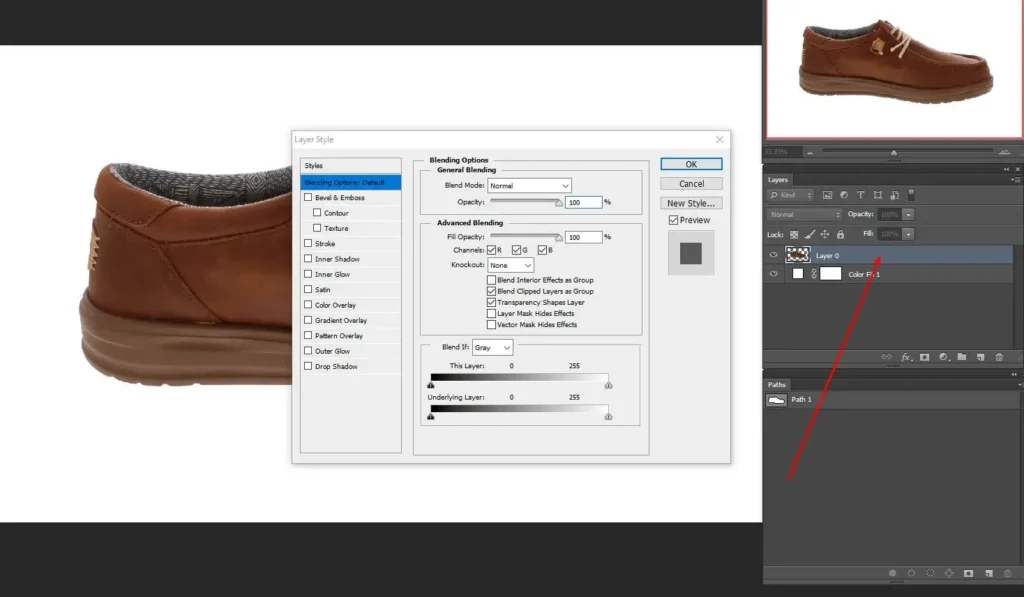
Step 4: Adding Shadows for Realism
As we are done with the bright white background addition, our task is done. But, without the shadow, the product looks incomplete. So, we use the blending option of Photoshop. Double-click on the subject layer to see the blending option.
On the left, you will see the options where the ‘Drop Shadow’ is located at the bottom. We are making some changes according to the subject we are using. Well, the subject you use may demand different modifications. Press OK to continue.
The final image is as follows. Of course, you can do further editing, such as retouching or color correction, for better results. We will discuss them in another tutorial in the future.
Pure White vs White Background in Photoshop
Although both may look similar, a pure white background is technically different from a standard white-looking background. This difference is especially important for ecommerce product images.
| Aspect | Pure White Background | Regular White Background |
|---|---|---|
| Color Code | #ffffff | Off-white or light gray |
| RGB Value | 255, 255, 255 | Usually below 255 |
| Brightness Level | Maximum digital white | Slightly dull or uneven |
| Ecommerce Compliance | Meets Amazon requirements | May cause rejection |
| Visual Impact | Clean, bright, professional | Can look flat or greyish |
A pure white background ensures marketplace compliance, better contrast, and a professional appearance. Regular white backgrounds may appear similar, but often fail technical requirements for ecommerce listings.
How to Check If Your Background Is Pure White
- Use the Eyedropper Tool
- Click the background
- Check RGB values in the Info panel
- Confirm it reads 255,255,255
Common Problems When Making Background White in Photoshop
Even after following the steps, you may notice small issues that affect the final result. Here are the most common problems and how to fix them properly:
1. Background Looks Gray Instead of Pure White
If your background appears slightly dull or gray, the RGB values are likely below 255, 255, 255.
How to fix it:
- Select the Eyedropper Tool
- Click on the background
- Check the RGB values in the Info panel
- If they are below 255, add a Solid Color layer
- Set the color to #ffffff
- Place the layer beneath your subject
This ensures a technically correct pure white background suitable for ecommerce platforms.
2. Edges Look Rough or Jagged After Background Removal
Rough edges usually happen when the selection is not refined properly.
How to fix it:
- Open the Select and Mask workspace
- Use the Refine Edge Brush Tool for hair or soft edges
- Apply slight feathering (0.5–1 px)
- Adjust contrast carefully
Clean edges make your product look more natural and professional.
3. White Product Blends into the White Background
When the product is also white, it can lose depth and separation.
How to fix it:
- Add a subtle Drop Shadow
- Slightly increase contrast
- Add a very soft inner shadow if needed
- Avoid heavy shadows — keep it realistic
This creates separation without breaking ecommerce compliance.
Why Pure White Background Matters for Ecommerce
A pure white background plays a crucial role in ecommerce product photography. It creates a clean, distraction-free presentation that helps customers focus entirely on the product. When shoppers can clearly see details, texture, shape, and color without background distractions, it increases trust and purchase confidence.
Most major ecommerce platforms—including Amazon, eBay, Shopify stores, and Walmart Marketplace—require or strongly recommend a pure white background (#ffffff) for main product images. A consistent white background ensures compliance with marketplace guidelines and improves overall listing quality.
Beyond compliance, a white background also enhances:
1. Higher Conversion Rates
Clean product images look more professional and credible. Customers are more likely to purchase when visuals appear clear, consistent, and high-quality.
2. Better Product Visibility
White backgrounds improve contrast and make colors stand out. This is especially important for fashion, electronics, cosmetics, and other detail-driven products.
3. Improved SEO and Click-Through Rate
Professional product photos increase engagement on ecommerce platforms and search engines. Better visuals can lead to higher CTR and improved ranking signals.
4. Consistent Brand Presentation
Using a uniform white background across all product listings builds a strong, recognizable brand identity. Consistency creates a premium and trustworthy appearance.
5. Easier Editing and Background Replacement
Once a product is isolated on a white background, it becomes easier to repurpose images for ads, social media, catalogs, or promotional campaigns.
In competitive ecommerce markets, product presentation directly impacts performance. A pure white background is not just a design choice—it’s a strategic requirement for professional product photography and online sales success.
Frequently Asked Questions
To make the background pure white in Photoshop, select the subject, apply a layer mask to remove the original background, then add a Solid Color layer set to #ffffff beneath the subject. Refine edges and confirm RGB values are 255,255,255.
White may appear bright but can contain gray tones. Pure white in Photoshop means RGB 255,255,255 or hex code #ffffff. Ecommerce platforms require true pure white for main product images to meet listing standards.
Your white background looks gray because the RGB values are below 255. Use the Eyedropper Tool to check the color. If needed, replace the background with a Solid Color layer set to #ffffff for a true pure white result.
The easiest way is to use Select Subject, apply a Layer Mask, and add a Solid Color layer beneath the subject. This method is fast, non-destructive, and works well for most product images.
Yes. Amazon requires the main product image to have a pure white background (RGB 255,255,255). Images that appear off-white or gray may be rejected during listing approval.
To make a white product visible on a white background, add subtle drop shadows, increase contrast slightly, and refine edges carefully. Shadows help separate the product from the background and improve visual clarity.
Yes, you can change any background to white by isolating the subject with selection tools or masking, then adding a pure white Solid Color layer underneath. Complex subjects may require edge refinement for clean results.
Conclusion
Creating a pure white background in Photoshop is simple when you follow a structured workflow—accurate subject selection, non-destructive masking, adding a Solid Color layer set to #ffffff, and refining edges for realism.
However, achieving true pure white (RGB 255,255,255) with clean edges and natural shadows requires precision—especially for ecommerce product photography where compliance and visual quality directly affect performance.
If you regularly edit product images, mastering how to make the background white in Photoshop will significantly improve your presentation quality, marketplace approval rate, and conversion potential.
For high-volume ecommerce stores or complex products, professional background removal services ensure consistent, production-ready results while saving time and maintaining brand standards.