Want your designs to look clean, creative, and professional without spending hours in Photoshop?
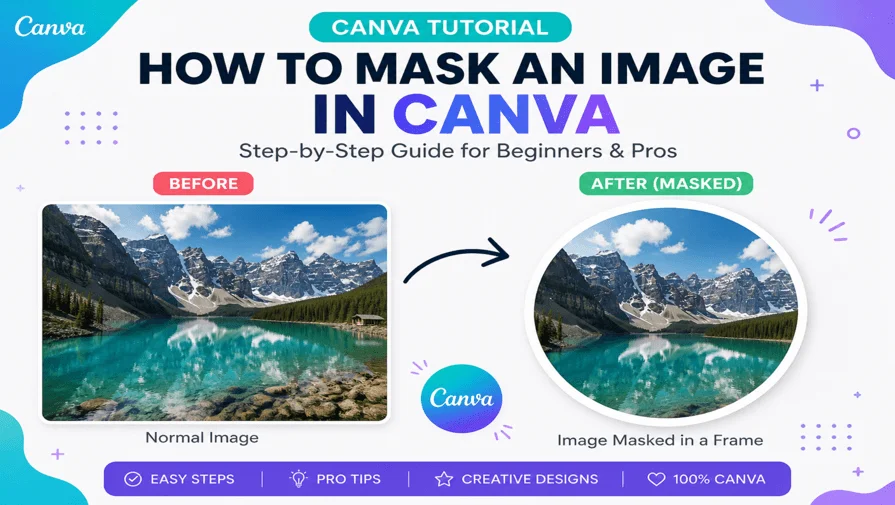
If you’re looking for how to mask an image in Canva, the easiest way is to use frames. Canva automatically clips your image into a shape when you place it inside a frame. It is simple for beginners to create professional designs in minutes.
Whether you’re designing social media posts, YouTube thumbnails, or marketing graphics, this technique helps you control how your images appear without any technical skills. In this guide, you’ll learn step-by-step how to mask an image in Canva, discover pro tips, and avoid common beginner mistakes.
How to Mask an Image in Canva (Quick Steps)
- Open Elements and search for “Frames.”
- Choose a frame shape
- Drag your image into the frame
- Double-click to adjust the image
What Is Image Masking in Canva?
Image masking in Canva is done by placing an image inside a frame, which automatically clips it into a shape. Unlike traditional design tools, Canva does not use manual layer masks. Instead, it relies on frames as a simple masking system, allowing users to fit images into shapes like circles, squares, letters, and custom graphics with just a few clicks.
Canva uses frames as a simplified alternative to traditional clipping masks used in advanced design software like Adobe Photoshop, making it ideal for beginners and non-designers.
Why Use Image Masking in Canva for Better Design?
Image masking in Canva helps improve both the visual quality and structure of your designs. Here’s why it’s widely used:
- Improves visual appeal
- Creates professional layouts
- Helps maintain brand consistency
- Makes designs more engaging
Canva Image Masking vs Photoshop (Key Differences)
| Feature | Canva | Photoshop |
|---|---|---|
| Method | Frames | Layer Masks |
| Difficulty | Beginner-friendly | Advanced |
| Flexibility | Limited shapes | Fully customizable |
| Speed | Very fast | Moderate |
Canva is best for speed and simplicity, while Photoshop is better for precision and advanced editing.
Step-by-Step: How to Mask an Image in Canva Using Frames
Step 1: Open Canva and Create a Design
Go to Canva and create a new design.
- Choose format (Instagram post, banner, etc.)
- Set custom dimensions if needed
Step 2: Go to Elements → Frames
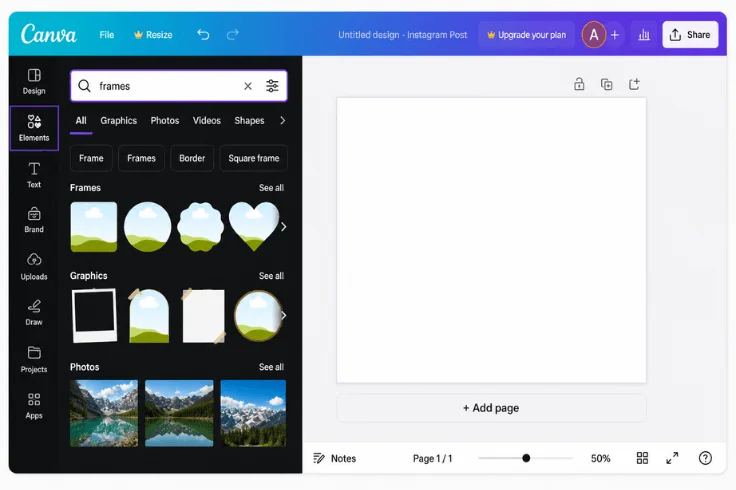
- Click Elements from the sidebar
- Search for “Frames”
Tip: Use the search bar to quickly find frame styles
Step 3: Choose a Frame Shape
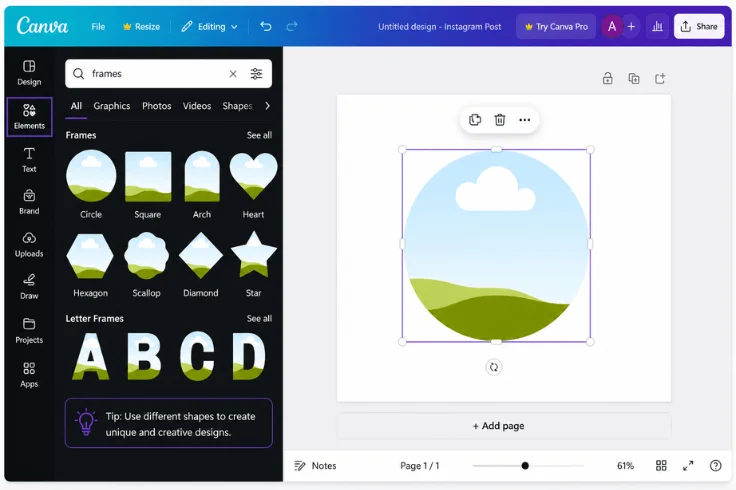
Pick a shape based on your goal:
- Circle → Profile images
- Square → Product photos
- Letters → Creative designs
Drag the frame onto your canvas.
Step 4: Add Your Image
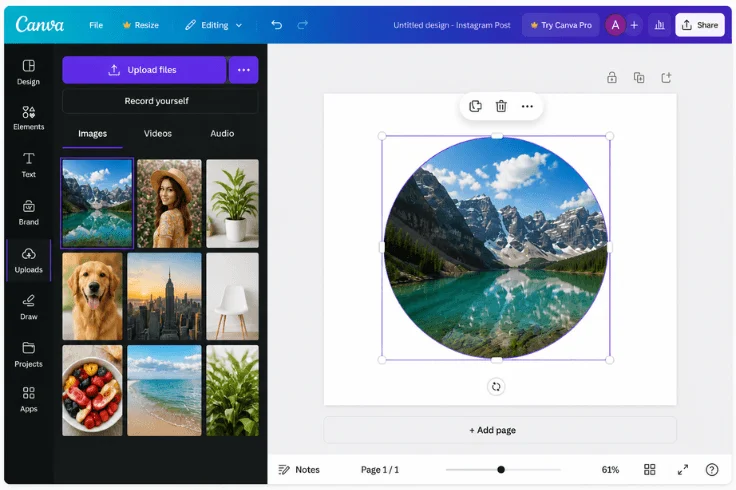
- Go to Uploads or Photos
- Drag your image onto the frame
Canva will automatically mask (clip) the image into the shape
Step 5: Adjust the Image
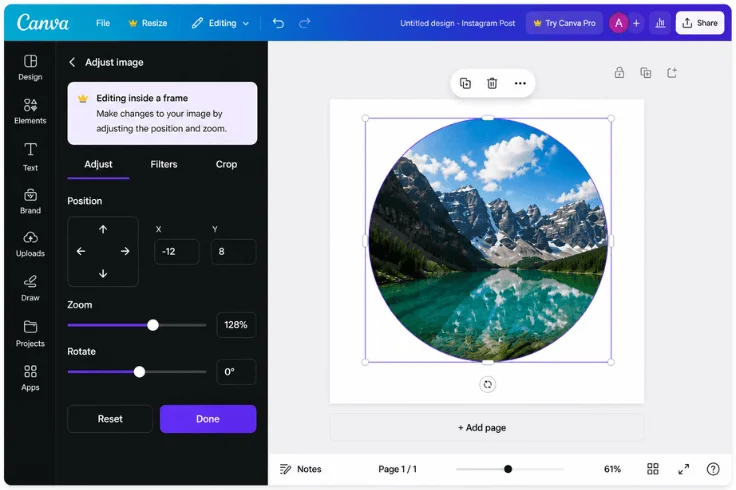
Double-click inside the frame to:
- Reposition
- Zoom in or out
- Align properly
Step 6: Customize Your Design
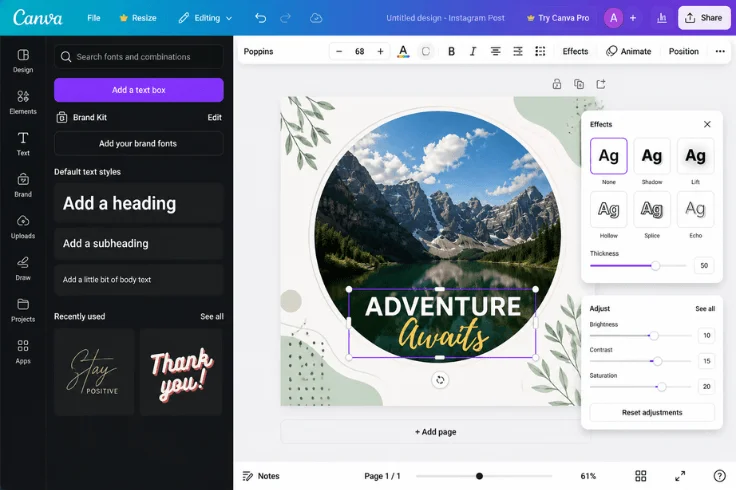
Enhance your masked image:
- Add text overlays
- Apply filters
- Adjust brightness/contrast
- Combine with other elements
Pro Tips for Better Image Masking in Canva
Before you start masking images in Canva, a few smart techniques can make a huge difference in your final design. While frames make masking easy, how you use them determines whether your design looks basic or truly professional. Here are some practical tips to help you get cleaner, sharper, and more visually appealing results.
1. Use Background Removal First
Before placing your image into a frame, remove the background to get a cleaner and more focused result. This is especially useful for product photos—learn more in our product photo editing guide.
2. Use High-Resolution Images
Always use high-resolution images to prevent pixelation when zooming or repositioning inside frames. Low-quality images can look blurry or distorted, especially in professional designs like ads or presentations.
3. Combine Multiple Frames Creatively
Don’t limit yourself to one frame. Use multiple frames together to create grids, collages, or layered compositions. This technique works great for social media posts, portfolios, and storytelling visuals.
4. Adjust Image Positioning Carefully
After placing your image into a frame, double-click to adjust it properly. Make sure the main subject is centered and not awkwardly cropped. Poor alignment is one of the fastest ways to make a design look unprofessional.
5. Add Depth with Shadows and Effects
Use Canva’s shadow and glow effects to create depth and separation from the background. Subtle shadows can make your masked images look more realistic and visually appealing.
6. Maintain Consistent Spacing and Alignment
When using multiple masked images, keep spacing and alignment consistent. Use Canva’s grid and position tools to ensure a clean, balanced layout—especially important for professional and brand designs.
By applying these simple but effective tips, you can turn basic Canva frames into powerful design tools. With the right approach, your masked images will look more polished, balanced, and professional—no advanced software required.
Real-Life Use Cases of Image Masking in Canva
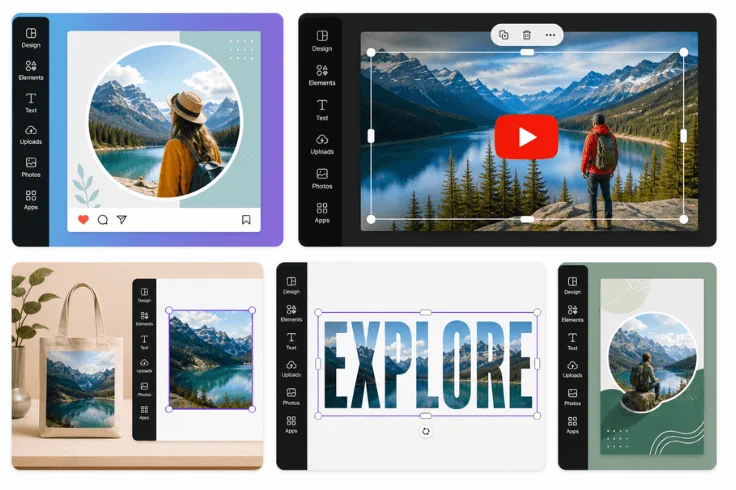
Masking in Canva is widely used for:
- Social Media Posts: Circular profile-style masked images for clean layouts
- YouTube Thumbnails: Bold compositions using shape-based masking
- Ecommerce Images: Product highlights inside clean frames
- Marketing Ads: Modern layouts using geometric masking
- Presentations: Professional slide visuals with structured image placement
Common Image Masking Mistakes in Canva to Avoid
Even though masking in Canva is simple, small mistakes can quickly ruin the overall look of your design. Being aware of these common issues will help you create cleaner, more professional results.
- Using low-quality images: Leads to blurry results when adjusting inside frames
- Over-zooming: Crops important parts of the image
- Misalignment: Makes designs look unprofessional
- Confusing icons with masked images: Not all visuals are masking
Avoiding these common mistakes will instantly improve the quality of your masked images. With proper alignment, image quality, and frame usage, your Canva designs will look much cleaner, sharper, and more professional.
Final Thoughts
Canva is perfect for everyday designs, but some projects demand more, like ecommerce product photos with complex backgrounds, fine hair details, or high-volume batch editing. In those cases, working with a professional image editing service can save time and deliver pixel-perfect results that Canva simply can’t match.
Clipping World specializes in exactly this, offering precise, high-quality masking and background removal for businesses that need consistent, professional-grade results at scale.
FAQs – How to Mask an Image in Canva
Yes, image masking in Canva is free. Most basic frames are available at no cost. However, some premium frames and design elements require a Canva Pro subscription.
Canva does not support true custom masks like Adobe Photoshop. However, you can combine frames, shapes, and elements creatively to achieve similar masking effects.
Your image will not mask if it is not placed inside a frame. Make sure you drag and drop the image directly onto a frame, not just onto the canvas.
Yes, you can mask text in Canva using letter frames. These allow you to place images inside text shapes, creating visually engaging typography designs.
Canva Pro includes a background remover that works well for simple images. However, for complex subjects like hair, glass, or fine edges, professional editing services often provide more accurate and detailed results.