
Posterizing transforms an image into an artistic, poster-like effect by reducing its color tones. In this tutorial, we’ll explain how to posterize a photo in Photoshop using adjustment layers and blending modes for a professional result.
What is Posterizing in Photoshop?
Posterizing is the process of reducing the number of colors or tones in an image, creating sharp transitions between areas of color. This effect gives the image a stylized, poster-like appearance, ideal for graphic design or artistic projects.
Step-by-Step Guide: How to Posterize a Photo
Step 1: Add a Posterize Adjustment Layer
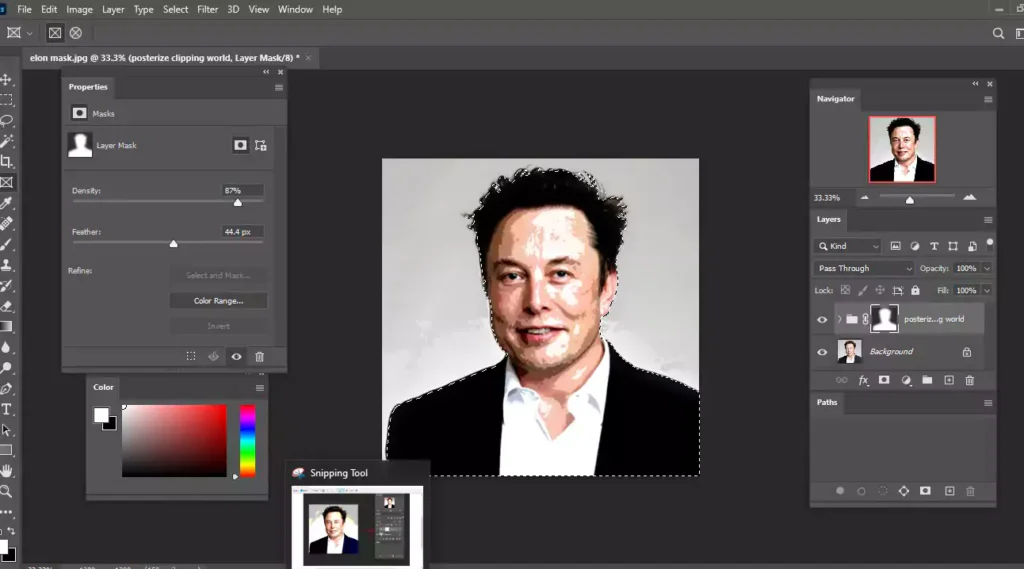
In this tutorial, we have selected Mr. Elon Musk’s image to be posterized. We took his photo from Google and will make a poster of it. Firstly, open up this image in Adobe Photoshop. It will automatically create a background layer.
From the layer window, you will enjoy several options. Press the “Create a new fill or adjustment layer” icon. You will see several options and choose to posterize from there.
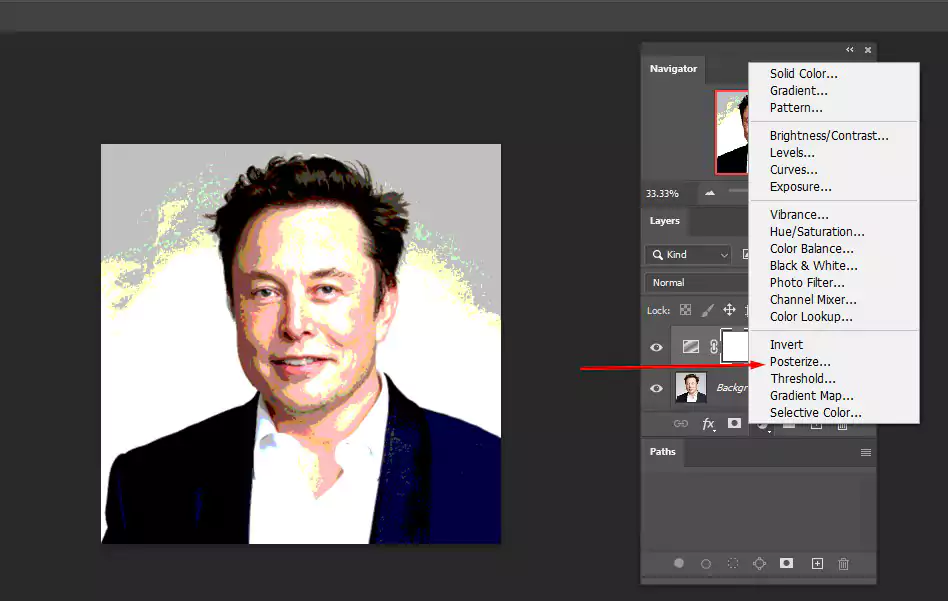
After clicking the posterization option, the image will look like this one!
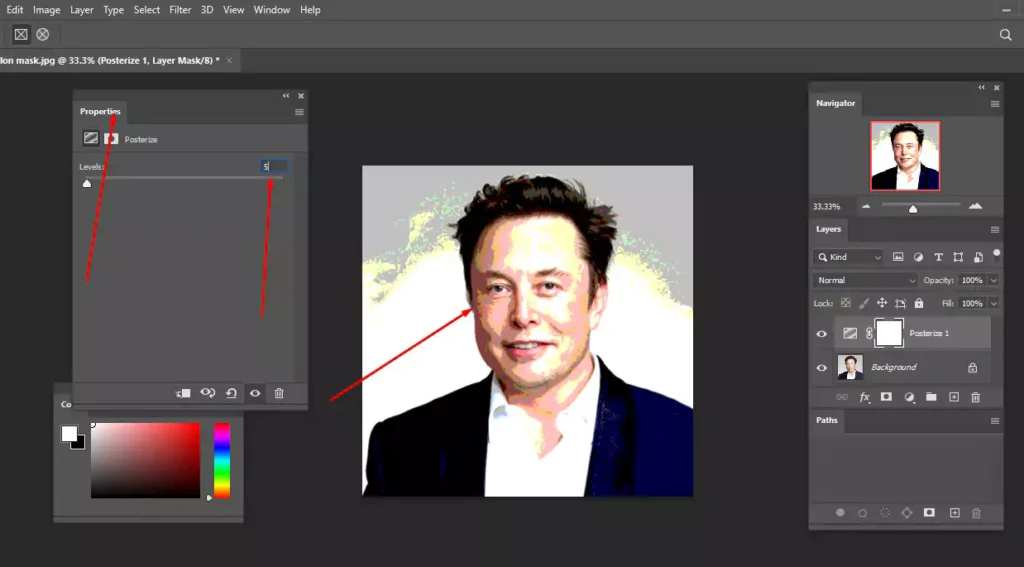
Let’s work on the levels | How does the posterization image work?
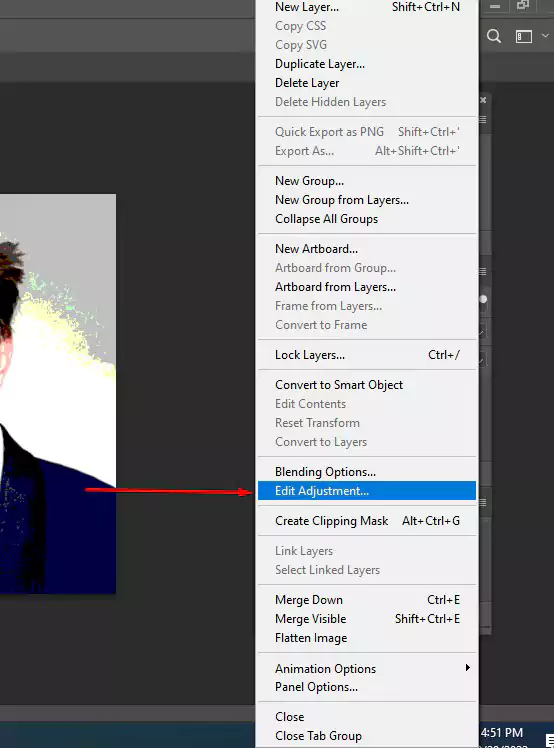
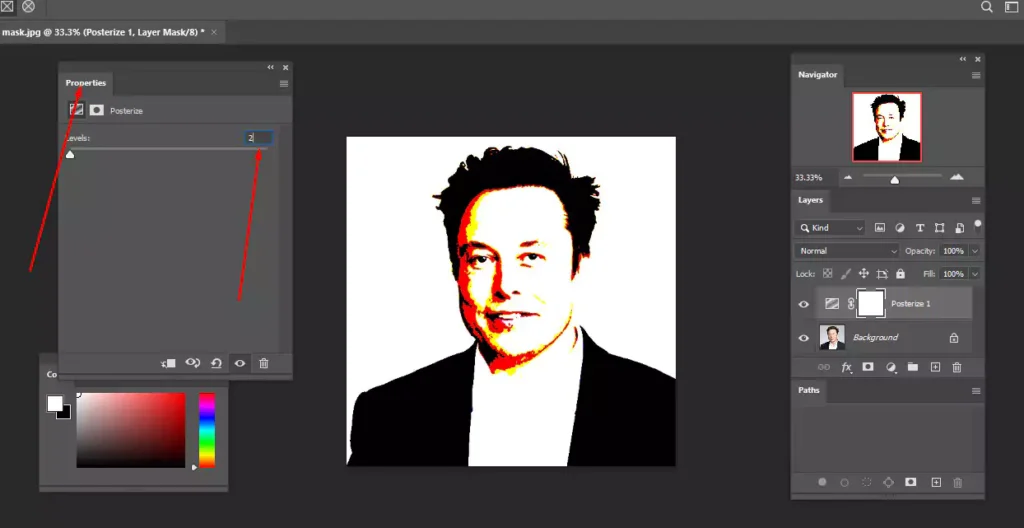
Selecting edit adjustment from the “create a new fill or adjustment layer option. When you click it, the window will look like this one.
This number, “2”, is the lowest number used on the labels. When we select 2, there is a great change in the image we have noticed so far. Now we will change it to the highest level, 255. Let’s see how it looks.

It looks different from the opposite one. It just looks normal: it looks like no filter is applied here. So, we will not choose this value. Rather, we will choose a medium value that will meet our demand. Let’s choose 5 as the level number and see how it looks.
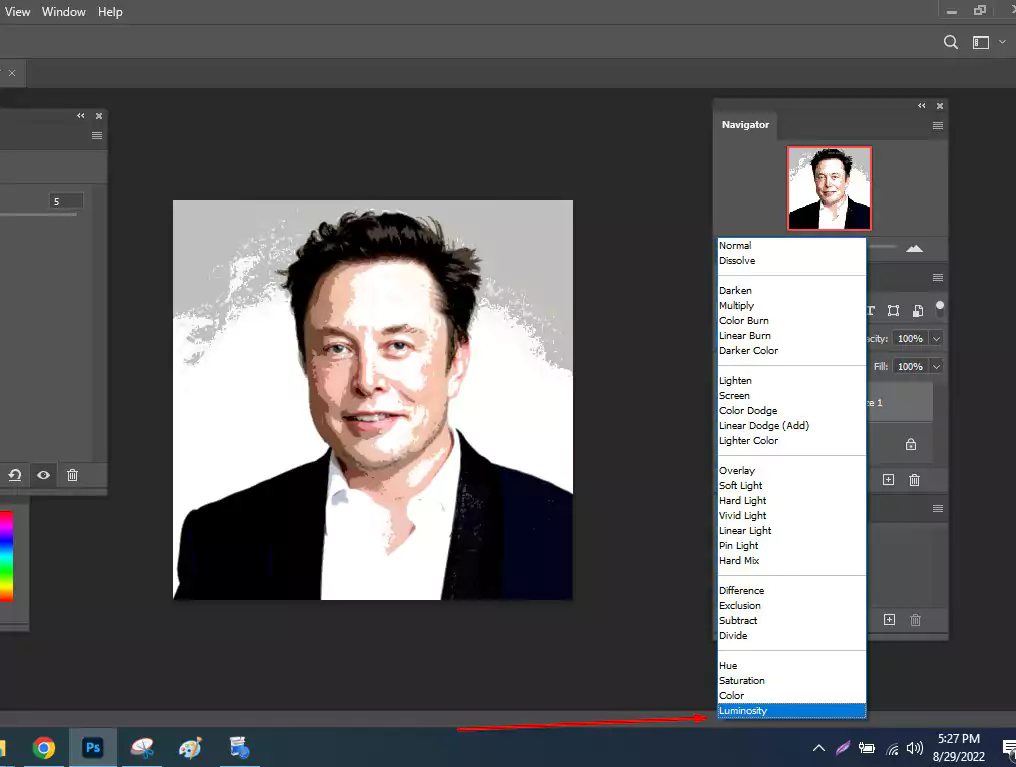
Step 2: Set the Blending Mode to Luminosity
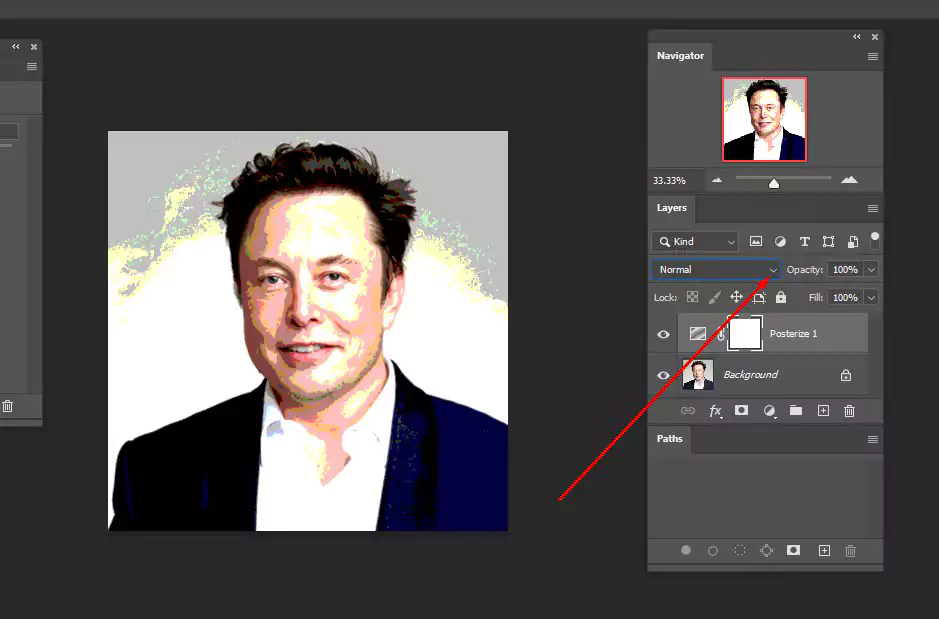
Have a look at the above image; the blending mode is normal. Next, we’ll group these adjustment layers for better organization. Now we will click the combo box and change it to the luminosity. When we click the combo box, there are several options available. Choose luminosity from there.
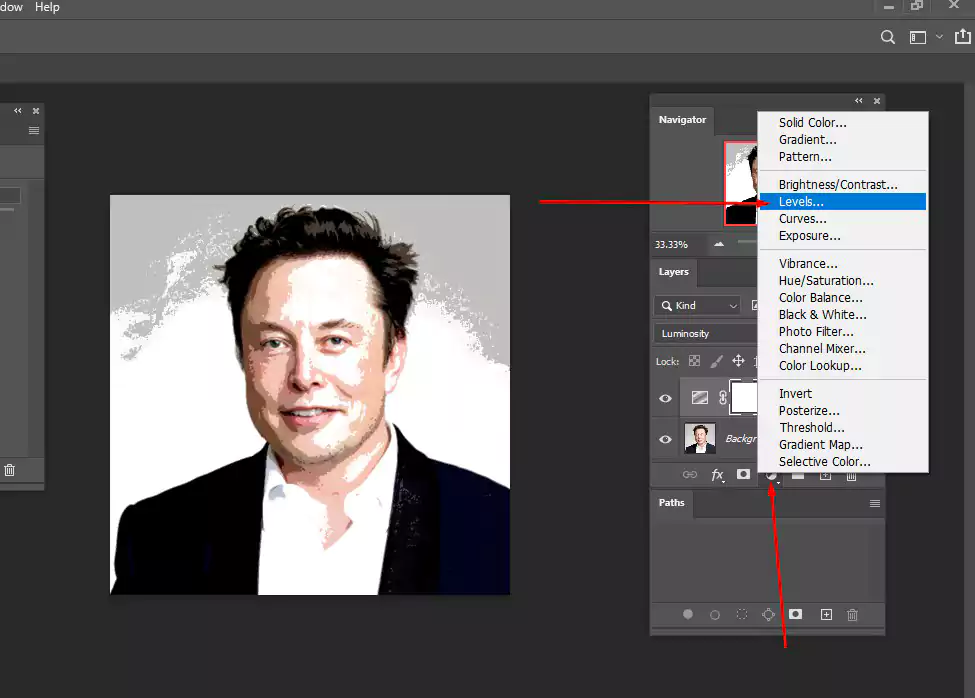
Step 3: Apply Levels Adjustment
Again, we will click the “create a new fill or adjustment layer” button and choose levels from there.
Just follow this guideline; I hope you can easily do that. After implementing the levels, it will look like this one.
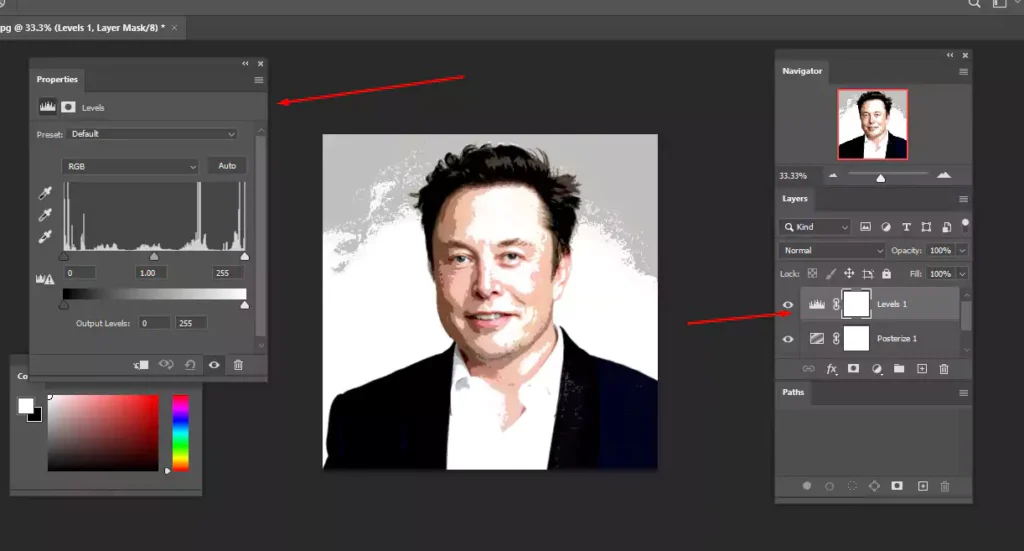
Above the background layer, we noticed a new layer, and it was named Level. Additionally, we have noticed a new window as well.
Step 4: Adjust the Levels Slider
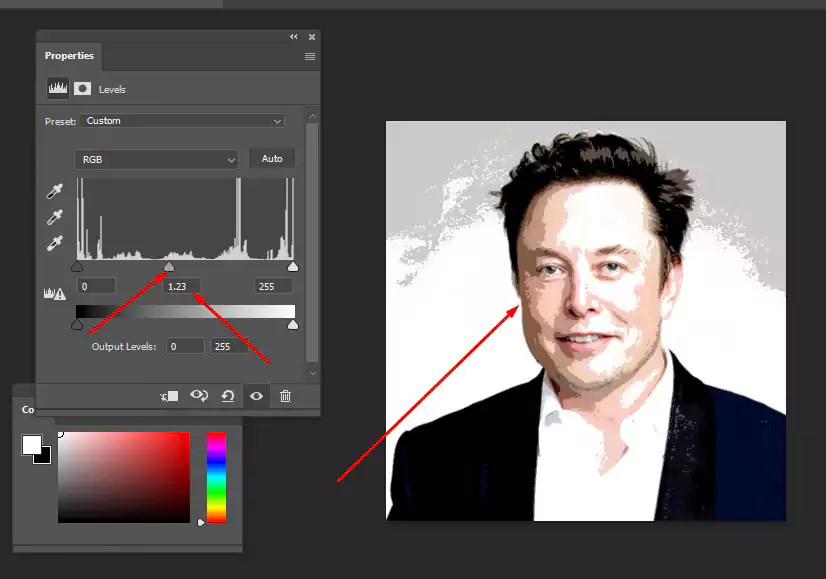
If we move the mouse cursor from left to right, the value will increase, and if we do the opposite, it will decrease. In this way, we can fix the skin tone and set the necessary values.
Step 5: Group the Adjustment Layers
Our next task is to combine both of these layers. To do that, click the adjustment layer button, press Shift, and select these two layers. The menu selects to create a new layer from the combo box of the layer.
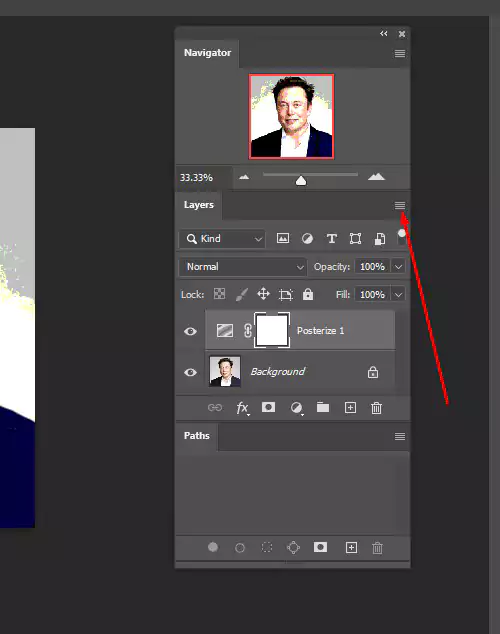
It is called the combo box. When you click here, you will notice different options.
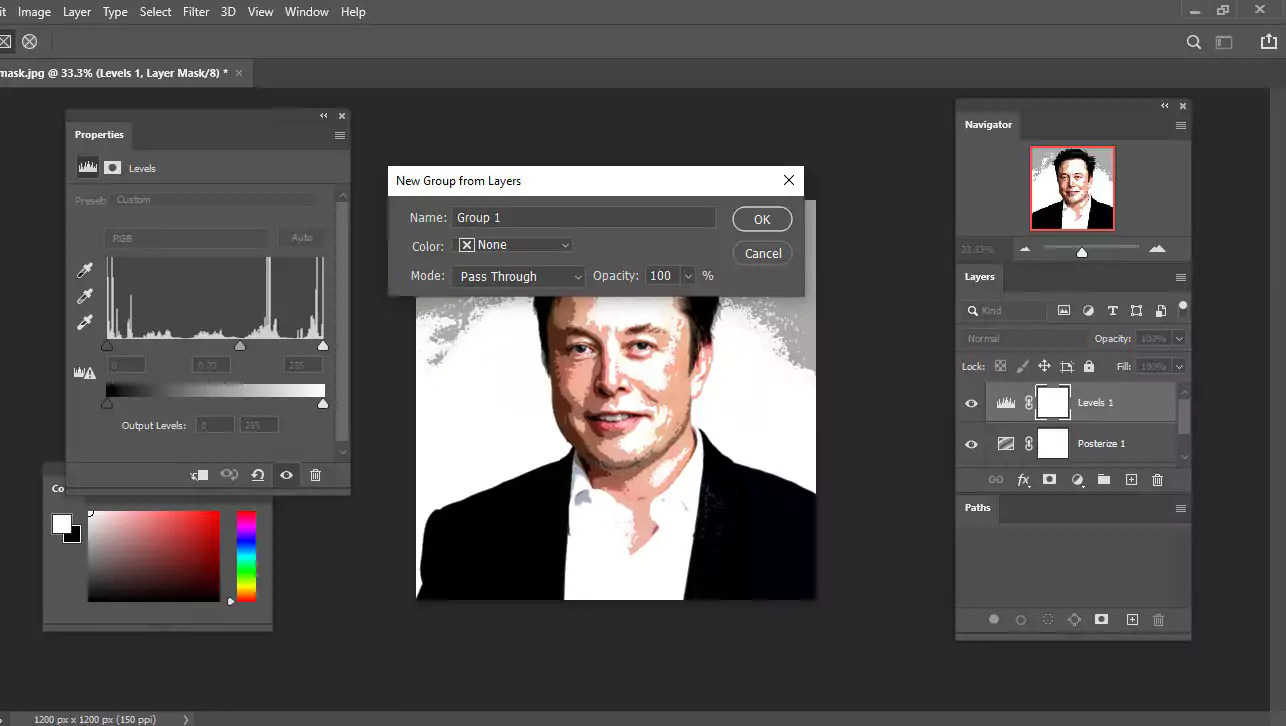
Initially, it will look like the above window. After that, you have to name it and press the okay button.

We have given it the name “posterize clipping world.” You can save as many different names as you wish.
Step 6: Add a New Layer and Select the Subject
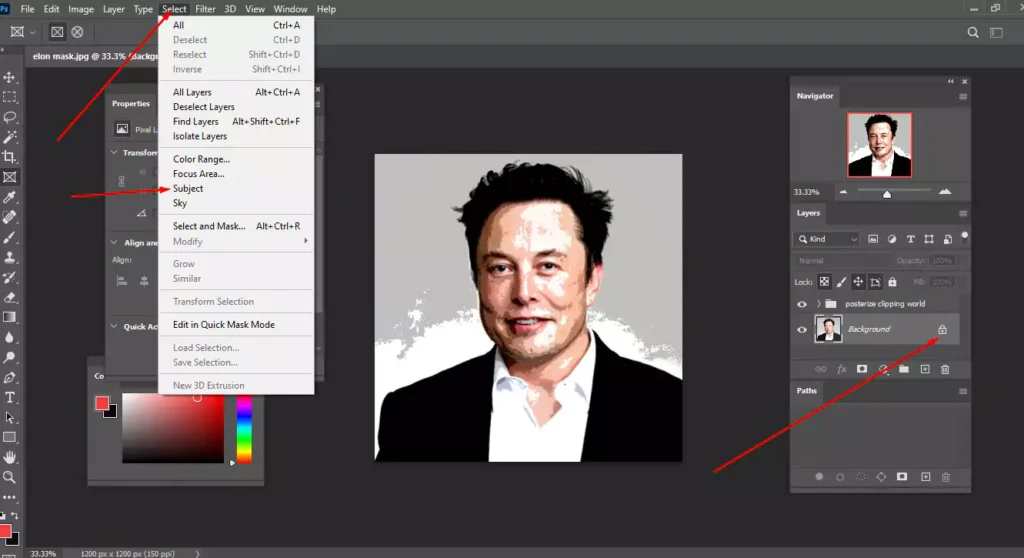
Besides the layer button, there is a button, and we need to make it off to deselect it and click the other layer, our image layer. Now, choose the subject
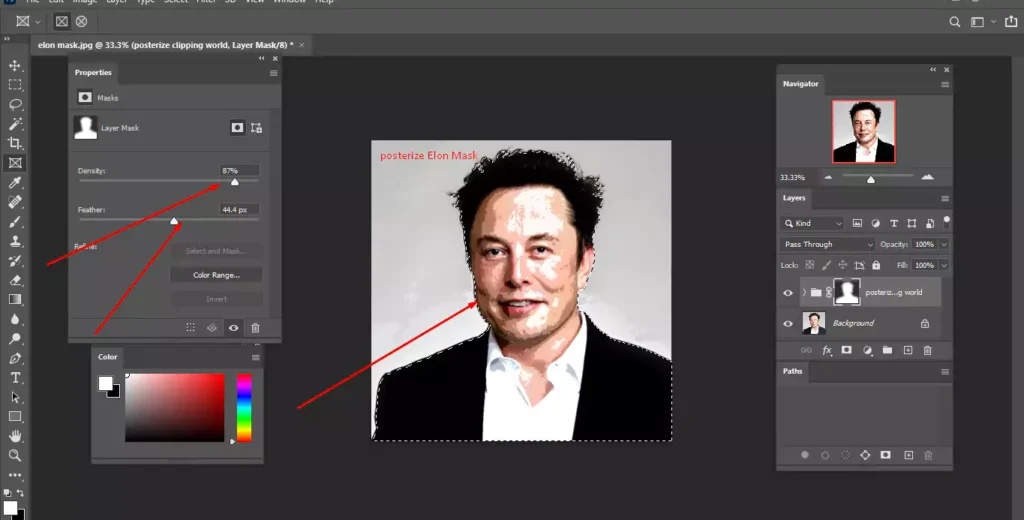
Step 7: Add a Layer Mask
Just make the additional layer off, like “posterize clipping world”, off, and click “create a layer mask” from the mask window. That’s all the journeys. If you need more refurbishment of this image, you can use the paint tool to remove an unwanted spot from the image. The final image will look like this one.
Final Thoughts on Posterizing Photos
I hope you found this tutorial easy to follow and feel confident creating your own posterized images in Photoshop. If you have any questions or run into any issues, please don’t hesitate to leave a comment below — I’d be happy to help! If you found this guide useful, feel free to share it with your friends and fellow creatives.
Also, be sure to check out our latest Photoshop tutorials to keep improving your skills and discover new creative techniques. Happy editing!
Check Out Our Latest Tutorials
- How To Change Brush Color in Photoshop
- How To Make a Clipping Mask in InDesign
- 61+ HD & Free Aesthetic Wallpapers for Professionals
FAQs about Posterizing Photos in Photoshop
Posterization is a common process of a continuous gradation of different tones. Eventually, it will cause abrupt changes and tone down to a different shape. The entire process is done with a photographic process.
In short, the posterize element is designed to analyze different colors of the pixel in a selected area and will eventually reduce that color. Somehow, they will maintain the original shape of the image. It is visually appealing and looks like artwork.