
We use the brush tool for everyday photo editing, a mandatory item. The brush tool will allow you to paint on different layers of your images. In short, we can tell you they work like a natural paintbrush. Customizing the brush color is fun, and you can do it easily by reading our tips and tricks.
Plotting
The brush tool is a particular element in Adobe Photoshop that needs to be added to the project. This article is for you if you do not know how to change the color. We will tell you different tips and tricks to help you change the color easily.
To do that, firstly, we need to select the brush tool; then, click the top color swatch of the color picker. You can easily find it from the bottom of the toolbar. From the color palette, you can easily select the color that you desire to implement within the image.
Step-By-Step Procedure for Changing Brush Color in Photoshop
Adobe Photoshop will offer us a plethora of color options to choose from. The most popular forms of colors are RGB, HSB, and Hexadecimal colors. Here, we have a chance to customize the color and pick the perfect one according to our needs.
Step: 1 – Open Up the New Window
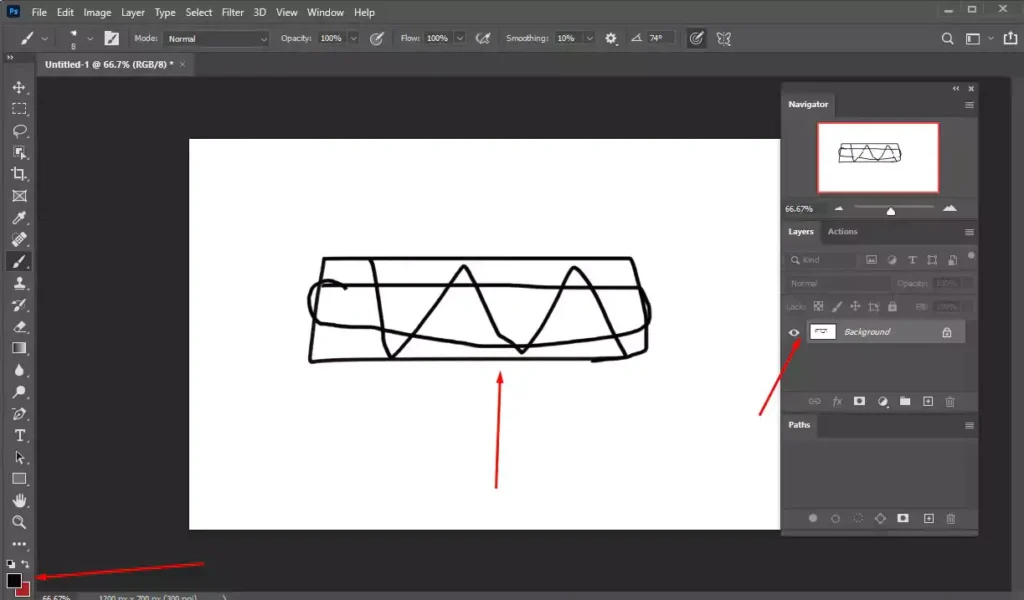
From the File menu, we have to open a new window and select the brush tool from the toolbar. Check out this image and how you can choose it.
Step: 2 – Use of Color Boxes
Our next task is to go to the color boxes and select them from the toolbar. Here the front part is the foreground swatch, and the back part is the background swatch.

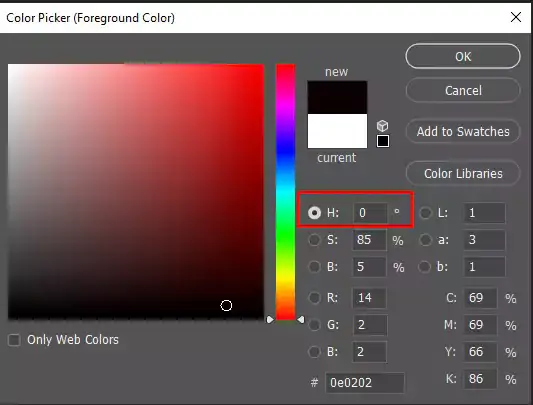
A. HSB | Hue Saturation Brightness
HSB describes the hue, saturation, and brightness of an image. We know it as an intuitive color model that will help us customize the colors. We measure it in the format of degree. The range is from 0 to 360 degrees. According to the color, it will change. In the o degree, it is pure black. Let’s have a look at it!
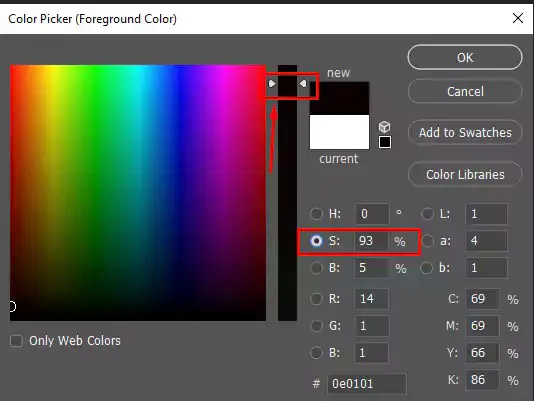
B. Saturation
From the saturation value, we know the intensity of the color. When we notice vibrant color, it will be saturated if we notice a dull image, the saturation will always be low. From the slider, you will see a brighter, colorful image if you move up the level. On the other hand, if you lower down the course, you will notice a dull graded picture. The saturation value is 93, and the cursor is above the straight line, which means you will have a dark black image.
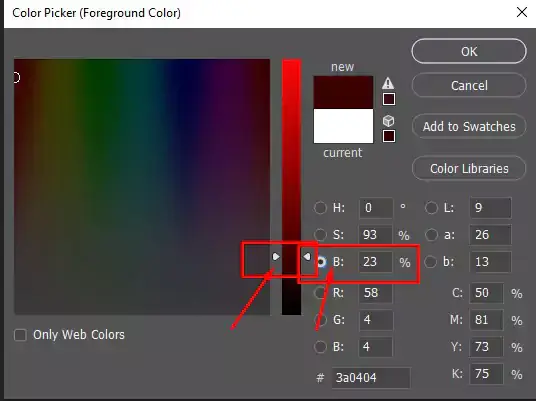
C. Brightness
Brightness will represent the amount of whiteness within this image. We will notice the white segment and bright color more the brightness. Here the brightness level is 23, and it is slightly up above the borderline.
D. RGB
Now let’s talk about the RGB format. RGB stands for red, green, and blue. This model will portray different colors on the digital screen.
RGB value will be between 0 to 255. The closer to 255, the color will be brighter. Here, all the “R”,” G”, and “B” values will be in the 0-255 range. It is pretty tough to calculate the RGB value by hand. As a result, we are suggesting you use the RGB color generator online. It will help you to get accurate results.
Suppose you are an expert in this sector. Do not be in a hurry! You can do it by yourself. If we provide the value 255 to “R”, 255 to “G”, and 4 to “B”, it will give you a yellowish color. Please have a look at it!

E. Hexadecimal
The hexadecimal color code is present at the bottom of the color palette. If you have enough idea regarding the hexadecimal code, you can directly use it in the image. It would be best if you were reminded that hexadecimal codes are within the range of “0” to” 9” and “a” to “f”. They will not exceed this range.

Final Step – Picking Up a Color from Color Palette
We can easily pick up the beautiful color from the color palette. Just click on the color palette icon at the bottom of the toolbar and pick a smooth color for your product. If you hesitate to pick up the best color for your product, move your cursor freely.
You will have it according to your choice. Following these tips and tricks, you can easily change the brush color in Adobe Photoshop. We will choose colors from the color wheel and change the brush color eventually.
Some Problems & Solutions | Change Brush Color
If this process is not working correctly. You have to think that there are some problems with the images like
- Issues with the layer masks
- The user has changed it in the wrong place.
Now let me solve these issues and give you the proper brush tips.


Here, we have used two images, and they are in different layers as well. Now I am trying to change the color of the second short image color with the help of the brush tool. The problem is the brush color is not working. To solve this issue, we need to merge it carefully. Just put the mouse cursor, open the layer icon, and combine it.
Now we can use the color in the second image. If we make this type of mistake, we must solve it this way. If we choose the black color from the color palette and implement it in the image, we will notice the result instantly. I didn’t choose the color perfectly.
Here, the problem is with the foreground and background color. From this left-side arrow, we have noticed two colors. The first one is the foreground, and the second one is the background color. While changing the foreground color, please do not select the background color. Then, it will not work. It will happen vice versa when we are working with the background color.
How to Change Brush Color in Adobe Illustrator?
Firstly, you need to open up the brush palette and select the brush you want to edit. After that, you need to double-click the meeting to open the settings. Now you have two essential things to do. Firstly, click the drop-down menu called colorization, and secondly, select the option tints. See the magic. The brush color is changed completely.
Wrapping Up | How to Change Brush Color in Photoshop
Follow these tips and tricks, and I hope you can change the brush color in Photoshop by yourself. It is not a hard thing to do. Stay with us. We will provide you with more brush tips, eyedropper tools, color swatches, and related articles shortly. If you find it helpful then, please share it with your friends. Have a good day!
Check Out Our Latest Tutorials
- How To Create a New Background Layer Action in Photoshop
- How To Crop a Layer in Photoshop | A Complete Guides
- How to Create Snowflake Shape Border in Photoshop
FAQ | How to Change Brush Color in Photoshop
What is An Eyedropper Tool?
We use it to select colors from the image or other Photoshop tools. In another way, we can say that the eyedropper tool is used to sample color from the given image.
For instance, we have an idea with multiple colors like red, green, blue, and black. We have noticed that the blue one seems terrific, and this color can be implemented in another image. In this situation, we will use the eyedropper tool to pick up that color easily.
Where is the Brush Stroke Filter in Photoshop?
We should use a dry brush filter for the illusion of painting. It is easy to pick up the dry brush from the menu bar of Adobe Photoshop. Firstly, go to the Filter menu and choose Filter Grey from there. Your next task is to choose artistic filters from there and, eventually, select a dry brush from the creative filters.