
Editing photos in Adobe Photoshop helps you turn ordinary images into professional-quality visuals. As a beginner, starting with the basics — cropping, resizing, and adjusting brightness and contrast — builds a strong foundation.
This guide walks you through simple yet effective Photoshop techniques like color correction, blemish removal, and clipping paths, so you can start editing photos confidently and develop your creative skills step by step.
Best Photoshop Edits for Your Photos
A photo editing service provider offers a range of services. But did you ever think about how they make the RAW images so beautiful? Yes, creativity is required in photo editing. Yet, the basic editing technique allows an editor to remove all the flaws from the photos.
A good understanding of the essential image editing tools helps to edit the photos according to the requirements. Here are the 5 effective methods to edit photos in Photoshop:
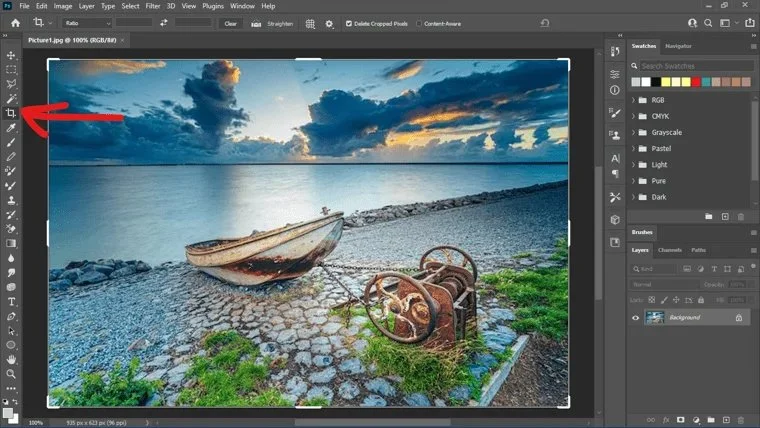
01. Crop and Straighten to Improve Composition and Alignment
Cropping and straightening are primary yet effective tools to fix the composition of your images. Cropping an image in Photoshop is quite easy. Here is how to do it:
- Open your image in Photoshop. You can use stock images from Freepik for practice. Also, it is easy to download pictures from this website.
- After opening the image, select the “Crop Tool”. You will get a square or rectangle icon on the Photoshop toolbar. This is the Crop Tool.
- Now select the area you want to keep. Click on the starting part of that area and drag the mouse to select that area. You can also drag the corners of the box to adjust the selection.
- Finally, click the “Enter” key to apply the Crop Tool.
Here is How to Straighten a Tilted Image in Photoshop
- Now select “Ruler Tool.”
- Click on the point that should be vertical or horizontal. It will set the angle of rotation of the image.
- Click and drag a line to the portion that should be straight.
- Release the mouse button and press “Enter”.
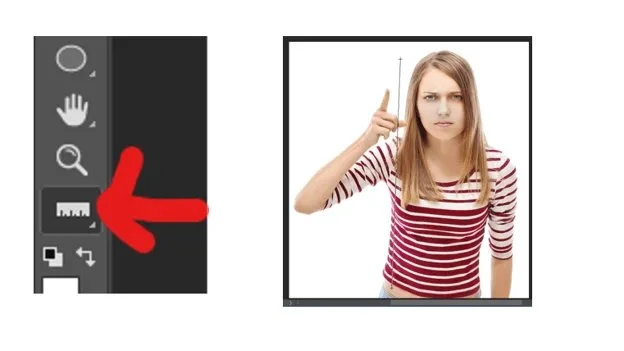
02. Image Resizing
Image resizing is one of the frequently used photo editing services. It is the process of adjusting the height and width of an image. But, the image quality will remain unaltered in the process.
Here is How to Resize Images in Photoshop
- Open your image in Photoshop.
- Choose the “Move Tool” from the toolbar and select the image using this tool.
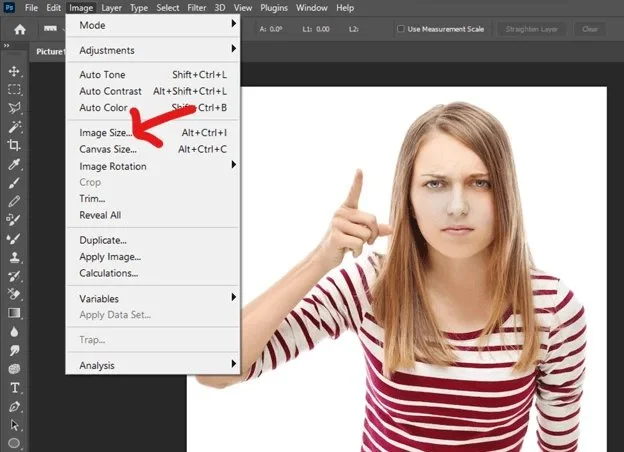
- Now navigate “Image” > “Image Size” in the top menu.
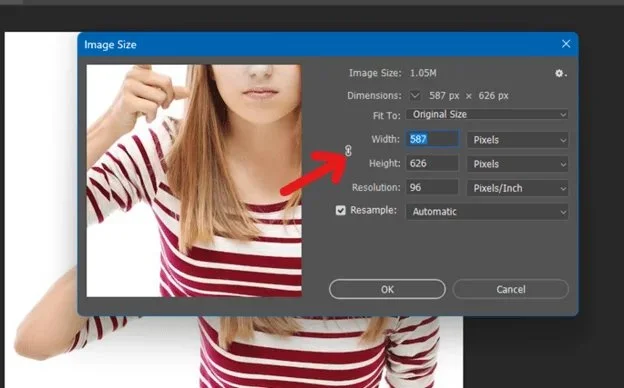
- Adjust height, width, and resolution from the box. You will find a chain icon connecting them with a height box here. When the chain icon is active, the highlight will change automatically with the width. Similarly, changing the height will automatically adjust the width. If it is not happening, you can change the size freely.
- Select the correct unit of measurement. Then, hit “OK” to apply the changes.
03. Adjusting Brightness and Contrast in Photoshop
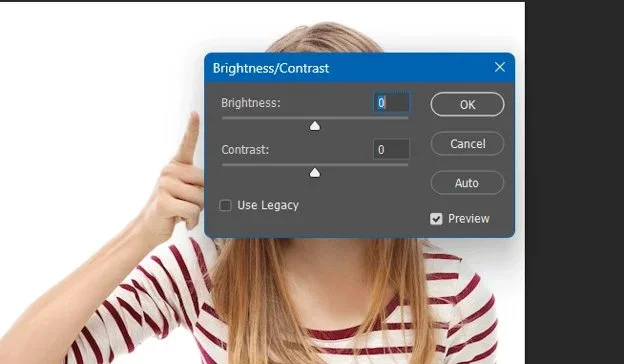
Now, it is time to adjust the brightness and contrast using Photoshop software. Brightness and contrast have a significant impact on an image. You need to lower the brightness when the picture looks brighter. It helps in creating an authentic look in the image.
Let’s See How To Adjust Brightness and Contrast
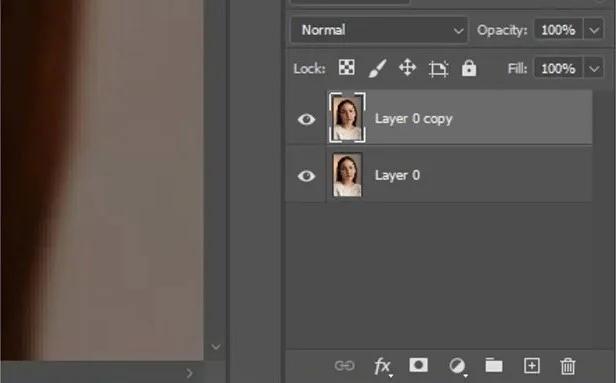
- Start by duplicating the original image. So, your photo will remain unaffected while adjusting brightness and contrast. Press “Ctrl”+” J” or right-click on the layer in the Layers Panel and select “Duplicate Layer”.
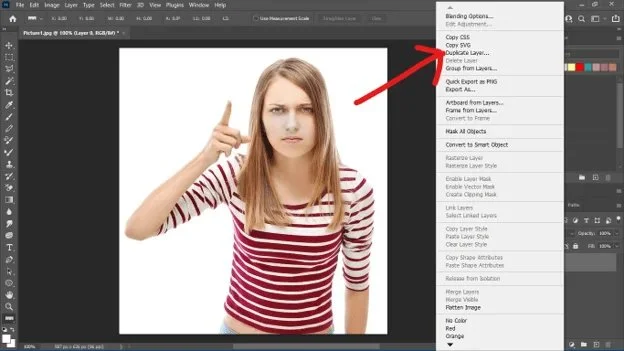
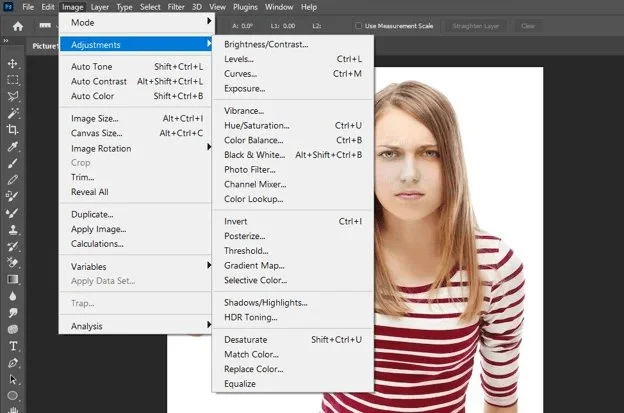
- Navigate “Image” > “Adjustments” > “Brightness/Contrast.” It will bring a new dialogue box.
- Move the Brightness/Contrast sliders right or left to alter brightness and contrast.
04. Clipping Path Using Photoshop
Clipping Path is one of the most popular Photoshop edits. You can use it for many purposes, like removing backgrounds, correcting colors, or advanced image edits.
Creating a clipping path can be tricky, which is why many people hire a clipping path service. But don’t worry — here’s an easy way to create a clipping path on your own photos.
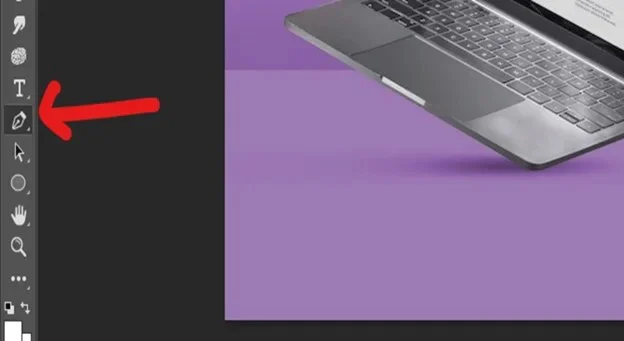
- After opening the image, select the “Pen Tool” from the Photoshop toolbar.
- Zoom in on the part of the image you want to clip. Press Ctrl + “+” to zoom in and Ctrl + “-” to zoom out. Zoom until you can clearly see the edges of your subject.
- Next, select the Pen Tool to start creating the clipping path. Click and hold to draw curved lines. Each point you place is called an anchor point. If any point looks off, you can adjust it later.
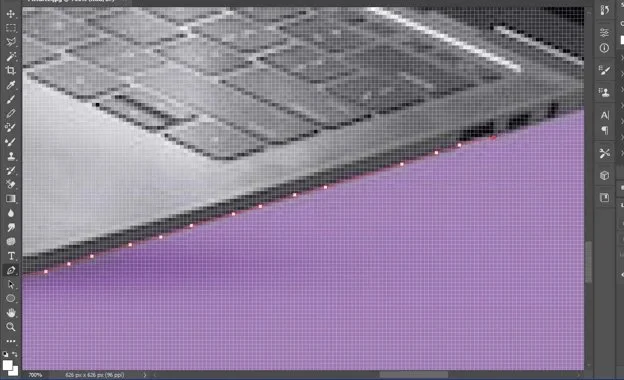
- Reach the first anchor point by covering the whole subject. Thus, you can complete the path.

- Now, use the Direct Selection Tool to adjust the anchor points.
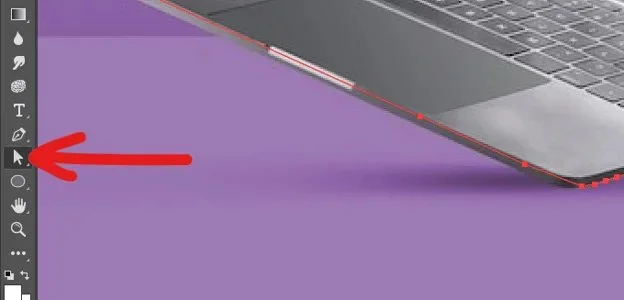
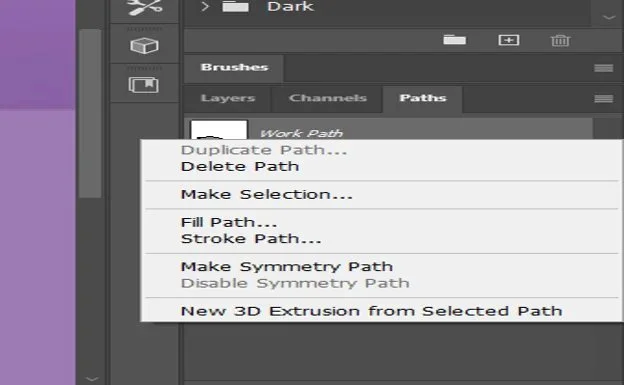
- Go to the “Paths Panel”. You will get it in the Layer Panel. Click on the Make Selection button to convert your path into a selection.
You can copy the selected portion and apply it anywhere. Also, you can take the clipped area to a new background. However, it may require a lot of practice to master drawing clipping paths.
To learn more about creating precise selections, check out our detailed guide on common uses of clipping paths in Photoshop.

How To Edit Photos In Photoshop: Download Now
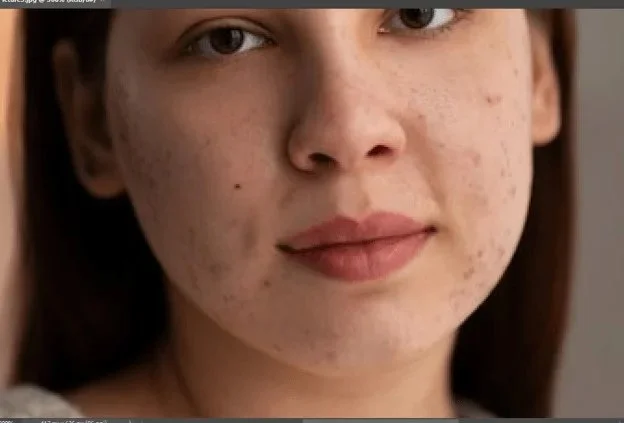
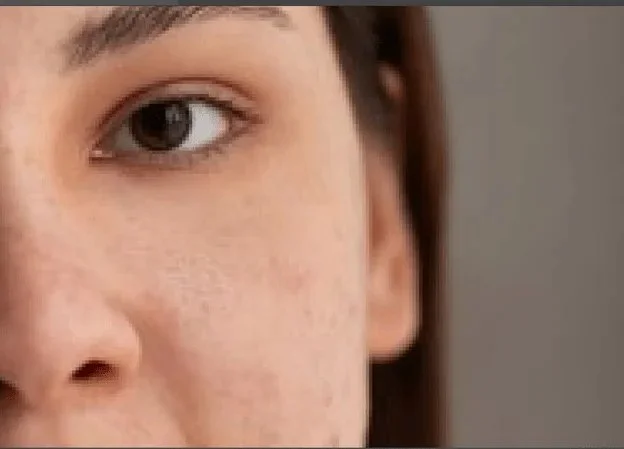
05. Removing Blemishes In Photoshop
Blemishes Removal is a handy photo editing service for portrait photos. Here’s a step-by-step guide to removing blemishes from your images:
- Unlock the background layer and duplicate it.
- Zoom in on the image and select the Spot Healing Brush Tool.
- Adjust the brush size from the options bar at the top.
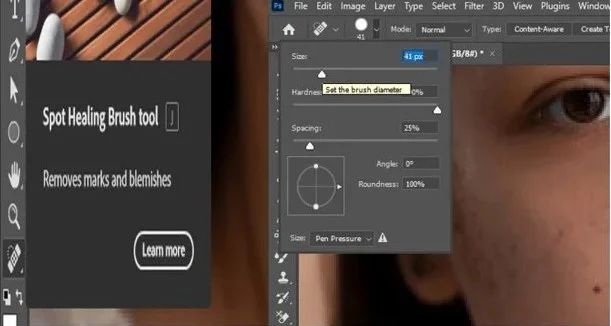
- Click on the blemishes that you need to remove. Photoshop AI will automatically sample nearby pixels to replace the flaw.
You can also use the Clone Stamp Tool to remove blemishes. This tool allows you to sample and paint over imperfections manually. It requires more precision but can be very effective for specific blemishes.
If you want to try more advanced retouching techniques, you might enjoy our step-by-step tutorial on how to face swap in Photoshop, or explore creative editing ideas with double exposure effects in Photoshop.
Final Thoughts | Photoshop Edits
Photoshop edits allow you to make your image look eye-catching. It is the second chance for the photographer to remove inconsistencies from their photos. So, how do you start photo editing? I have provided a complete guide to start your Photoshop image editing. Please make these edits to get a flawless photo.
FAQ | Photoshop Edits Guide
Photos allow the application of several image editing methods. You fix the color of the image using color correction techniques. You can remove the background using clipping paths and image masking. Moreover, you can add text to remove blemishes from the photo using text and brush tools.
Image selection tools allow you to edit a part of an image. Photoshop has several image selection tools such as Lasso, polygon, pen, free selection, and image masking.
Explore More Photoshop Editing Tutorials
Learning to edit photos in Photoshop takes practice, but starting with the basics makes it easy to grow your skills. Begin with simple edits like cropping, resizing, and adjusting brightness or contrast, then explore more advanced tools such as clipping paths and blemish removal.
With patience and creativity, you’ll soon be able to enhance any image and give it a professional finish. Keep practicing — every edit brings you one step closer to mastering Photoshop.
- How to Face Swap in Photoshop – Learn to swap faces realistically step-by-step.
- Double Exposure Effects in Photoshop – Create stunning double exposure images.
- Removing Background from Logo – Perfect your logo images with clean background removal.
- Creative Text on Face Effects – Discover how to blend text creatively onto faces.
- Common Uses of Clipping Paths in Photoshop – Understand how clipping paths can elevate your editing.