
In our photo editing journey, we have seen some unique images where text is blended with the face, creating an illusion within the brain. Somehow, it will attract us, and we will be lost for some time. Let’s discuss how we can manipulate text on the face in Photoshop. Stay with us and enjoy this step-by-step tutorial.
Manipulation of Text on the Face in Photoshop
Interestingly, you do not need a great man’s photo. Start this procedure by taking a picture of yourself. If you want to write some funny stories here, go ahead. It will be the best chance for you to implement that. Hopefully, you will not face any problems here. Just follow these procedures, and you can add different types of text manipulation to your face.
Step-By-Step Guidelines on the Manipulation of Text on the Face
First Task: Crop the Image Around the Face
Have a look at this text image!
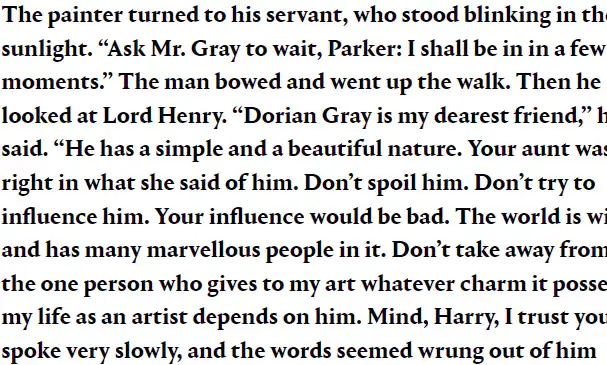
Before we begin this editing journey, we need to keep the original copy of this image. As a result, we can compare how it looks when we eventually blend. Go to the file menu and save it perfectly. For further checking, keep it as a text portrait effect.
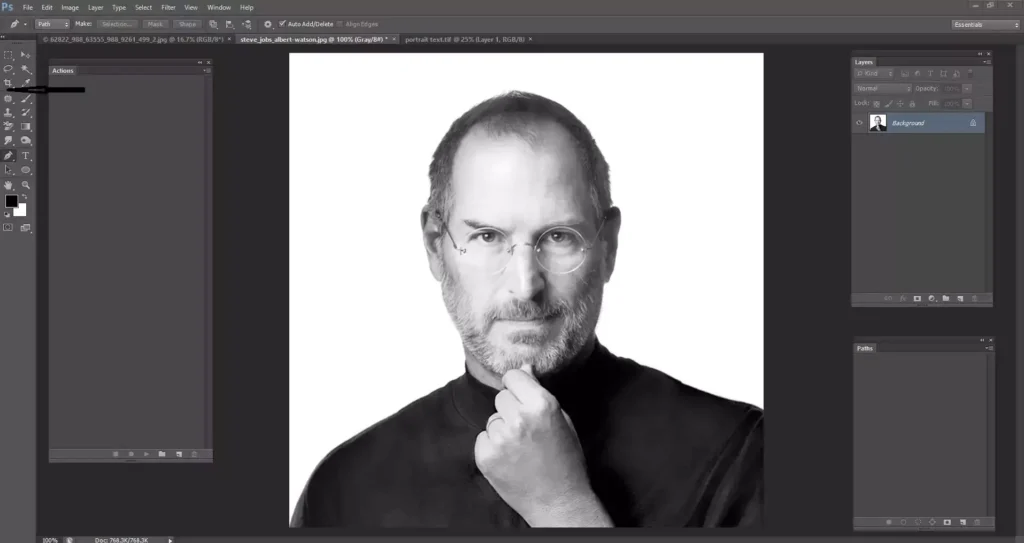
Let’s begin this task by cropping this man’s face perfectly. To do that, first, we need to select the crop tool from the Photoshop toolbox. We suggest you use a rectangular marquee toolbox.
It would be best if you used the rectangular tool according to the shape of your face in the picture. Try to capture the face with a specific portion of the body. It will highlight the image perfectly.
After the selection process, go to the menu bar, select the image, and press crop. Suppose you are a new user and do not know the various functions of Photoshop in detail. Use this strategy.
Second Task: Make the Text Image Transparent
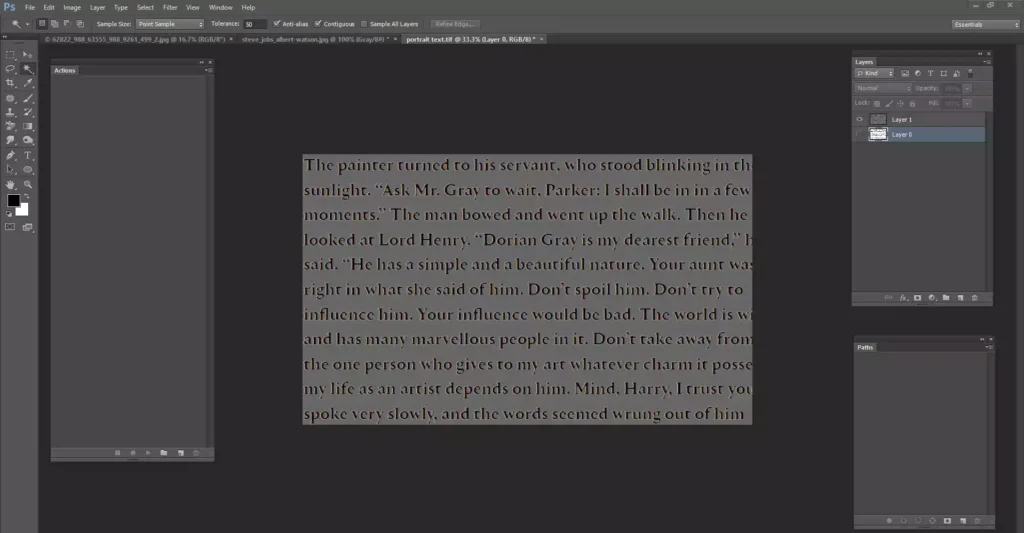
Double click on the image, and if you have found the picture tools, click format, and then choose a color. From there, set the color to transparent.
Third Task: Make a New Layer and Overlap the Text on the Face
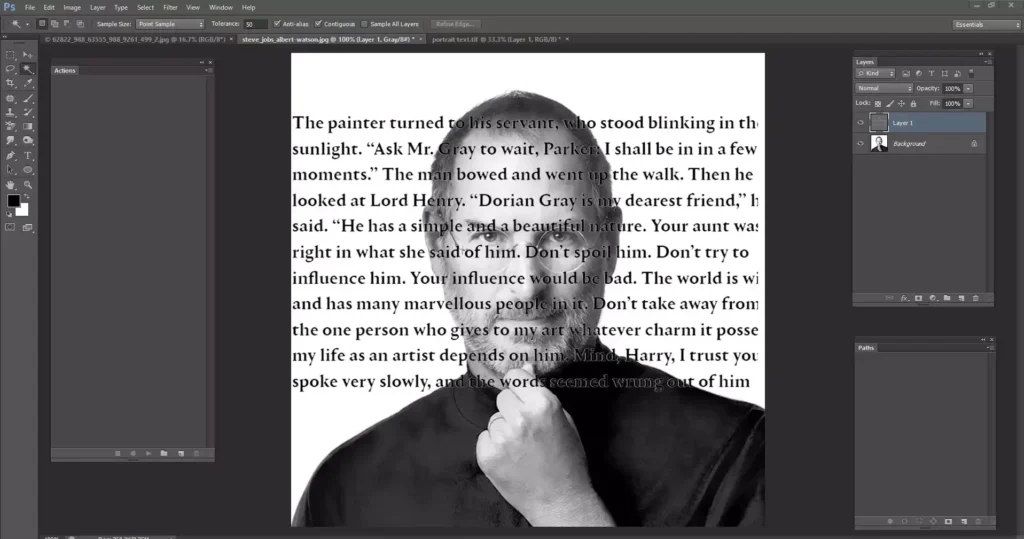
From the layer panel, you will have the option to create a new layer. If you hover your mouse over the layer panel options, you will see them easily. Now, overlap the text on the face carefully. Keep one thing in mind: the text should be in the middle of the face. It will highlight the feature in a smart way. If you turn the eye button on and off, it is possible to check out the differences.
Fourth Task: From the Layer Option, Choose Multiply
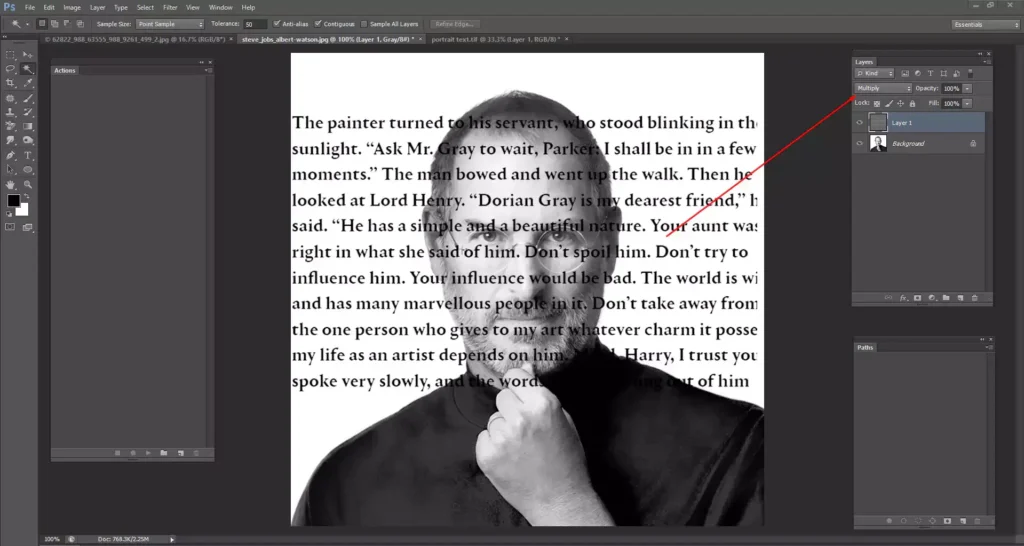
Now, we will make some property changes to the image. At the top of the layer option, there is a combo box. If you click it, you will have several options to choose from. From there, please select the “multiply” option.
Fifth Task: Make a Path Around the Object
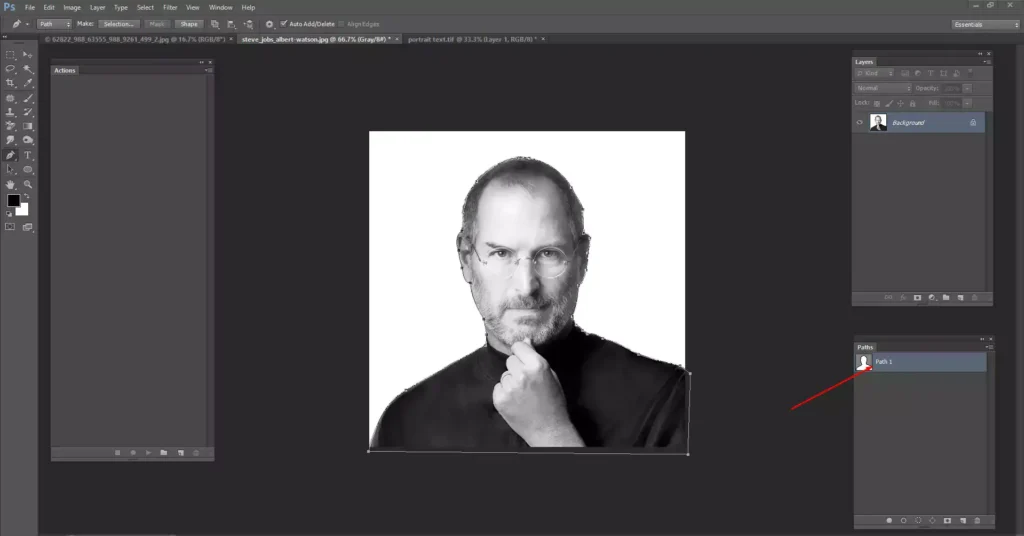
This part is very crucial to us. By using the pen tool, we will create a path around the object. This is a very simple task; you just need to draw the lines around the object and eventually mix them up from the starting point to the ending point. Another important thing is that we will do it on a new layer.

From the layer window, we will create a layer mask. Just select the background layer and press the Make Layer Mask icon. If you hover your mouse icon over the layer window, it will be easy. It will remove the text outside of the head.
Sixth Task: Reduce the Opacity to 70%, and End the Process
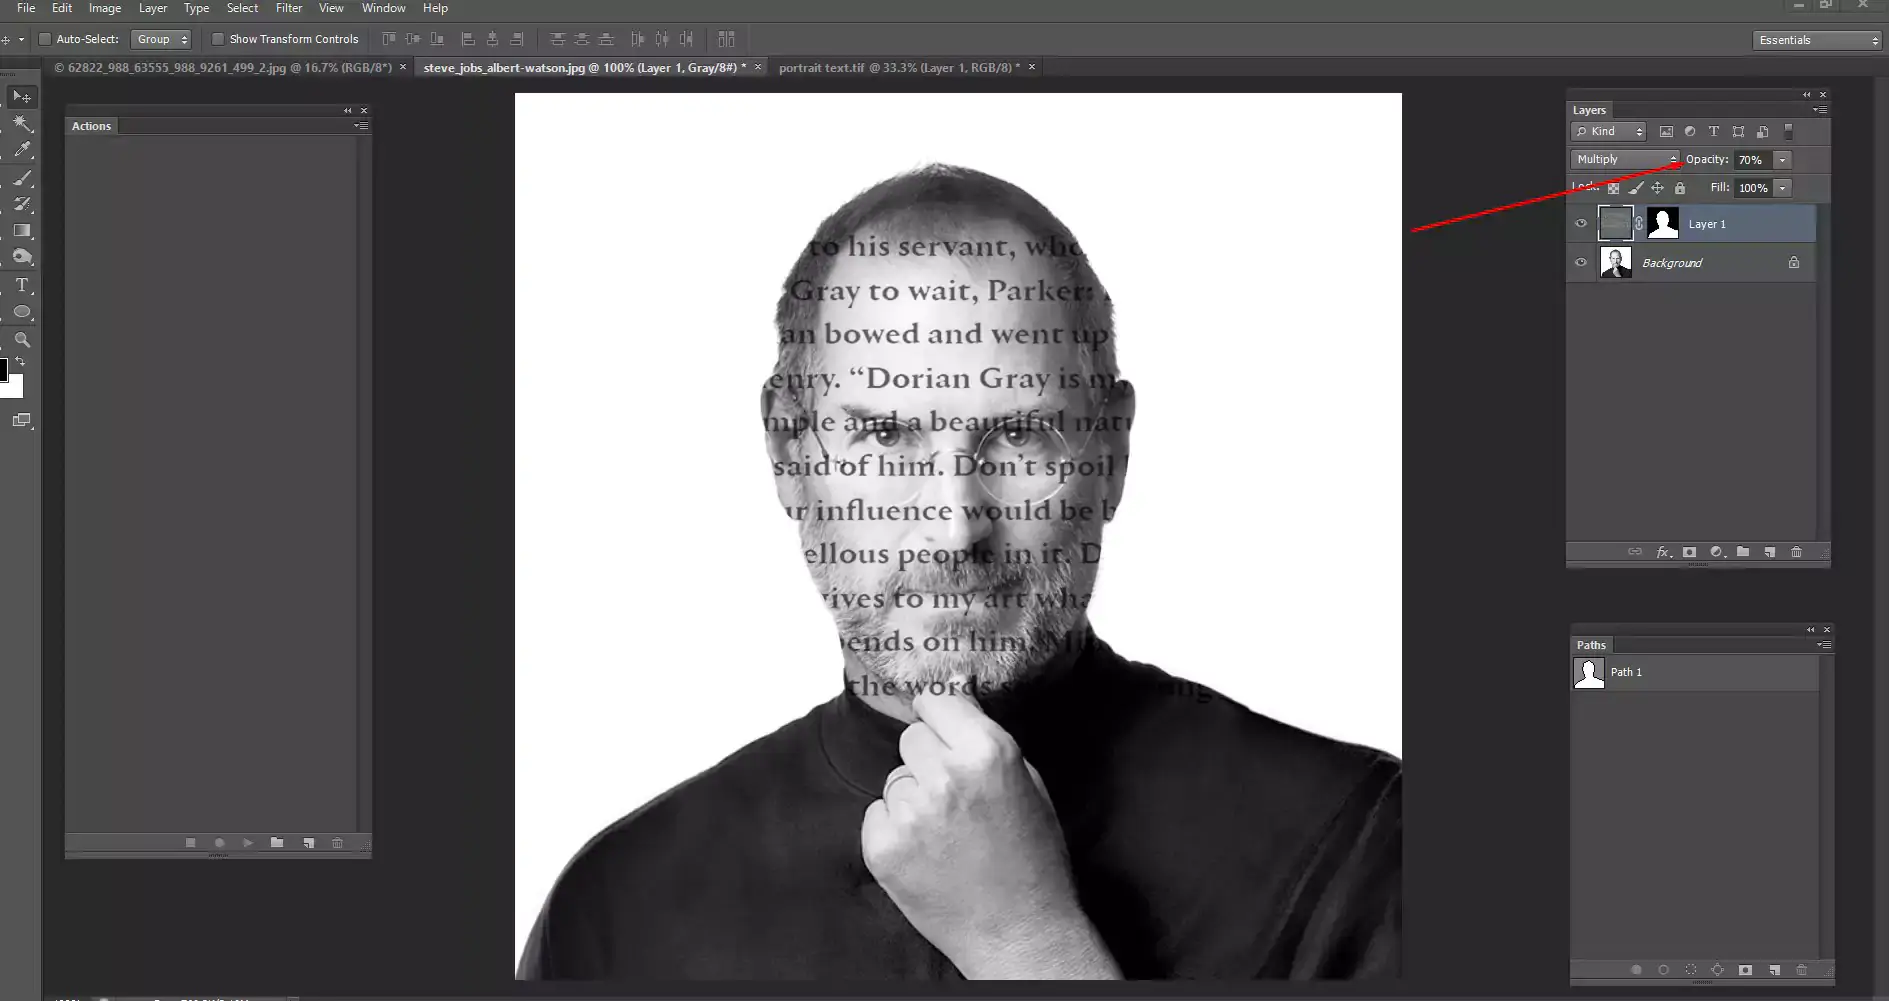
From the opacity combo box, reduce the opacity to 70%. It will blend the text with the face. In this way, you can do manipulation for “text on face in Photoshop.
Wrapping Up | Text on Face Photoshop
If you follow this step-by-step tutorial properly, I firmly believe you can do it yourself. However, if there are any more problems, watch a video on YouTube. I firmly believe you will do that perfectly. However, do not forget to share this article with your friends. Have a great day!
FAQ | Text on Face Photoshop
Firstly, select the text from the layer option. Please right-click on the text and convert it into a smart object. Please right-click on the text and wrap it perfectly; from the menu bar, press the select option. Here you will find several ways to highlight your text. It can be an Arctic wrap, etc. At the top of this menu bar, you will have an option called “custom.” Click on the custom menu and select the design as you wish.
Do not install Photoshop on your PC if you wish to make curved text. How do you do that? Just visit mockofun and create an account there. Here, you can create different styles within a minute—for instance, roundish text, wave text, broken text, etc.