You took the photos. You uploaded them. But somehow, your product still isn’t selling. The problem might not be your product — it could be your images. If you’re wondering how to edit ecommerce photos to make them look professional and high-converting, you’re not alone.
Studies show that 90% of online shoppers say photo quality is the most important factor in their buying decision. On platforms like Amazon, Shopify, or Etsy, your product image is your first impression — and you rarely get a second chance.
The good news? You don’t need a professional studio or expensive equipment to fix this. With the right editing techniques, even a basic product photo can be transformed into a high-converting image.
In this guide, you’ll learn exactly how to edit ecommerce photos step by step — from removing backgrounds to final optimization — so your products look professional, trustworthy, and ready to sell.
Quick Checklist: Editing Ecommerce Photos Effectively
Before diving into the details, here’s a quick overview of everything covered in this guide:
- Use a clean, distraction-free background
- Maintain consistent lighting across all images
- Ensure product clarity and sharpness
- Adjust colors for accuracy and realism
- Add a natural shadow or reflection
- Optimize image size for fast loading
- Follow marketplace guidelines (Amazon, Shopify, Etsy, eBay)
You can also follow a complete ecommerce photo editing checklist to ensure better results.
What is Ecommerce Photo Editing?
Ecommerce photo editing is the process of enhancing product images for online stores to make them clean, professional, and visually appealing. It includes techniques like background removal, color correction, retouching, and image optimization.
Tools You Need to Edit Ecommerce Photos
Choosing the right tool depends on your experience level and editing needs. Here are the most popular options:
- Adobe Photoshop – Best for advanced editing, background removal, and professional retouching
- Adobe Lightroom – Ideal for color correction, brightness adjustment, and batch editing
- Canva – Beginner-friendly tool for simple edits, backgrounds, and quick designs
- remove.bg – AI-powered tool for fast and automatic background removal
Tip: Beginners can start with Canva or remove.bg and upgrade to Photoshop as their skills grow.
How to Edit Ecommerce Photos Step by Step
Follow this process to edit ecommerce photos professionally and create high-quality product images for your online store.
Step 1 — Choose the Right Base Image
Editing can enhance a good photo, but it can’t save a bad one. Before you open any editing tool, make sure your base image is:
- Shot in natural light or a lightbox — avoid harsh shadows
- In focus and sharp — especially around the product edges
- High resolution — minimum 2000 pixels on the longer side
- Taken from the correct angle — usually straight-on or slightly elevated
Important: If your base photo is blurry, overexposed, or shot in bad lighting, re-shoot it. No amount of editing will fully fix a poor-quality image.
Step 2 – Remove the Background
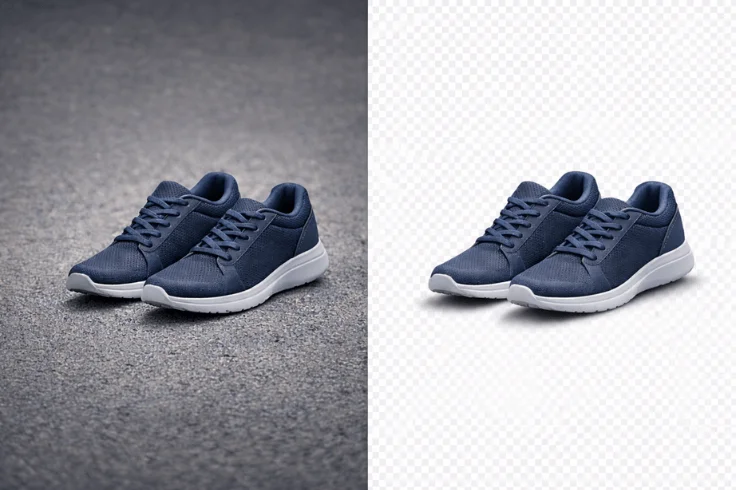
Most ecommerce platforms — especially Amazon — require a pure white background (RGB 255, 255, 255) for main product images.
Here’s how to do it properly:
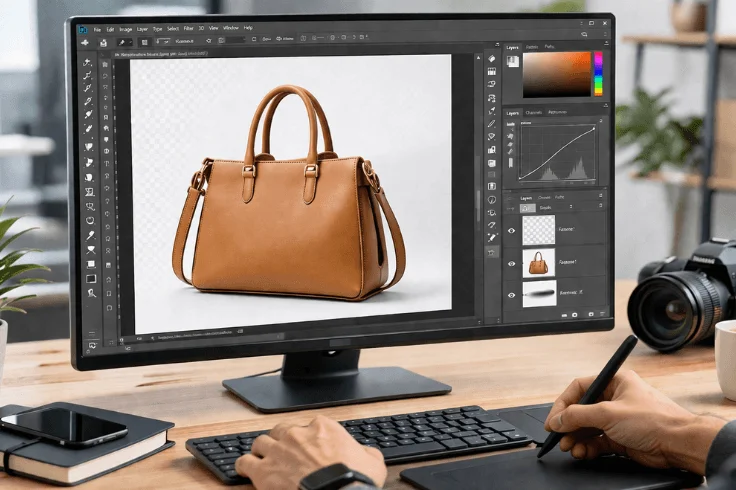
- Photoshop: Use the Remove Background button (newer versions) or the Pen Tool for precise cutouts around complex edges like jewelry or fabric
- remove.bg: Upload your image and get automatic background removal in seconds — works best for simple products
- After removal: Always zoom in to 100% and check the edges. Fix any rough or jagged areas with a soft eraser or refine edge tool
Common mistake: Leaving a faint gray or colored fringe around the product. Always check edges carefully before moving on.
Step 3 – Adjust Brightness & Contrast
A flat, dull image won’t attract clicks — even if the product is great. In Photoshop or Lightroom, adjust:
- Brightness: Increase slightly if the product looks dark, but don’t blow out highlights
- Contrast: A small boost (around +10 to +20) makes the product pop without looking unnatural
- Exposure: If shooting in RAW, adjust exposure first before anything else
- Whites & Blacks: Pull whites up slightly and blacks down to add depth
Goal: The product should look well-lit and clear — exactly as it looks in real life, just slightly better.
Step 4 – Color Correction

This is one of the most important steps — and the most overlooked. Inaccurate colors lead to more returns. If a customer orders a navy-blue bag and receives something that looks dark purple, that’s a trust problem.
How to correct colors properly:
- White Balance: Make sure whites look truly white, not warm or cool
- Hue & Saturation: Adjust individual colors to match the real product — don’t oversaturate
- Use a color reference card while shooting — it makes correction much easier in post
- Compare with the real product on your screen after editing
In Lightroom, use the HSL panel to fine-tune specific colors without affecting the whole image.
Step 5 – Retouch & Remove Imperfections
Even a well-shot product image has small flaws — dust, lint, scratches, or uneven surfaces. Here’s how to fix them:
- Healing Brush / Spot Healing (Photoshop): Perfect for removing dust spots or small marks
- Clone Stamp Tool: Use for larger imperfections or repeating textures
- Patch Tool: Great for fixing wrinkled fabric or uneven surfaces
What to retouch:
- Dust or fingerprints on the product
- Wrinkles on fabric or packaging
- Scratches or scuff marks
- Stray threads on clothing
Don’t over-retouch. The product should still look real — not like a 3D render. Over-editing creates unrealistic expectations and leads to more returns.
Step 6 – Add Shadow or Reflection
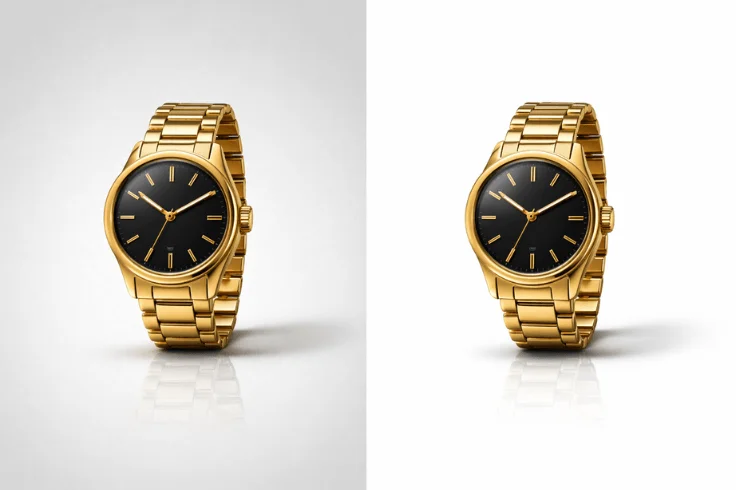
Without a shadow, products can look like they’re floating — unnatural and less trustworthy. There are three common types:
- Drop Shadow: A soft shadow falling behind or below the product. Best for packaged goods, electronics, or accessories
- Natural Shadow: Preserved from the original photo. Looks the most realistic
- Reflection Effect: A mirror-like reflection below the product. Works well for bottles, shoes, or luxury items
How to add a shadow in Photoshop:
- Create a new layer below the product
- Use a soft black brush at low opacity (10–20%)
- Paint gently beneath the product edges
- Adjust layer opacity until it looks natural
The shadow should be subtle — just enough to ground the product visually.
Step 7 – Resize & Optimize for the Platform
A perfect image that loads slowly is still a problem. Use the table below to resize your images correctly for each platform:
| Platform | Recommended Size | Min Size | Max File Size |
|---|---|---|---|
| Amazon | 2000 × 2000 pixels | 1000 × 1000 pixels | Under 10MB |
| Shopify | 2048 × 2048 pixels | 800 × 800 pixels | Under 20MB |
| Etsy | 2000 pixels shortest side | 1000 pixels | Under 1MB |
| eBay | 1600 pixels longest side | 500 pixels | Under 7MB |
How to optimize your images:
- Save as JPEG for white background images — smaller file size
- Save as PNG if the background is transparent
- Use tools like TinyPNG or Squoosh to compress without losing quality
- Always keep the original high-res file as a backup
Common Mistakes in Ecommerce Photo Editing
Avoiding common mistakes can save you time, improve image quality, and help you create more professional ecommerce product images.
1. Over-Editing the Image
After editing 5,000+ ecommerce product images, we’ve found that heavy filters, extreme brightness, and unnatural colors can make your product look fake. Customers expect to receive what they see — if an image looks overly polished, it creates distrust. Aim for clean and realistic, not perfect.
2. Incorrect Color Adjustment
Boosting saturation too much changes how colors appear on screen. A ‘bright red’ product that arrives looking ‘cherry red’ in person leads to returns and negative reviews. Always compare your edited image to the real product.
3. Inconsistent Editing Style
If your store has 50 products but each image looks different — different backgrounds, different brightness, different shadows — it looks unprofessional. Create a consistent editing workflow or preset and apply it across all images.
4. Ignoring Marketplace Guidelines
Amazon will reject your listing if the main image has a colored background, watermark, or text overlay. Shopify recommends square images for consistent grid layouts. Always check platform requirements before uploading.
5. Uploading Unoptimized Images
A 15MB image might look great, but it will slow down your page load time — and slow pages lose customers. Always compress your final images without sacrificing visible quality.
Avoiding these mistakes will help you create clean, consistent, and high-converting product images.
Ecommerce Image Guidelines (Amazon, Shopify & More)

To succeed in ecommerce, your product images must follow specific marketplace guidelines. Platforms like Amazon and Shopify have strict requirements to ensure consistency and quality across listings.
Amazon Image Requirements (Main Image)
- Pure white background (RGB 255, 255, 255)
- Product must fill at least 85% of the image frame
- Minimum 1000 pixels on the longest side (2000 pixels+ recommended for zoom)
- No text, logos, watermarks, or additional props
- Preferred format: JPEG
To fully understand how to optimize your product images for Amazon listings, you can follow detailed Amazon product photo editing methods to ensure compliance and better performance.
Shopify Image Guidelines
- Recommended image size: 2048 × 2048 pixels
- Maintain consistent image dimensions across all products
- Use clean backgrounds for a professional storefront look
- Optimize images for fast loading — use compressed JPEGs
Etsy Image Guidelines
- Minimum 2000 pixels on the shortest side
- Lifestyle images perform well alongside white background shots
- Use all 10 image slots — more images = more trust
eBay Image Guidelines
- Minimum 1600 pixels on the longest side
- No borders, text, or artwork added to images
- Multiple angles strongly recommended
Following these ecommerce image guidelines ensures your product listings remain compliant, professional, and conversion-ready.
DIY vs Professional Ecommerce Photo Editing
When editing ecommerce photos, you can either do it yourself (DIY) or hire a professional service. While both options have their advantages, the difference in quality, consistency, and efficiency can significantly impact your business results.
| Feature | DIY Editing | Professional Editing |
|---|---|---|
| Speed | Time-consuming, especially for bulk images | Fast turnaround, even for large batches |
| Quality | Inconsistent — varies with your skill level | Consistent, professional quality every time |
| Cost | Free or low-cost tools available | Paid service, but saves time and improves consistency |
| Skill | Learning curve required | Expert-level editing from day one |
| Best For | Beginners, small stores, and low-volume projects | Growing businesses, large product catalogs |
If you’re working with a few images, DIY editing can be enough. But for consistent quality, faster delivery, and better results at scale, professional ecommerce photo editing is the smarter choice.
Which Option is Better?
DIY editing works well when you’re just starting out, have a small product catalog, or want to keep costs low. Many beginners get surprisingly good results with tools like remove.bg and Canva.
Professional editing becomes the smarter choice when:
- You have a large number of product images to process
- Inconsistent image quality is affecting your conversions
- You need a fast turnaround for new product launches
- Your current images don’t meet Amazon or Shopify standards
- You want to free up time to focus on growing your business
👉 Try our ecommerce photo editing service with a free trial.
Ecommerce Photo Editing FAQ
Start with a high-resolution image, remove the background and replace it with pure white, adjust brightness and contrast, correct colors to match the real product, retouch any imperfections, add a subtle shadow, and optimize the file size before uploading. Following platform-specific guidelines (like Amazon’s 85% product coverage rule) is essential.
Adobe Photoshop is the industry standard for advanced editing. Adobe Lightroom excels at color correction and batch editing. Canva is ideal for beginners who need quick results. remove.bg is the fastest option for background removal. For mobile editing, Snapseed and VSCO are solid choices.
No. Beginners can get great results with Canva, remove.bg, or even the built-in editing tools in Shopify or Etsy.That said, Photoshop gives you the most control and produces the highest quality results — especially for complex products with intricate edges.
Basic edits (background removal + brightness adjustment) can take 5–10 minutes per image. Advanced retouching with shadows and color correction may take 20–30 minutes. Batch editing with presets in Lightroom can significantly speed up high-volume workflows.
Yes. Tools like Canva and remove.bg are designed for non-designers and produce solid results. However, achieving consistent, high-quality output across a large product catalog typically requires practice or professional help.
Final Checklist Before Publishing Your Product Images
Run through this checklist before every upload:
- Shot on a clean, well-lit setup with a neutral background
- Background removed and replaced with pure white (RGB 255, 255, 255)
- Brightness and contrast adjusted — product looks clear and vibrant
- Colors corrected to match the real product accurately
- All dust, scratches, and imperfections removed
- Natural shadow or reflection added for depth
- Image resized to match the platform’s recommended dimensions
- File compressed and optimized for fast loading
- Checked against marketplace guidelines (no text, logos, or watermarks)
- Saved a backup of the original high-resolution file
Following this checklist consistently will help you build a professional, trustworthy store that converts browsers into buyers. If you want consistent, high-quality results without spending hours editing, try our ecommerce photo editing services with a free trial.