Removing blemishes from photos is simple when you use the right tools. Whether you want to remove acne, pimples, dark spots, or scars, modern photo editing software and apps can fix skin imperfections in just a few clicks.
In this guide, you will learn how to remove blemishes from photos using Photoshop, mobile apps, and free online tools. We will show beginner-friendly steps that help you keep the skin natural and avoid over-smoothing.
If you prefer professional results without spending hours editing, consider our professional photo retouching service for natural and high-quality skin corrections.
What Is Blemish Removal in Photo Editing?
Blemish removal in photo editing is the process of digitally removing skin imperfections such as acne, pimples, dark spots, and scars while preserving natural skin texture and tone.
Quick Answer: How to Remove Blemishes from Photos
You can remove blemishes from photos using Photoshop’s Spot Healing Brush, Healing Brush, or Clone Stamp tool. For faster results, free online AI blemish removers and mobile apps can automatically remove acne, pimples, and dark spots. For natural results, always preserve skin texture and avoid heavy blurring.
The right method depends on whether you want quick automatic results or full professional control over skin texture.
What Are Blemishes in Photos?
Blemishes in photos are small skin imperfections that become visible in images. These can include temporary issues like pimples and acne, as well as dark spots, minor scars, blackheads, and uneven skin texture.
Common types of blemishes include:
- Pimples
- Acne
- Dark spots
- Small scars
- Blackheads
- Uneven skin texture
In photography, blemishes often appear more noticeable due to lighting, high camera resolution, and close-up shots. That’s why many people search for how to remove blemishes from photos while keeping the skin natural and realistic.
How to Remove Blemishes in Photoshop (Step-by-Step Guide)
If you want full control and natural results, Photoshop is the best option. Below are the easiest ways to remove blemishes in Photoshop. For more detailed skin texture and smoothing techniques, see our How to Smooth Skin in Photoshop guide.
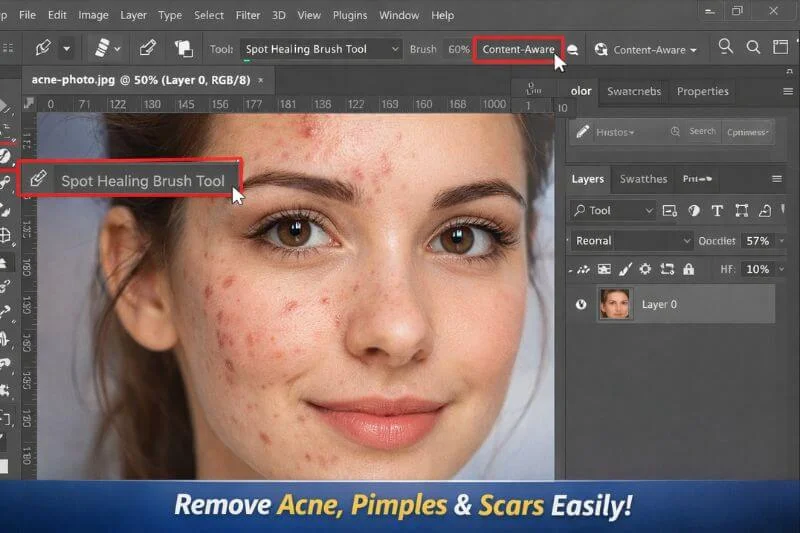
Method 1 – Remove Acne Using Spot Healing Brush (Fastest Way)
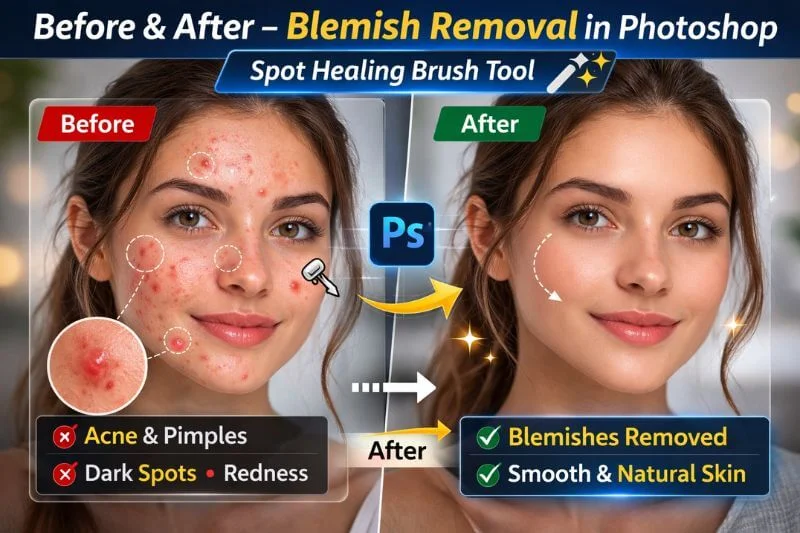
The Spot Healing Brush Tool is the quickest way to remove acne from photos.
Steps:
- Open your image in Photoshop.
- Select the Spot Healing Brush Tool (J).
- Make sure “Content-Aware” is selected.
- Adjust the brush size slightly bigger than the blemish.
- Click once on each pimple or spot.
This method works great for removing pimples in Photoshop without damaging skin texture.
Method 2 – How to Edit Acne Out of Pictures Using Healing Brush
If the spot healing tool does not give perfect results, use the Healing Brush Tool.
Steps:
- Select the Healing Brush Tool.
- Hold Alt (Option on Mac) and click on clean skin to sample.
- Gently paint over the blemish.
This method gives better control when editing acne out of pictures, especially near edges or detailed areas.
Method 3 – Remove Spots from Photo Using Clone Stamp
The Clone Stamp Tool copies pixels from one area to another.
Steps:
- Select the Clone Stamp Tool (S).
- Hold Alt and sample clean skin.
- Carefully paint over scars or large blemishes.
Use this method for removing larger scars or stubborn spots.
Advanced Method – Frequency Separation (Professional Technique)
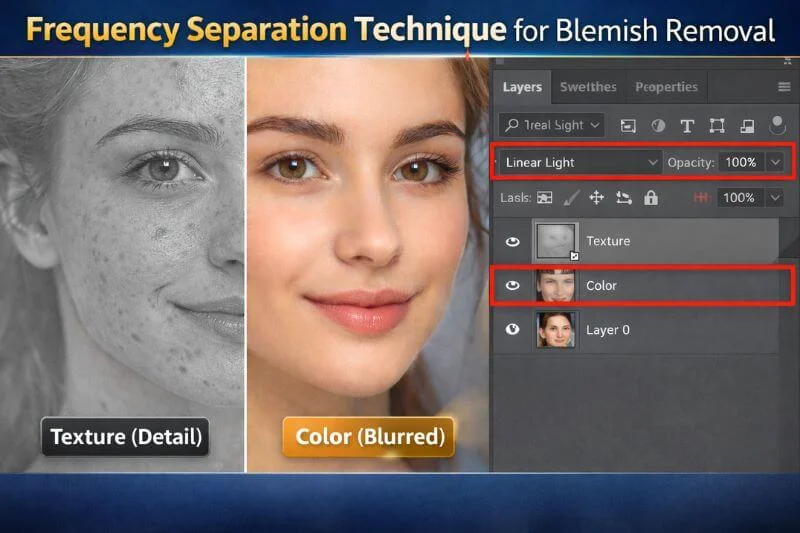
Professional retouchers use frequency separation to remove blemishes while preserving natural skin texture. This technique separates color and texture into two layers, allowing acne and imperfections to be corrected without creating a plastic look. It is widely used in high-end beauty and commercial retouching for natural, professional results.
How to Remove Acne from Photos on iPhone or Android
If you don’t have Photoshop, you can use mobile apps.
Most photo editor apps include:
- Blemish remover tool
- Retouch brush
- AI acne removal
- Skin smoothing tool
Steps are simple:
- Upload your photo.
- Select the blemish remover tool.
- Tap on pimples or dark spots.
- Adjust intensity if needed.
This is helpful for quick social media edits.
Remove Blemishes from Photos Online (No Photoshop Needed)
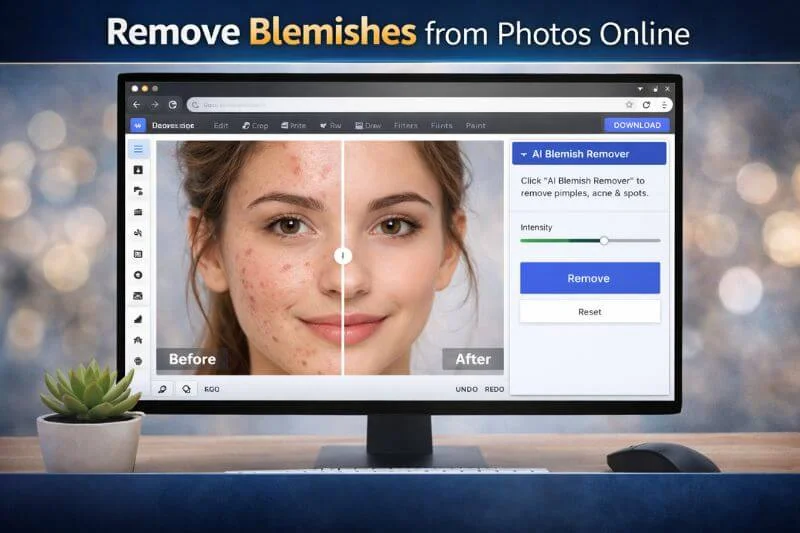
There are also free online tools that allow you to remove blemishes from photos online without installing software.
How it works:
- Upload your image.
- Select the AI blemish remover or retouch tool.
- Let the system automatically remove acne and spots.
- Download the edited photo.
Online tools are fast but may not always give natural skin results.
How to Edit Pimples Out of Pictures Naturally (Avoid Over-Smoothing)
To edit pimples out of pictures naturally, focus on removing temporary imperfections without damaging the original skin texture. The goal is to clean the skin while keeping it realistic and detailed.
Follow these tips for natural results:
- Do not over-blur the skin
- Preserve natural skin texture and pores
- Zoom in while editing for precision
- Use small and soft brush strokes
- Lower brush opacity when necessary
- Keep natural shadows and highlights intact
Natural-looking edits always appear more professional than overly smooth, plastic-looking skin. For more advanced facial corrections like dark circle & wrinkle removal, see How to Remove Eye Bags, Dark Circles, and Wrinkles in Photoshop.
Common Mistakes When Removing Blemishes
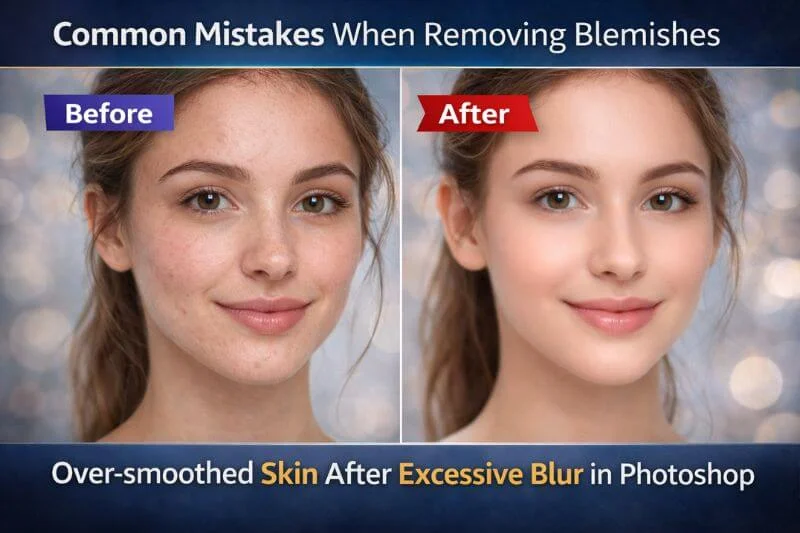
When removing blemishes from photos, many beginners make small mistakes that make the skin look unnatural. The goal of blemish removal is to clean the skin while keeping its natural texture and lighting intact.
Common mistakes include:
- Overusing blur filters that destroy skin texture
- Making the skin look plastic or overly smooth
- Removing natural shadows and highlights
- Editing at 100% opacity without blending
- Ignoring lighting and skin tone consistency
Good blemish removal should be invisible. If people can notice the retouching immediately, it has likely been overdone.
DIY Editing vs Professional Photo Retouching
You can remove blemishes from photos yourself using apps or Photoshop. DIY editing works well for small, temporary imperfections.
DIY Editing is suitable for:
- Quick social media photos
- Minor acne or small spots
- Personal use images
- Basic corrections
However, for professional images such as:
- Headshots
- Model portfolios
- Wedding photos
- Commercial shoots
Professional retouching provides:
- Natural skin texture preservation
- Balanced skin tone
- No over-smoothing
- High-end, magazine-quality finish
For complete headshot retouching techniques used by professionals, see How to Do Headshot Retouching in Photoshop.
While DIY tools work for small edits, professional photo retouching ensures flawless and natural results without damaging skin texture. If you need high-end and natural skin retouching, consider our professional photo retouching service for natural, studio-quality results.
Photoshop vs Online Tools: Which Is Better?
Both Photoshop and online tools can remove blemishes from photos, but they work differently. The best option depends on your needs, skill level, and the type of image you are editing.
Photoshop is better for:
- Full control over skin texture
- High-resolution professional images
- Advanced techniques like frequency separation
- Detailed headshots and commercial photos
- Natural and precise retouching
Photoshop provides manual control over every detail. This helps maintain realistic skin texture and avoid over-smoothing, especially in professional or commercial images.
Online tools are better for:
- Quick edits
- Beginners with no editing experience
- Social media photos
- Automatic AI blemish removal
- Fast results without installing software
Online tools are simple and easy to use. Most AI-based editors automatically detect and remove acne, pimples, and spots in seconds. However, they may reduce image quality or create unnatural smoothing, especially in high-resolution or professional photos.
If you need quick and automatic blemish removal, online tools are convenient. However, for professional-quality results with natural skin texture, Photoshop is the better choice. For studio-level images, professional retouching delivers the most reliable and polished outcome.
Final Thoughts
Removing blemishes from photos is easy when you choose the right method. Photoshop gives you full control and professional results, while online tools and mobile apps offer fast and automatic solutions. Always aim to preserve natural skin texture for the best outcome.
If you need flawless and natural skin edits for professional use, expert retouching can save time and deliver high-end, studio-quality results. For businesses that prefer professional results instead of manual editing, explore current photo retouching service pricing options.
Frequently Asked Questions (FAQs)
You can remove blemishes from photos using tools like Photoshop’s Spot Healing Brush, Healing Brush, or Clone Stamp tool. Simply select the tool, adjust the brush size slightly larger than the blemish, and click or paint over pimples, acne, or dark spots to blend them naturally with the surrounding skin.
You can remove acne from photos without Photoshop by using mobile apps or free online AI photo editors. Upload your image, select the blemish remover or retouch tool, and tap on pimples or dark spots. Most apps automatically blend the skin texture for a quick and natural result.
The best Photoshop tool for removing pimples is the Spot Healing Brush Tool. It automatically samples nearby skin and blends imperfections naturally. For better control, you can use the Healing Brush Tool or Clone Stamp Tool, especially when editing acne near edges or detailed areas.
Yes, you can remove blemishes from photos online for free using AI-based photo editors. These tools allow you to upload your image, select a blemish remover option, and automatically remove acne, pimples, or spots. However, free tools may reduce image quality compared to professional editing.
No, removing blemishes does not reduce photo quality if done correctly. Using tools like the Spot Healing Brush or Healing Brush preserves natural skin texture. However, over-blurring or excessive smoothing can make the skin look artificial and reduce overall image quality.
Yes, it is generally acceptable to remove temporary acne or blemishes from professional photos. Most photographers and retouchers clean up temporary skin imperfections while keeping natural features intact. The goal is to enhance the image without changing the person’s natural appearance.