
In Photoshop, color adjustments are essential for creating great images. The Hue and Saturation tool is one of the most useful for this. It helps you fix colors and get creative with your edits. Whether you want to correct colors, change specific shades, or brighten up your photos, understanding Hue and Saturation will make your editing easier and more effective.
This guide covers everything about Hue and Saturation in Photoshop. You will learn the basics and how to use the tool. It also includes advanced tips and real examples. By the end, you’ll be confident using this feature to improve your photos like a pro.
What Is Hue and Saturation in Photoshop?
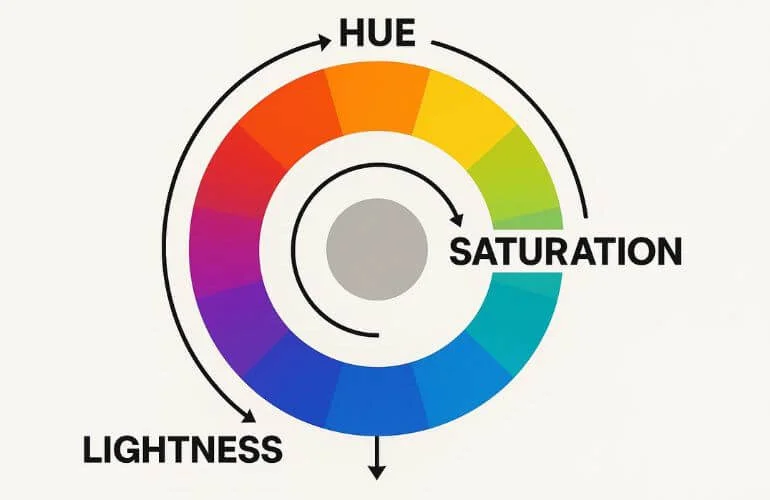
In Photoshop, Hue refers to the basic color (like red, blue, or green), while Saturation describes the intensity or vividness of that color. The Hue/Saturation tool in Photoshop enables users to alter these elements to either correct image colors or create artistic effects.
- Hue changes the base color by rotating it along the color wheel spectrum
- Saturation controls how intense or muted the colors appear.
- Lightness adjusts the brightness or darkness of those colors.
These edits are made using the HSL model (Hue, Saturation, Lightness), which defines how colors are represented digitally.
Why Use Hue/Saturation Adjustments?
The Hue/Saturation tool is essential for both beginners and professionals because it helps with important tasks such as:
- Correcting color casts and imbalances to ensure photos look natural and true to life.
- Modifying colors to match branding, product presentation, or seasonal trends.
- Enhancing dull or underexposed photos by adding vibrancy and life.
For industries like eCommerce, fashion, and real estate photography, accurate and appealing colors are crucial. Accurate color representation builds trust and can directly impact conversion rates.
For a detailed official tutorial on using Hue/Saturation adjustment layers in Photoshop, visit Adobe’s Hue/Saturation adjustment guide.
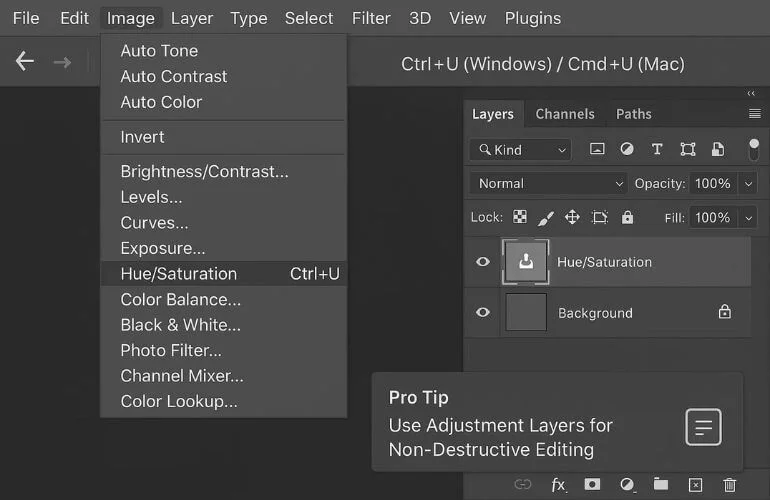
How to Access the Hue/Saturation Tool in Photoshop
You can access the tool in several ways:
- From the top menu: Image > Adjustments > Hue/Saturation
- Keyboard shortcut: Ctrl + U (Windows) / Cmd + U (Mac)
- Using an adjustment layer: Layer > New Adjustment Layer > Hue/Saturation
Always use adjustment layers for non-destructive editing. This lets you re-edit the adjustments without affecting the original image. To understand more about color basics and how color wheels work in editing, check out our article on the Adobe Color Wheel.
Understanding the Hue/Saturation Panel
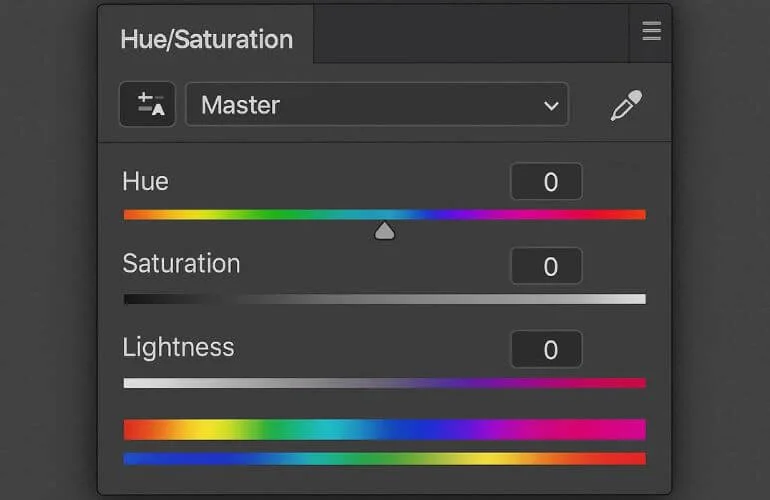
The panel includes three main sliders:
- Hue: Moves the selected color range around the color wheel, shifting tones (e.g., red to yellow, blue to green).
- Saturation: Increases or decreases the vividness of colors.
- Lightness: Brightens or darkens the selected color range.
Color Range Selection Options (in Hue/Saturation panel):
- Master: Adjusts all color channels.
- Specific channels: Reds, Yellows, Greens, Cyans, Blues, and Magentas for targeted adjustments.
Also includes an eyedropper tool for sampling exact colors and a color range refinement bar.
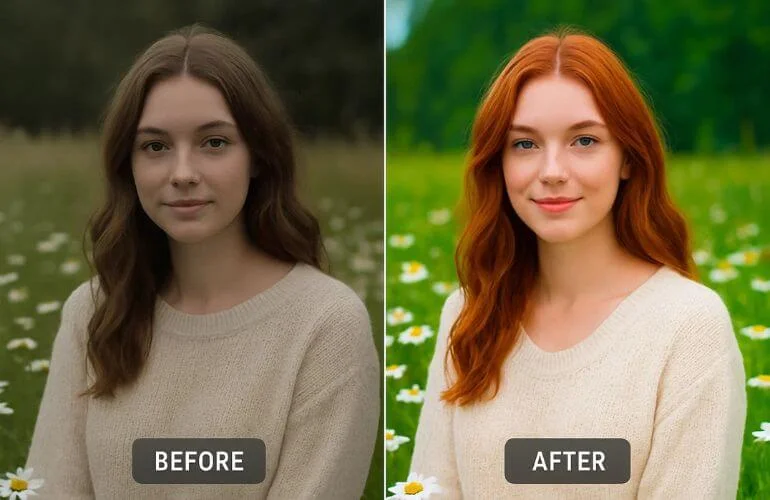
How to Change Hue in Photoshop

Want to change a specific color in your image without altering the entire photo? Follow these steps:
Step-by-Step:
- Open your image in Photoshop.
- Go to Layer > New Adjustment Layer > Hue/Saturation.
- In the Properties panel, open the color dropdown and choose a target range (e.g., Reds, Greens, etc.).
- Move the Hue slider left or right to shift the selected color.
Example:
- Change a green dress to purple while leaving the background untouched.
If you want to deepen your skills, learn the difference between color correction vs color grading to apply color edits more professionally.
How to Adjust Saturation in Photoshop
- Add a Hue/Saturation adjustment layer.
- Use the Saturation slider:
- Move right to intensify colors.
- Move left to dull or remove colors.
- “Use layer masks to apply saturation adjustments to specific areas only.
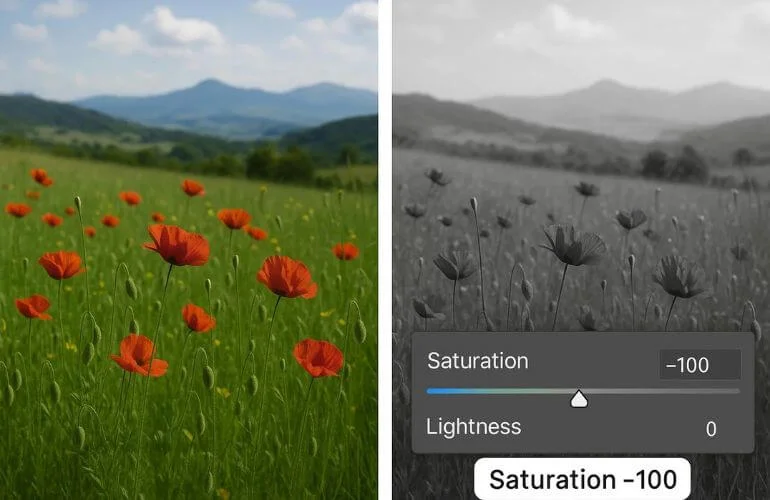
Pro Tip: Set Saturation to -100 to create black-and-white effects.
How to Use Targeted Adjustments (Color Range Selection)
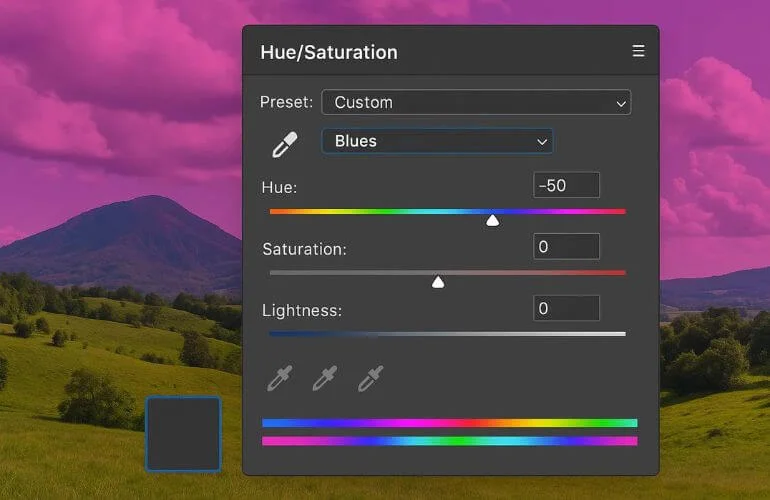
Fine-tune specific colors in your image:
- In the adjustment layer, open the color dropdown menu.
- Select a range like Blues to edit skies or water.
- Use the eyedropper tool to pick custom shades.
- Adjust the color range limits using the color sliders under the gradient bar.
This method is perfect for editing a subject’s clothing, sky colors, or product packaging without affecting the whole image. To better understand color relationships and composition in photography, explore our guide on Color Composition in Photography.
Use Cases of Hue/Saturation Tool (With Examples)
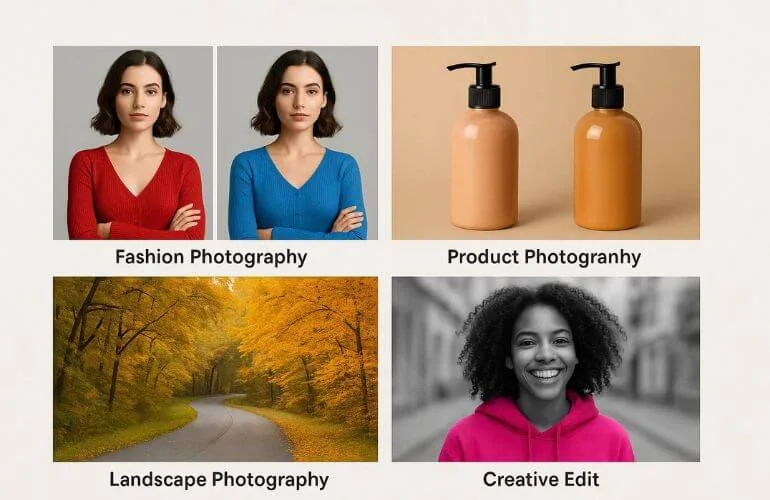
- Fashion Photography: Change the color of garments for seasonal campaigns.
- Product Photos: Unify the colors of different batch items.
- Landscape Photography: Change green foliage to golden hues in fall edits.
- Creative Projects: Create color splash effects by desaturating backgrounds.
Visual consistency across product catalogs or portfolios boosts viewer engagement and brand professionalism.
Common Mistakes to Avoid When Using Hue and Saturation in Photoshop
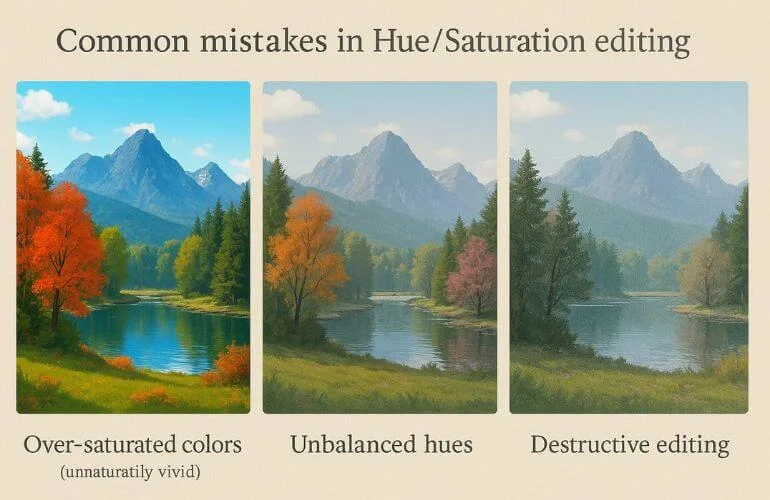
- Over-saturating Images: Pushing the saturation too far can cause unnatural, harsh colors that distract and look fake.
- Ignoring Color Balance: Changing colors without considering the overall balance can create an unbalanced or unnatural image.
- Editing Destructively on Raster Layers: Editing directly on the original layer limits flexibility and risks damaging the photo.
- Neglecting Context and Surrounding Colors: Adjusting one color without considering background or adjacent colors can cause awkward clashes and unprofessional results.
Final Thoughts
Mastering the Hue and Saturation tool in Photoshop unlocks a powerful layer of creative control and color precision. Whether you’re enhancing product photos, creating artistic edits, or refining skin tones, this tool is foundational for photographers, designers, and editors alike.
Ready to refine your edits even more?
For advanced color correction services and professional-level retouching, consider working with a trusted editing service like Clipping World. We offer precise, high-volume photo editing solutions tailored to creative and commercial needs.
Explore Our Relevant Articles
Frequently Asked Questions
Yes. Use layer masks or color selection to isolate areas.
Ctrl + U on Windows, Cmd + U on Mac.
Not when using an adjustment layer. Always use non-destructive workflows.