
Poor product photos can cost you real sales — even if your product is amazing. In a world where people shop with their eyes, product photography editing makes a big difference. Whether you’re a store owner, photographer, or marketer, this guide will show you how to edit your photos the right way — with the best tools, techniques, and tips for pro-quality results.
What Is Product Photography Editing?
Product photography editing means improving product photos after they’re taken. The goal is to make the product look as appealing and true-to-life as possible while meeting platform-specific requirements.
Unlike general photo editing, which might focus on creative expression, product editing is all about clarity, consistency, and visual accuracy. It ensures your product looks its best to potential buyers. Beginners can also explore Canva’s Beginner-Friendly Photography Tips for easy-to-follow advice.
Why Is Editing Important in Product Photography?
Here’s why editing is non-negotiable in the world of product photography:
- Increases Visual Appeal: Clean, bright, and high-quality images attract more clicks.
- Boosts Brand Trust: Professionally edited images create a consistent and polished look.
- Meets Platform Requirements: Online marketplaces like Amazon, Etsy, and eBay have specific image guidelines (e.g., white backgrounds, minimum resolution).
- Highlights Product Details: Editing allows you to correct lighting, remove distractions, and focus attention on what matters most — the product.
Common Editing Techniques for Product Photos
Here are the most common product photography edits:
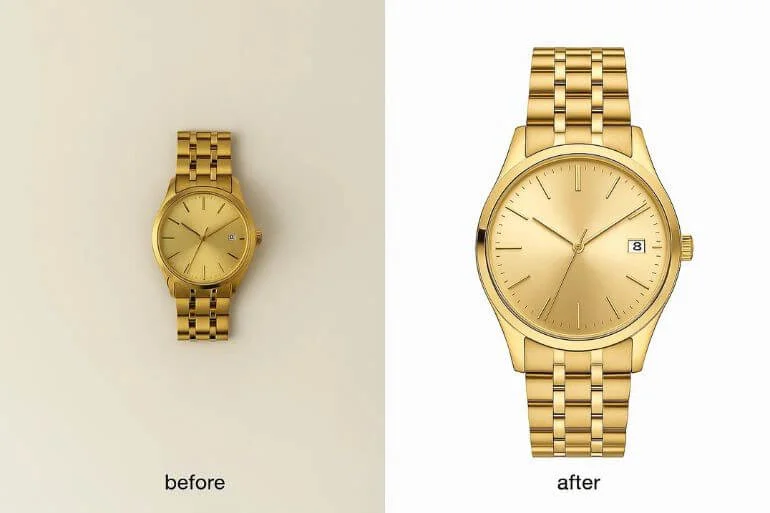
1. Background Removal or Cleanup
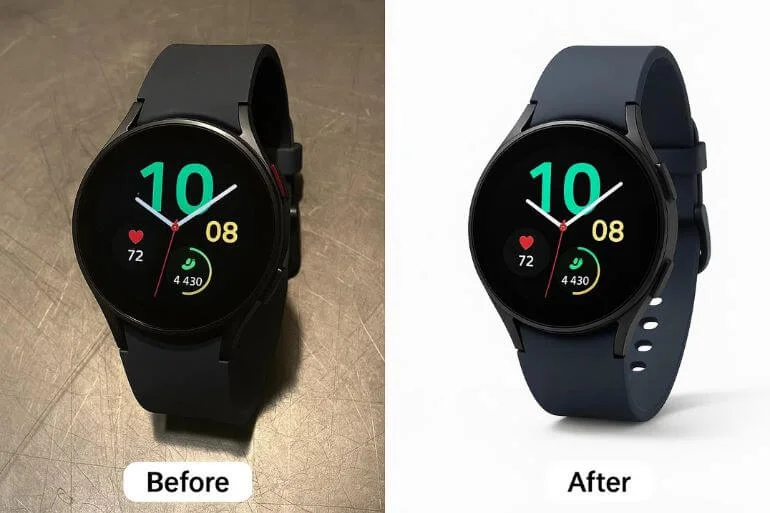
Removing the background helps your product stand out and look professional. Most online marketplaces prefer a white or transparent background. This type of background keeps the focus on the product and meets platform requirements.
You can do this manually using tools like Photoshop or automatically with AI tools like remove.bg. Just make sure to keep natural shadows and edges so the product still looks realistic.
2. Color Correction
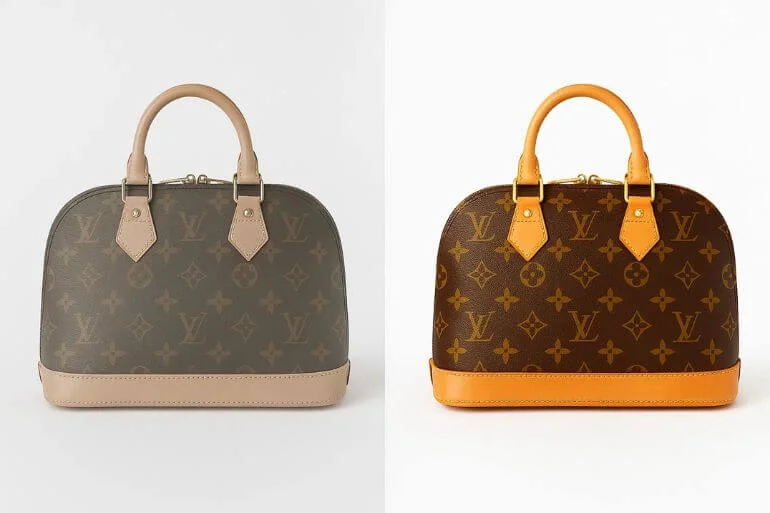
Color correction is an editing process that fixes a photo’s color, brightness, and contrast. It makes sure your product looks just like it does in real life. This is very important for items like clothing, home decor, or anything where color accuracy affects buying decisions.
You can adjust the hue, saturation, and brightness using tools like Photoshop, Lightroom, or online editors. The goal is to keep colors consistent across all photos and avoid anything that looks unrealistic.
Guides such as Color Correction in Lightroom, Hue and Saturation Technique in Photoshop, and Automatic Color Correction in Adobe Photoshop CS6 are helpful for consistency.
3. Exposure and Contrast Adjustment
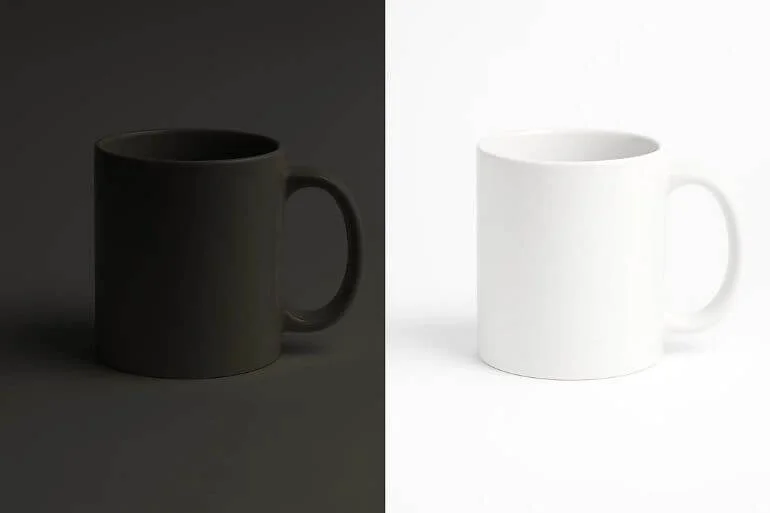
Adjusting exposure and contrast makes your product photos bright and clear without being too bright or washed out. Good contrast helps your product stand out and makes the colors pop. You can make these adjustments in tools like Photoshop, Lightroom, or other editors.
Always check your edits on multiple devices to make sure the lighting looks natural. Don’t over-brighten — small, subtle changes usually look more professional.
4. Shadow Creation or Enhancement
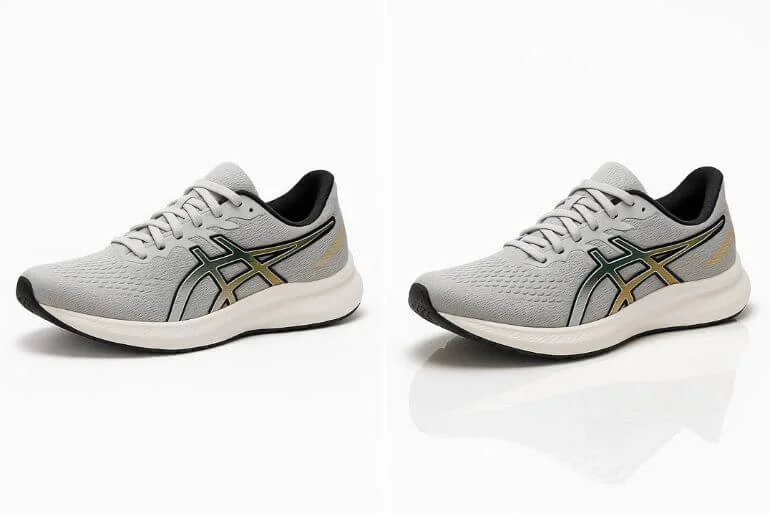
Shadows make product photos appear more three-dimensional and realistic. They help the product feel “grounded” rather than floating. Common types include drop shadows (under the product) and reflection shadows (soft, mirrored reflections on shiny surfaces). Use Photoshop or Lightroom to create or enhance shadows naturally.
5. Cropping and Resizing
Cropping removes extra space around the product and centers the focus. Resizing ensures your images display correctly on different platforms like Amazon, Shopify, or social media.
What Software Is Best for Product Photography Editing?
Choosing the right tools depends on your skill level and budget:
- Adobe Photoshop: Industry standard for detailed editing and background removal.
- Lightroom: Great for batch editing and color adjustments.
- Canva: Simple interface ideal for quick edits and social media use.
- GIMP: Free and open-source alternative to Photoshop.
- Mobile Apps: Lightroom Mobile, AI Photo Editor, and VSCO are handy for basic mobile edits.
DIY vs. Professional Editing: Which Should You Choose?
When it comes to editing product photos, you can either do it yourself or hire a professional. This quick comparison will help you decide which option fits your needs best.
| Feature | DIY Editing | Professional Editing |
| Cost | Lower, mostly free or software-based | Higher, but worth the investment |
| Time | Can take a long time | Fast and efficient |
| Skill Level | Requires basic editing knowledge | Experts handle advanced tasks |
| Quality | Can be inconsistent | High-quality |
| Tools Needed | Photoshop, Lightroom, Canva, etc. | Professional software + experience |
| Best For | Small projects or tight budgets | Brands needing consistent images |
If you’re managing hundreds of SKUs or need high-end retouching, especially for niche categories like automobile photography, outsourcing to a product photo editing company can be a smart move.
How Long Does Product Photo Editing Take?
- Simple edits: 2–5 minutes per image
- Complex edits: 10–20+ minutes per image
- Batch processing: Can be sped up using presets or automation
Time varies based on the number of photos, the quality of the original shots, and the level of detail needed.
Tips for Editing Product Photos Like a Pro
- Start with high-resolution RAW files
- Keep edits consistent across all product photos
- Preserve natural colors and textures
- Use soft shadows to enhance realism
- Export in the correct size and format (JPEG, PNG, etc.)
Mistakes to Avoid in Product Photo Editing
- Over-editing (unrealistic colors or sharpness)
- Inconsistent backgrounds across product listings
- Removing all shadows, making products look flat
- Ignoring brand style guidelines
Always aim for clean, clear, and honest representations of your product.
Where to Get Help with Product Photography Editing
If editing isn’t your strong suit, you have options:
- Freelancers on Fiverr or Upwork
- Professional editing agencies like Clipping World or Graphics Cycle
- In-house editors (if you’re scaling operations)
Look for portfolios, pricing transparency, and turnaround times before hiring.
FAQs About Product Photography Editing
Use JPEG for web, PNG for transparent backgrounds, and PSD or TIFF if you plan to edit again later.
Yes. Apps like Lightroom Mobile and Snapseed are powerful for basic tasks, especially on the go.
It typically ranges from $1 to $10+ per image based on complexity and quantity.
Absolutely. Clean, attractive images improve click-through rates and conversions.
Conclusion on Product Photography Editing
Product photography editing is a must-have skill or service for anyone selling online. From background cleanup to professional retouching, every step you take to enhance your images pays off in customer trust, brand perception, and ultimately, sales.
Whether you edit yourself or work with professionals, investing in high-quality product images is investing in your business success.
👉 Looking for professional e-commerce photo editing near you? Get in touch with us today for a free quote!