Many people use Photoshop to remove backgrounds, but the process can often be difficult and frustrating. Tools like the Magic Wand or Eraser can leave rough edges. They also take a long time to get right.
The good news is, there’s a hidden way to remove the background in Photoshop that is both faster and produces cleaner results. In this guide, we’ll show you how to do it step by step.
Why Removing Backgrounds Can Be Tricky
Many people use basic tools to remove backgrounds, but they have problems:
- Magic Wand Tool: Sometimes misses areas with small color differences.
- Eraser Tool: Takes a long time and can make mistakes.
- Manual Selections: Often tedious, especially for hair, fur, or complex shapes.
That’s why finding a hidden method that is both fast and precise can be very helpful.
The Hidden Way to Remove Background in Photoshop
To overcome these common challenges, here’s a step-by-step method that many users might not know about:
Step 1: Open Your Image in Photoshop
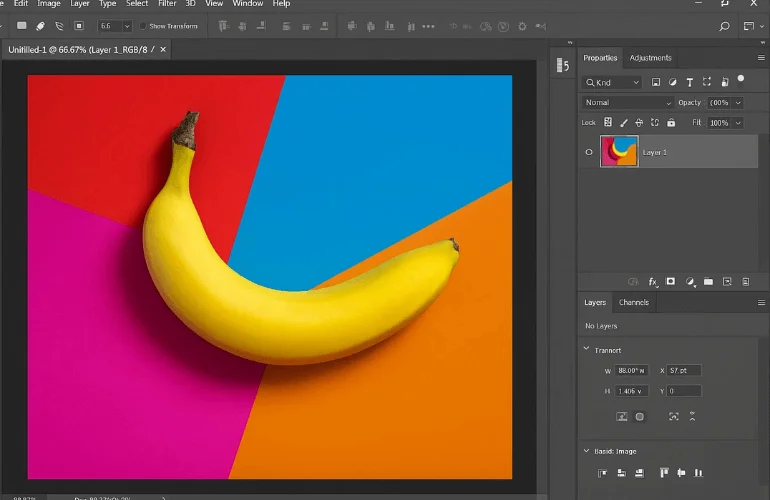
First, open the image you want to edit. This works best with high-contrast photos, but it can work on almost any image.
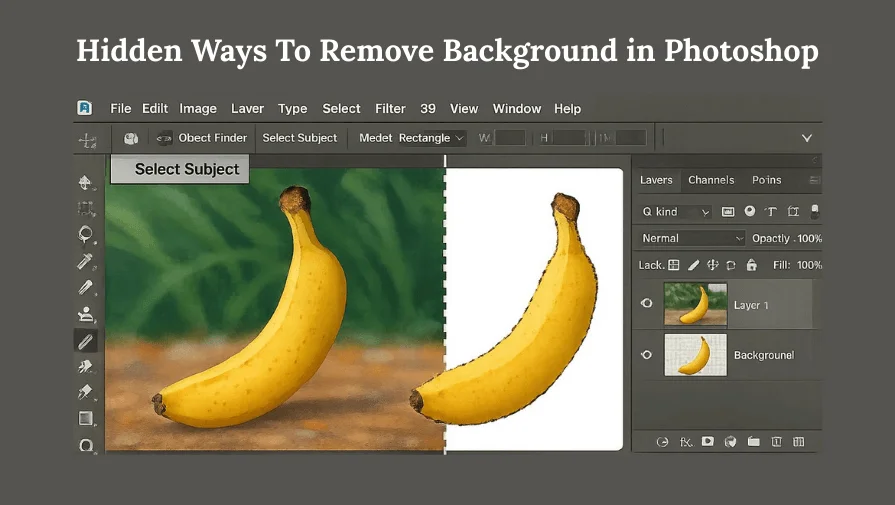
Step 2: Use the ‘Select Subject’ Feature
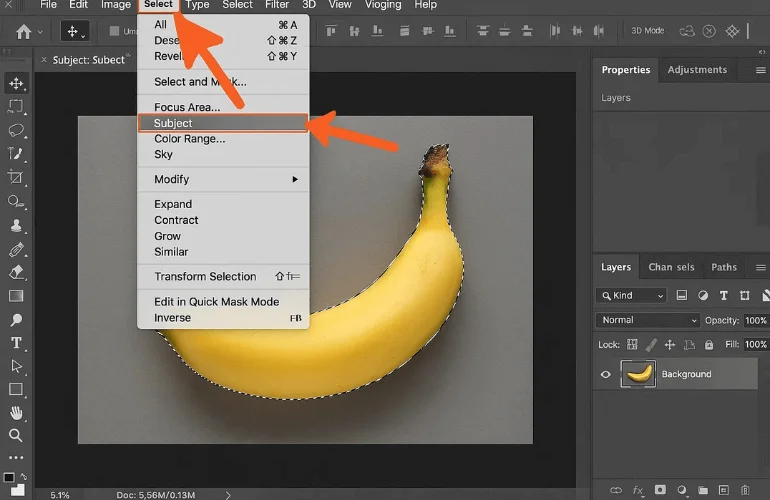
Go to Select → Subject. Photoshop’s AI will automatically detect the main subject of your image. This feature is often hidden in plain sight but is incredibly powerful for quickly selecting objects.
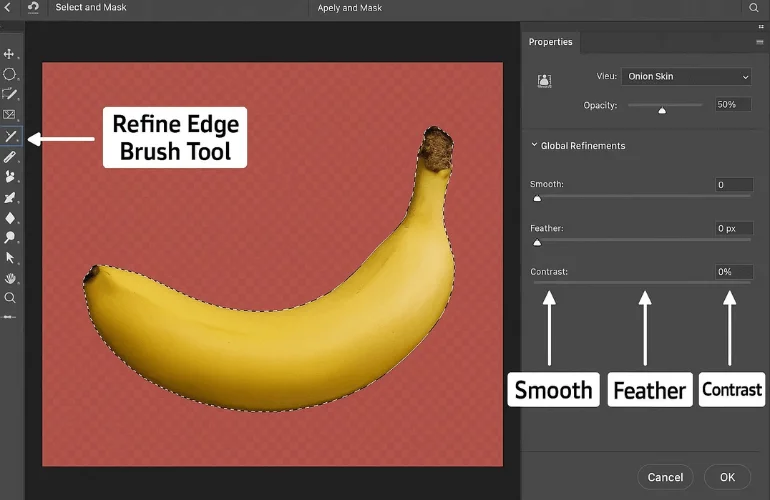
Step 3: Refine the Selection with ‘Select and Mask’
After selecting the subject:
- Click Select → Select and Mask.
- Use the Refine Edge Brush Tool to perfect edges around hair, fur, or intricate details.
- Adjust Smooth, Feather, and Contrast sliders for a polished look.
This is where the “hidden” magic happens. Photoshop allows you to refine selections that would normally take hours to do manually.
Step 4: Remove the Background
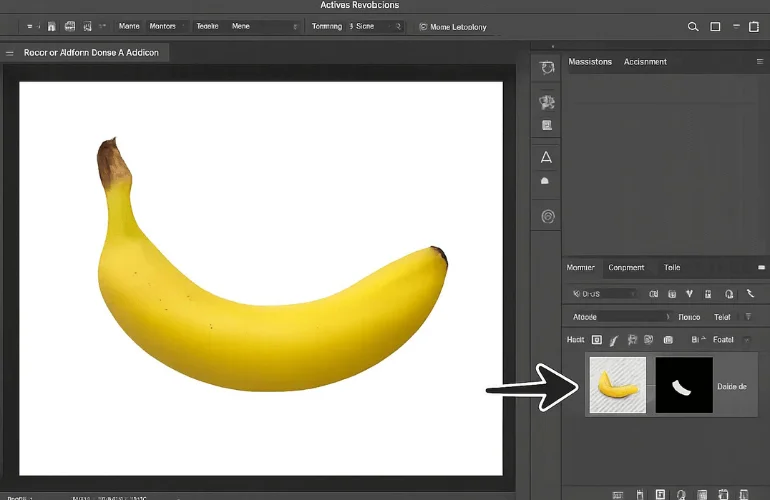
Once your selection looks good:
- Output the selection as a Layer Mask (non-destructive) or New Layer with Layer Mask.
- Now your subject is cleanly separated on a transparent background. You can use it in new designs or place it anywhere you like.
Tips to Improve This Hidden Method
- Enhance Selection Accuracy: Adjust exposure or contrast before selecting the subject.
- Manual Tweaks: Use the Quick Mask mode for fine-tuning tricky areas.
- Combine Tools: For complex images, combine Select Subject with the Pen Tool for maximum precision.
Common Mistakes and How to Avoid Them
One common mistake is over-relying on Auto Selection, which can leave rough edges if you don’t fix them. Another is skipping the Layer Mask—erasing the background directly makes it harder to make changes later. Also, don’t forget the details. Hair, fur, or transparent areas need extra attention for a clean, professional finish.
Why This Hidden Method Beats Traditional Techniques
- Time-Saving: Automates the bulk of the work.
- Cleaner Results: Less jagged edges and better handling of complex subjects.
- Beginner-Friendly: Even new users can achieve professional results with minimal effort.
Conclusion
The hidden way to remove backgrounds in Photoshop is by using Select Subject and Select and Mask. It makes the process much easier. It’s faster, cleaner, and far more efficient than traditional methods. Next time you need to isolate a subject, try this method and see how much smoother your workflow becomes.
If you want to save time and get professional results without the hassle, our background removal service can handle it for you quickly and perfectly. Get your images ready for design, e-commerce, or marketing— contact us today and let us take care of the hard work!
Frequently Asked Questions
Open your image, go to Select → Subject, or use Quick Actions → Remove Background. Photoshop’s AI isolates the subject automatically.
Works best with high-contrast images. Complex areas like hair or fur may need extra refinement in Select and Mask.
Yes. Select the mask thumbnail and use Select and Mask to adjust Refine Edge, Smooth, Feather, and Contrast.
Available in Photoshop 2021 and later. Make sure your software is updated.
Use the Quick Selection Tool, Pen Tool, or Background Eraser Tool. Select and Mask can help fine-tune details.
Further Reading / References
01. Select and Mask Workspace – Adobe Help Center – Learn how to refine selections, adjust Smooth, Feather, and Contrast sliders, and perfect edges.
02. How to Use Select and Mask in Photoshop – PhotoshopCAFE – In-depth guide with tips for refining selections and improving Photoshop performance.