
Struggling to draw a pumpkin in Photoshop? Don’t worry! This guide will show you the best Pen Tool techniques to create a realistic pumpkin effortlessly. You’re in the right place to explore effective pumpkin drawing ideas and improve your skills.
Let’s dive into the step-by-step process! I will show you how you can easily draw a pumpkin in Photoshop.
Pumpkin Drawing Easy Step-By-Step Guideline
Now, to draw in Photoshop, you will find some textures to use, like wood texture and paper texture. But I will use an old, reliable brush tool that you will find in any traditional Photoshop tool.
Step 1: Select the Custom Tool & Create A New Custom Page
To begin, create a new Photoshop document, name it “pumpkin,” set the width to 11 and height to 8.5 inches, and set the resolution to 300 pixels. Your color mode is normally set to RGB color, 8-bit, and we will have a transparent background. Make sure your color profile square is pixel by default, and press the button to create.
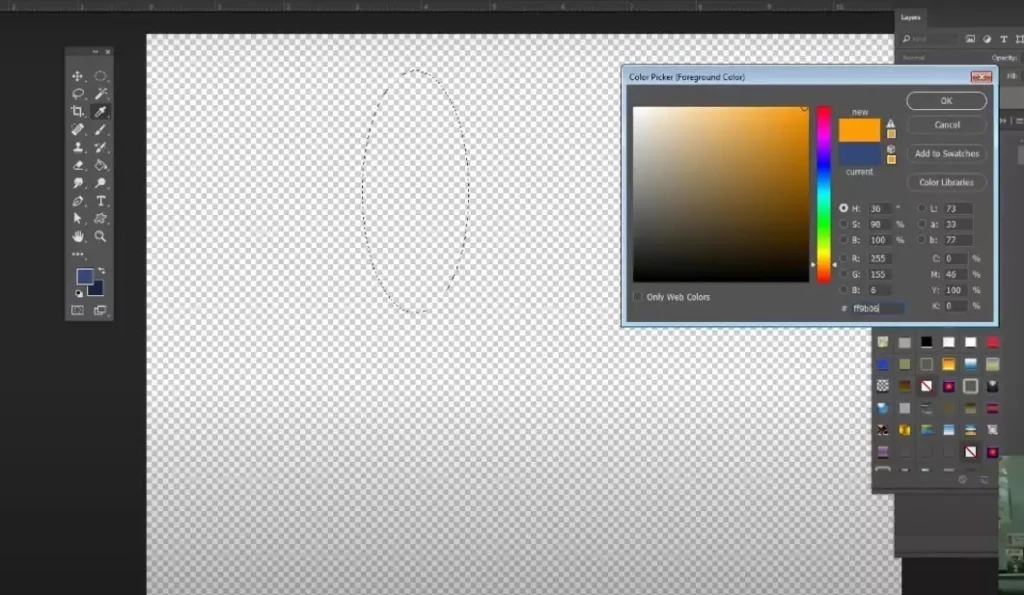
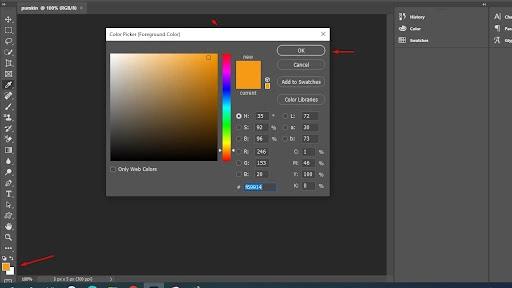
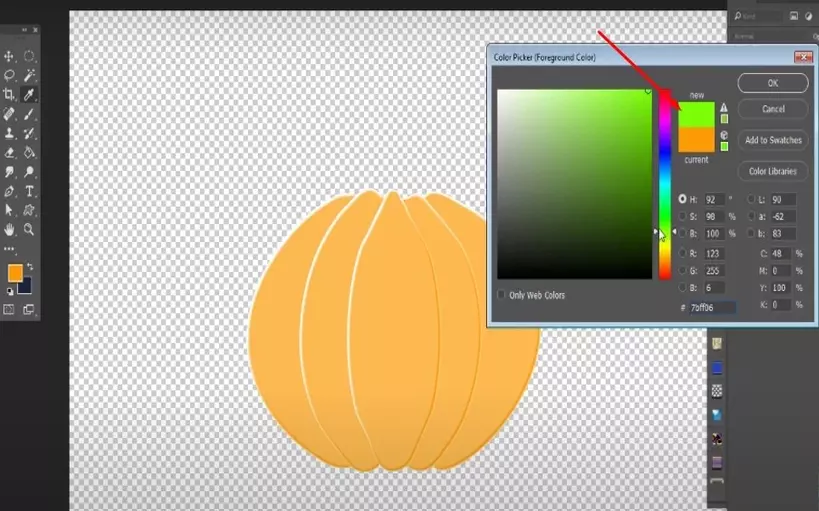
Step 2: Set Foreground Color in Photoshop | Pumpkin Drawing
We will use the ellipse tool to draw a round, oval shape for the pumpkin. Therefore, in the ellipse tool, first, we need to change our color, and we want to grab a color that is the orange shade of a pumpkin. After selecting the orange color, we will set the foreground to orange.
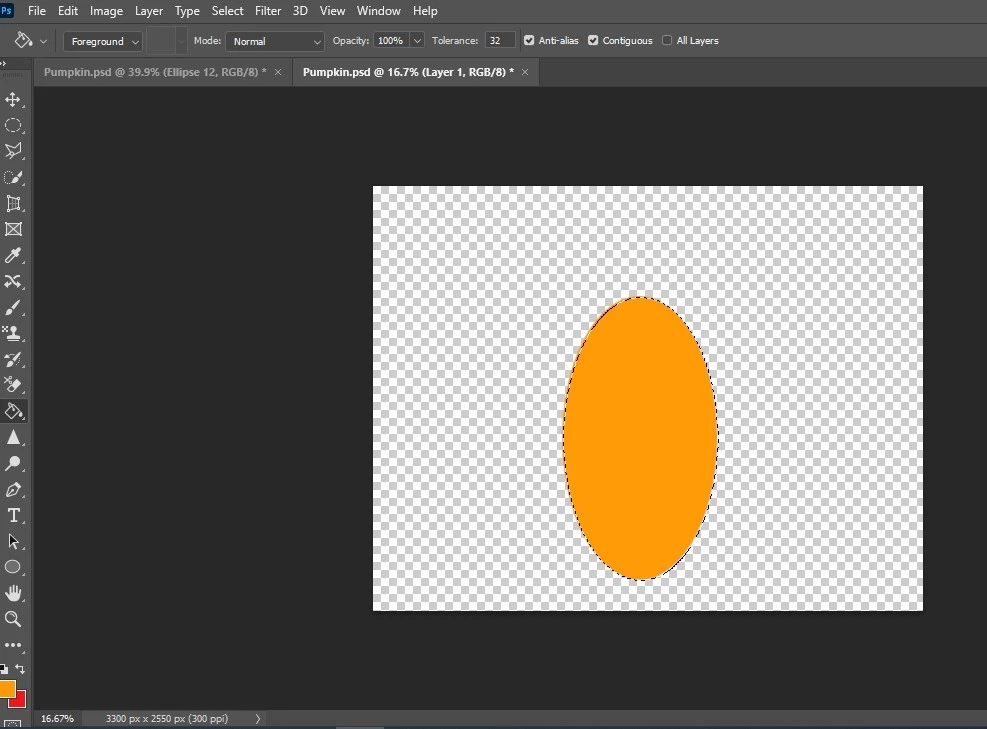
Step 3: Draw Shapes With the Ellipse Tool
Now, grab the ellipse tool, which is hiding inside the rectangle. Now my pumpkin isn’t perfectly round, so I’m going to draw that ellipse and drag it, then leave it on the oval side to become a round pumpkin.
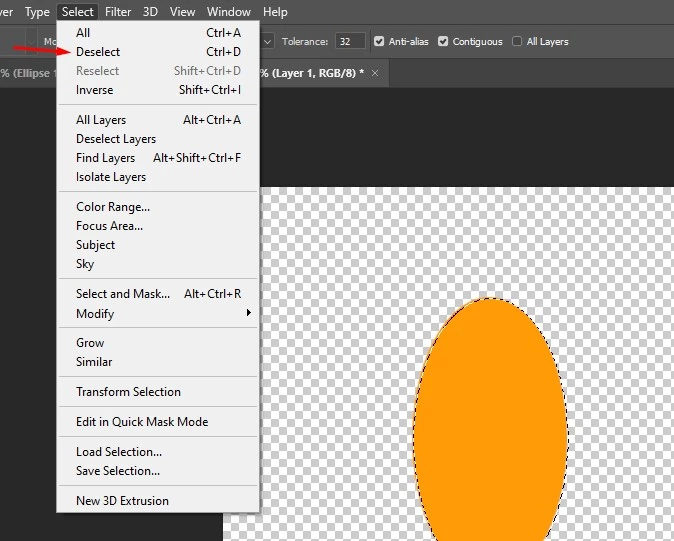
Step 4: Deselect the Selection
Once you have done this, hit select to deselect.
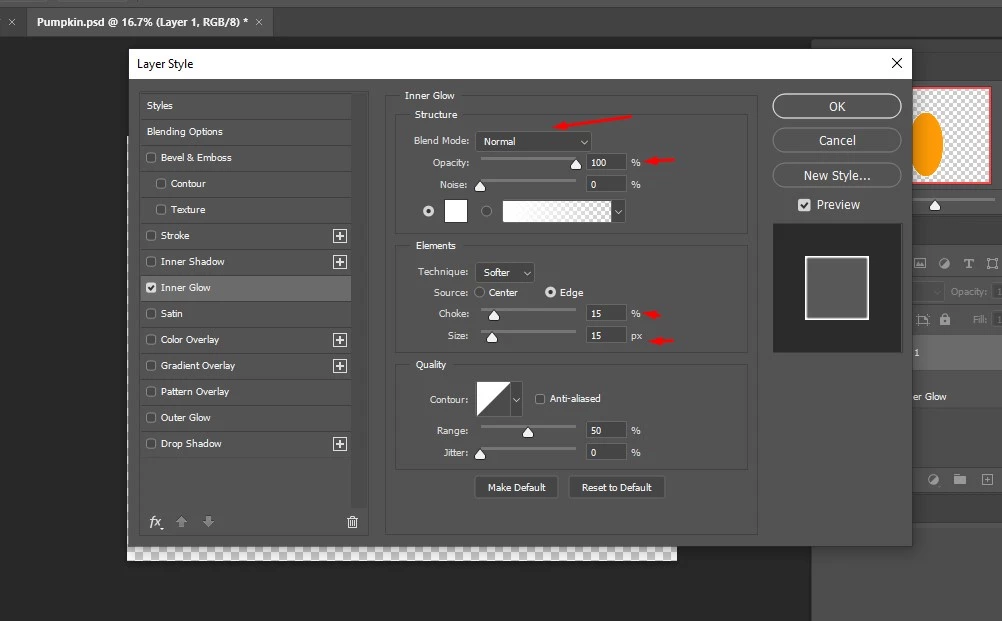
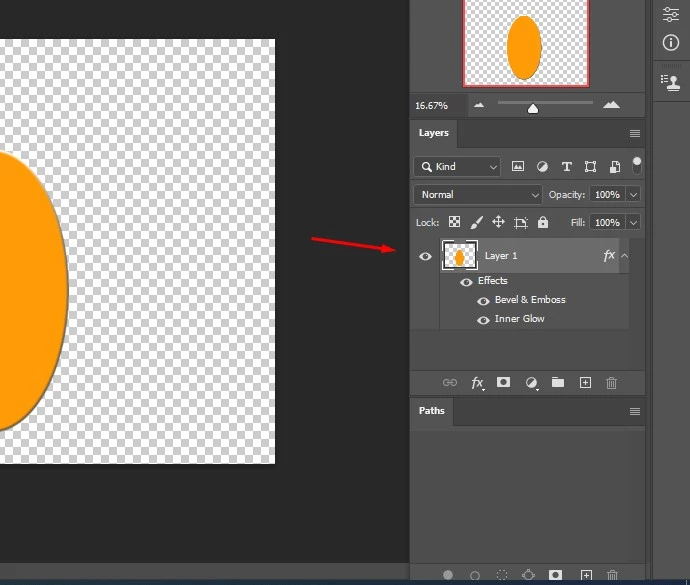
Step 5: Photoshop Inner Glow Setting | Free Pumpkin Drawing
Then we need to go to FX. We will pick Inner Glow and make its blend mode “Normal.” The opacity is then set to 100%. It’s time to bump up the choke and size to 15%.
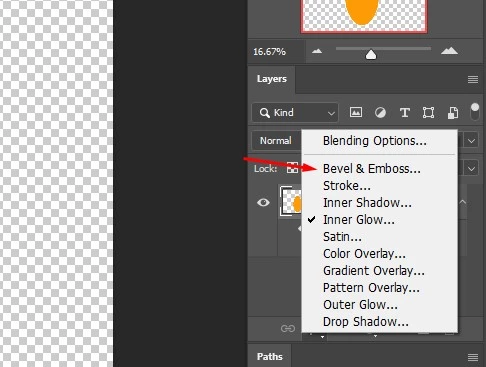
Step 6: Bevel and Emboss Effect to Make A Pumpkin
Now choose Bevel and Emboss. Here you need to make depth 220 %, size 13 px, soften 5 px, at the same time highlight mode opacity 100%, and last shadow mode opacity 55%.then click ok.

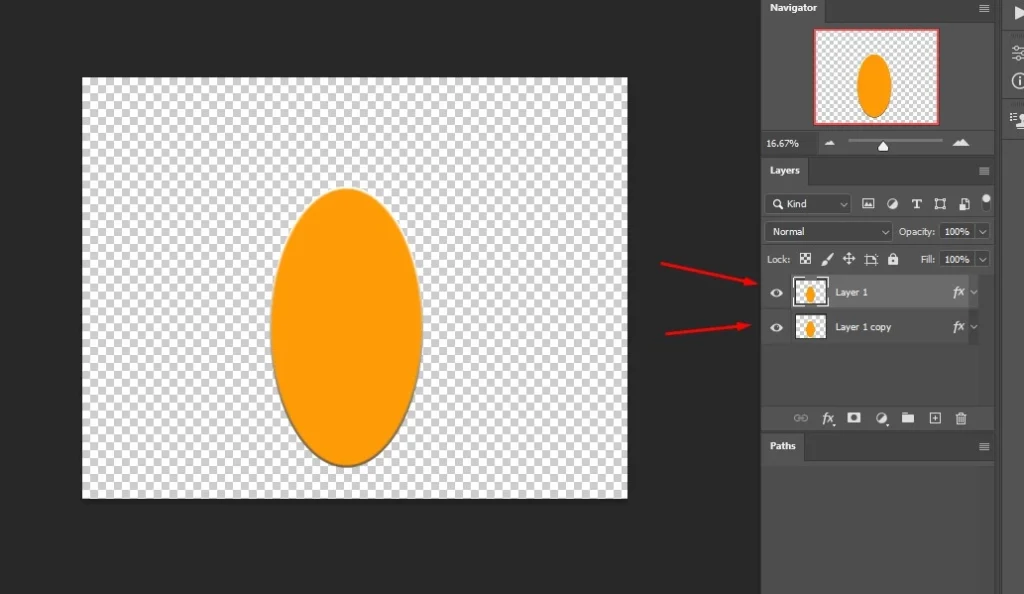
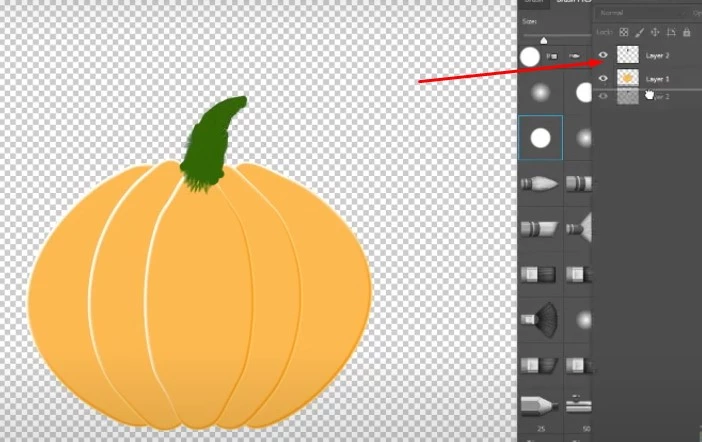
Step 7: Drag the Layer to the Thumbnail
Now, drag the layer to the thumbnail to create a new one, so you need to duplicate the layer.
Step 8: Duplicate the Layer | Pumpkin Drawing Ideas
Ctrl+J will duplicate the layer. Now you have two layers and the choice to keep the first layer on top.
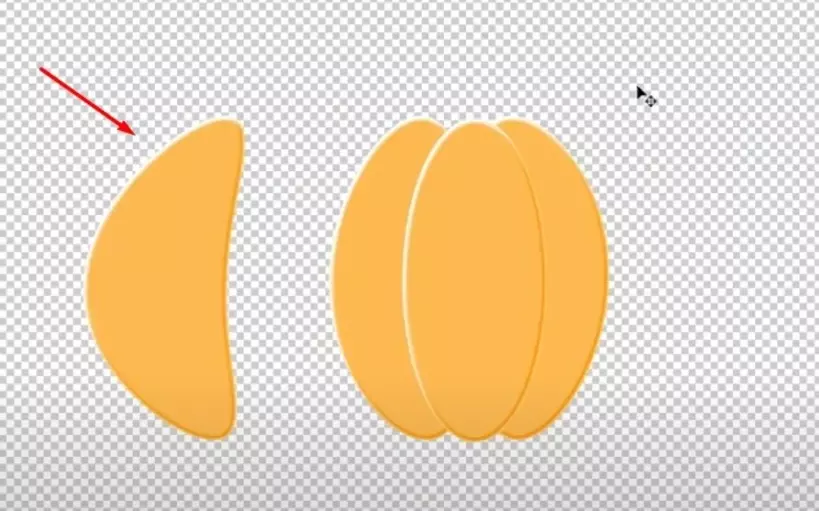
Step 9: Distort the Pumpkin Shape
The next step is to go into the filter, where you will find a distortion, search for the word shear, and click select.
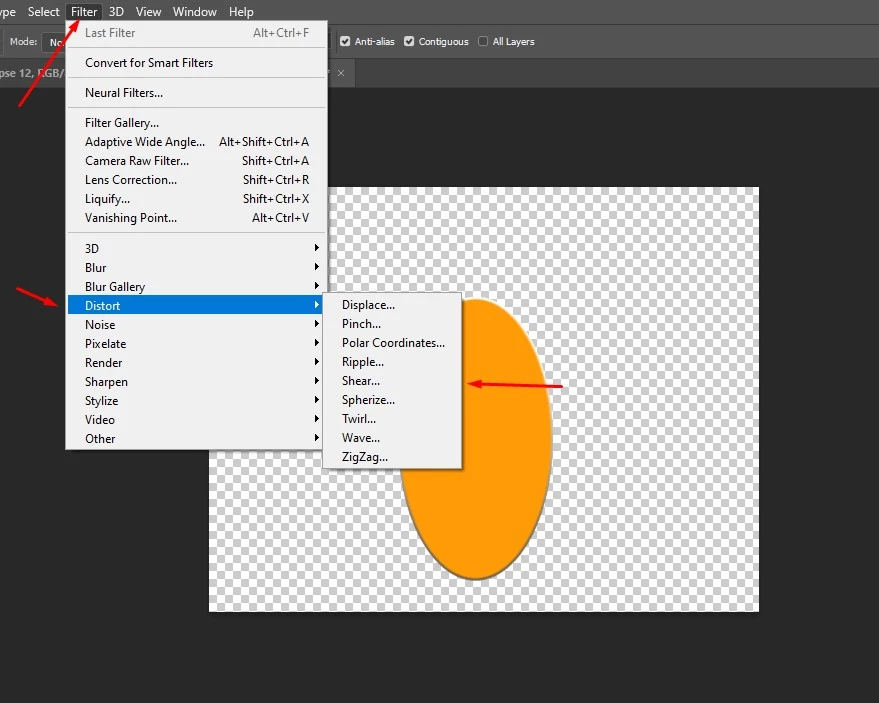
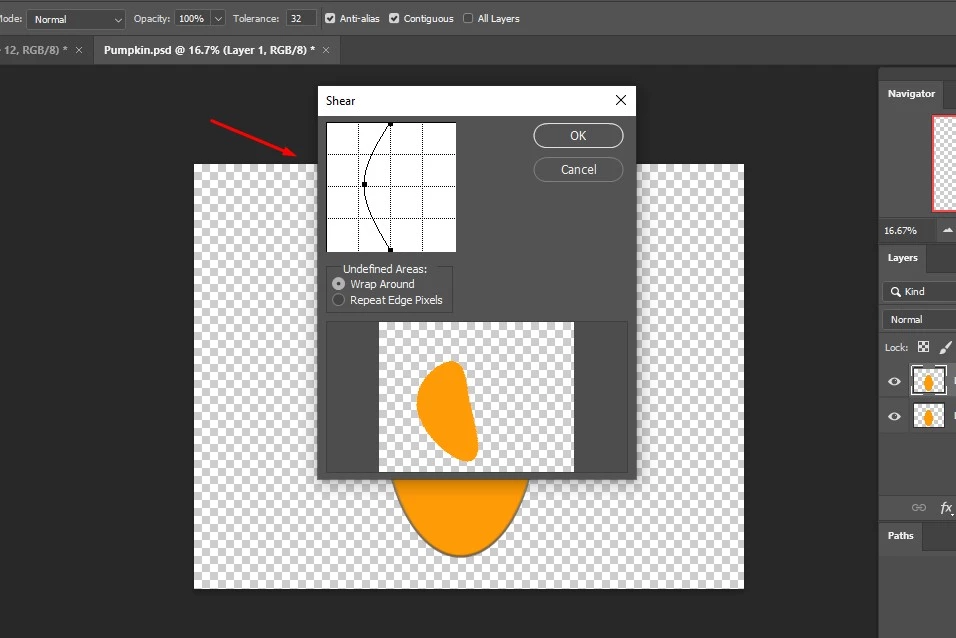
Step 10: Selecting the Shear Word
The new interface will appear after selecting the shear word. You have to blow it to the left, then click ok.
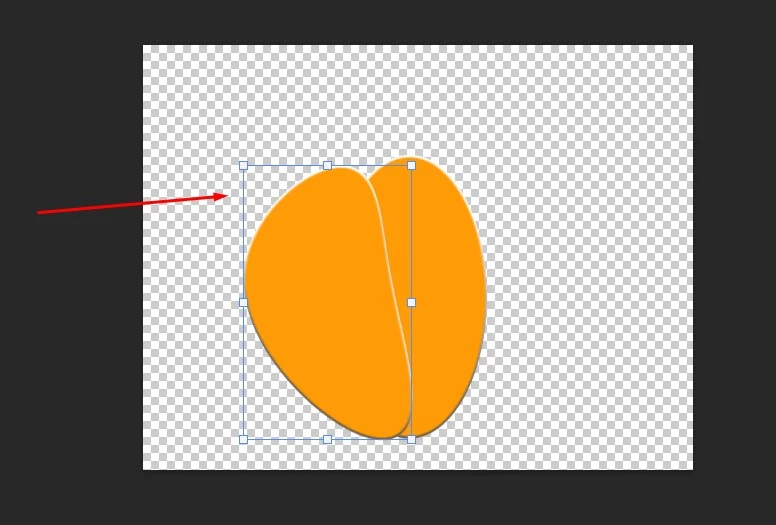
Step 11: Fix the Pumpkin Slide | Simple Pumpkin Drawing
Now, as you can see here, another shape slide comes here, so in that case, you can press Ctrl + T to fix the slide.
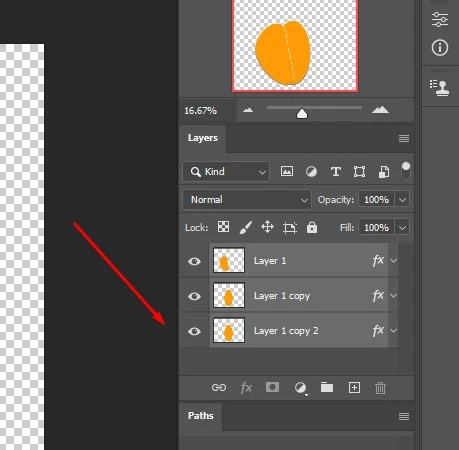
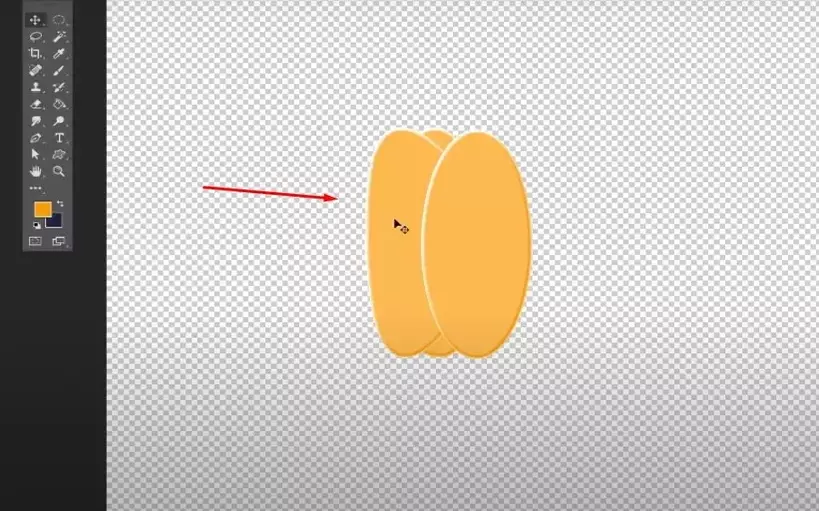
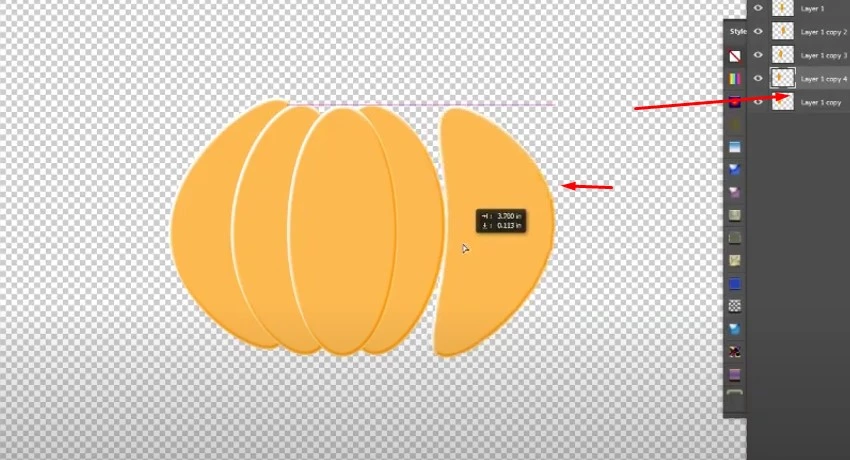
Step 12: Duplicate the Layer One More Time
Duplicate the layer one more time, then go to edit, find transform, and click the 180-degree angle to flip it.
Step 13: Pull Around the Pumpkin
Then it will come with another slide, and then you pull around, and it will start to look like a pumpkin.
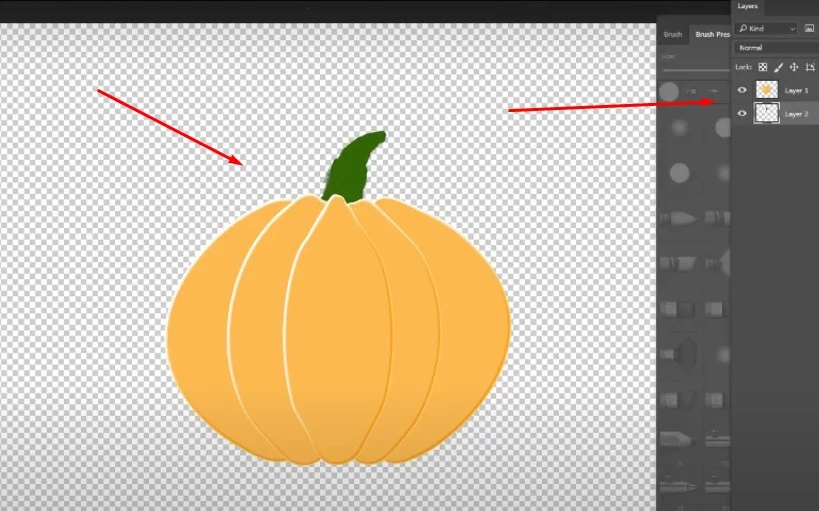
Step 14: Duplicate the Layer Again
We will repeat the layering process as we have done previously. Therefore, we will duplicate the layer again.
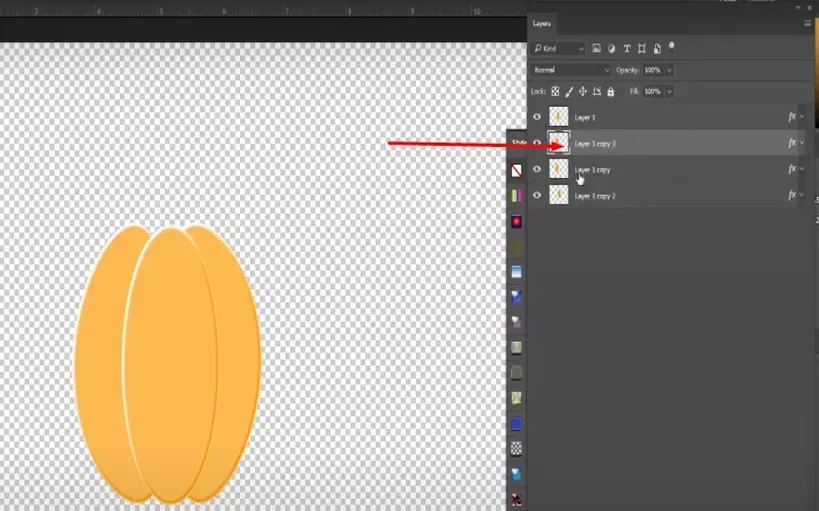
Step 15: Pull Out the Pumpkin Shape a Little Bit More
After duplicating the layer, go to ->filter, then select -> distort ->shear. Now it will pull it out a little bit more.
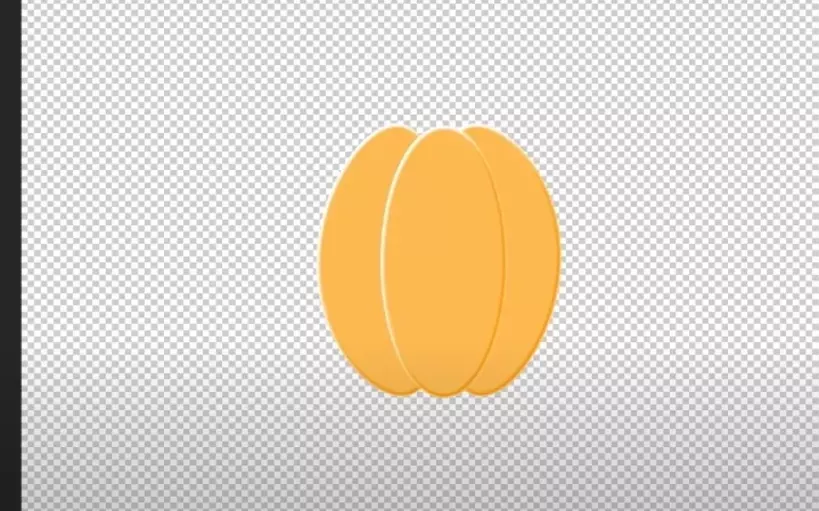
Step 16: Rotate 180 Degrees to Flip the Slide
We will make another layer for a duplicate. Then we will go to Edit -> Transform -> Rotate 180 degrees to flip the slide. Now it looks like a decent pumpkin.
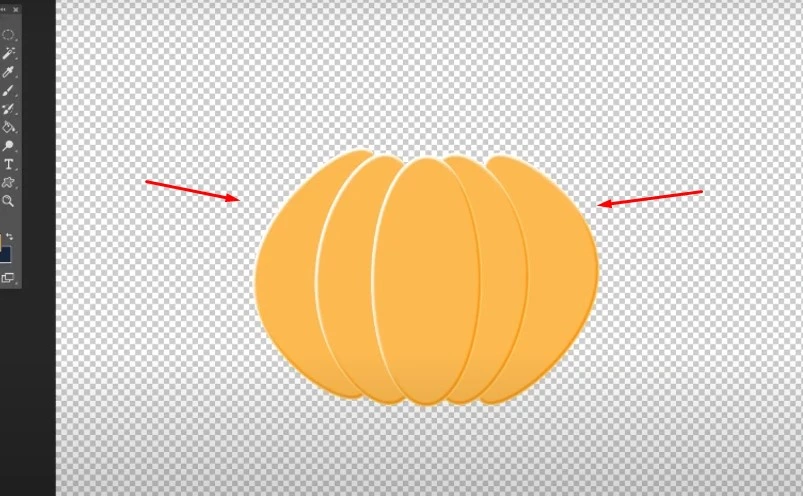
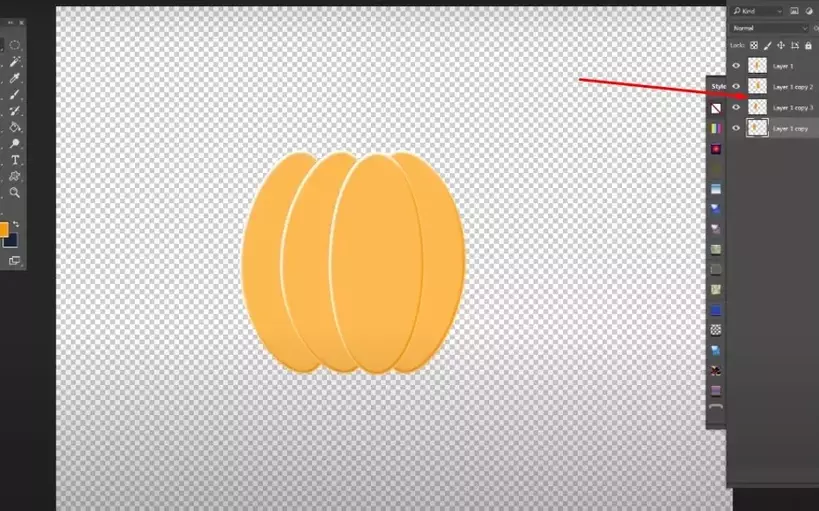
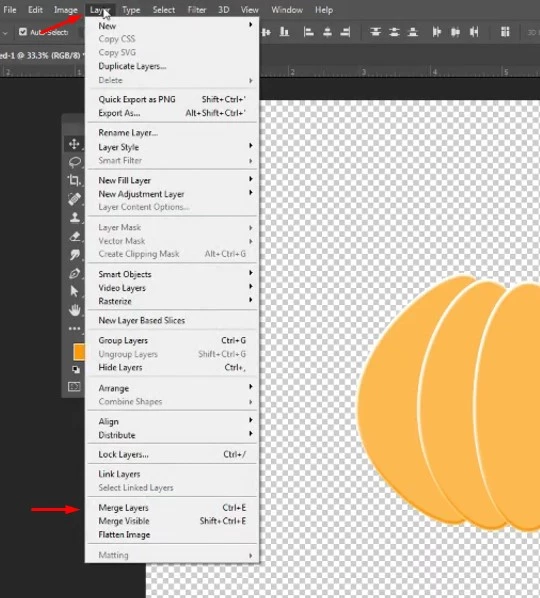
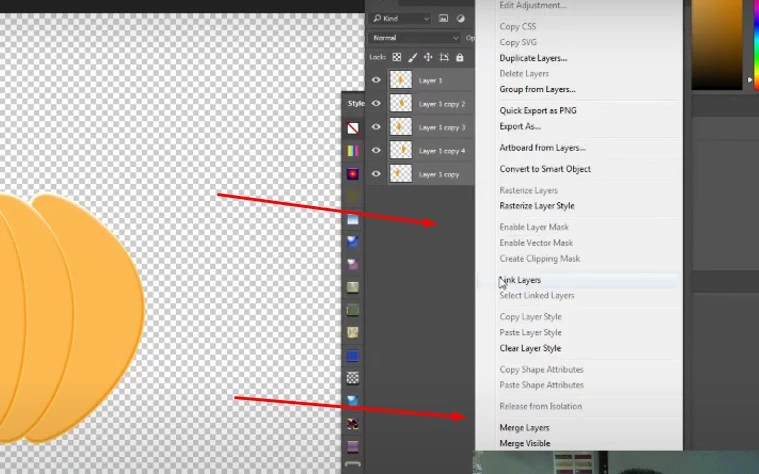
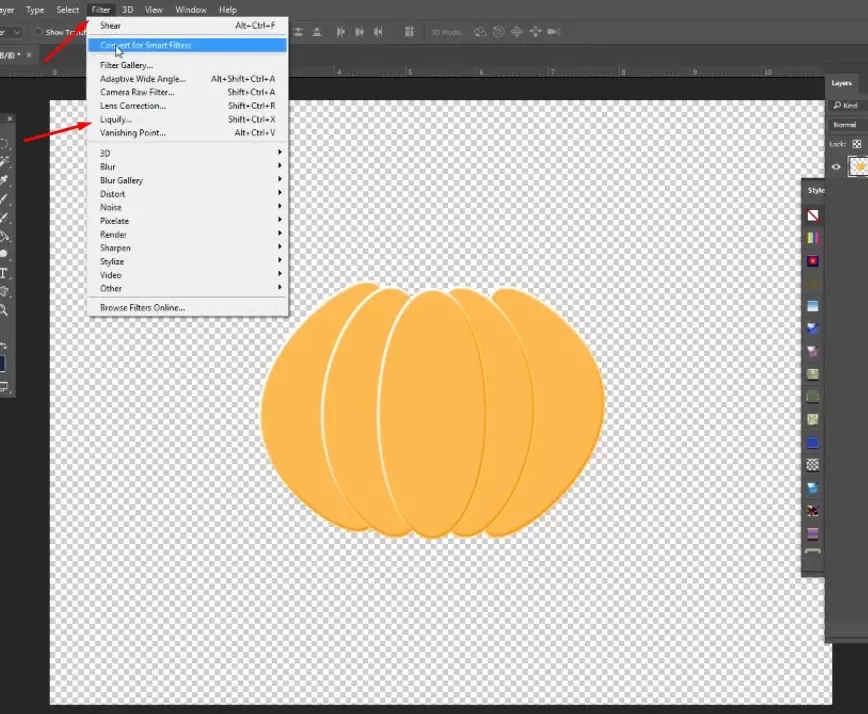
Step 17: Merge the Layer | Easy Pumpkin Drawing
Then go to the layer and look at the lower part. You will find merge layers, or you can click the right mouse button on the layer slide part. Then, you can also find the margin layer by using a shortcut.
Step 18: Liquefy all the Layers | Pumpkin Drawing for Beginners
After merging all the layers, it will all be in one layer. We need to liquefy all the layers, which you will find under the filter option in Photoshop.
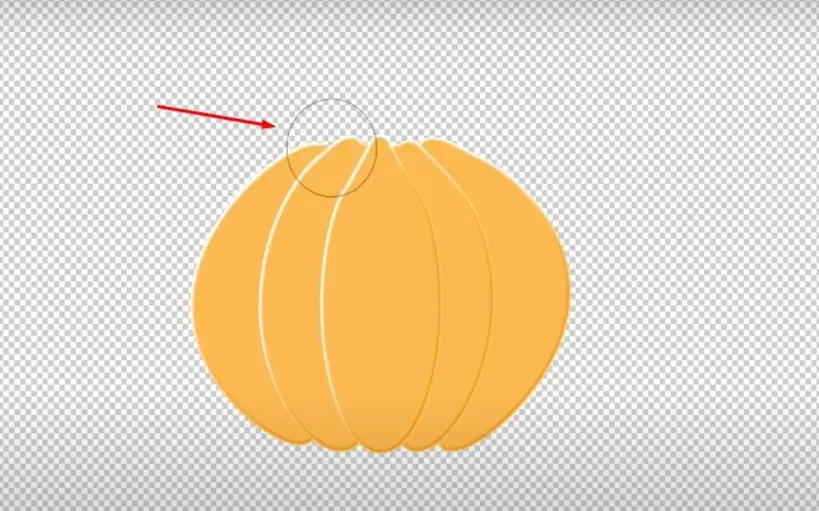
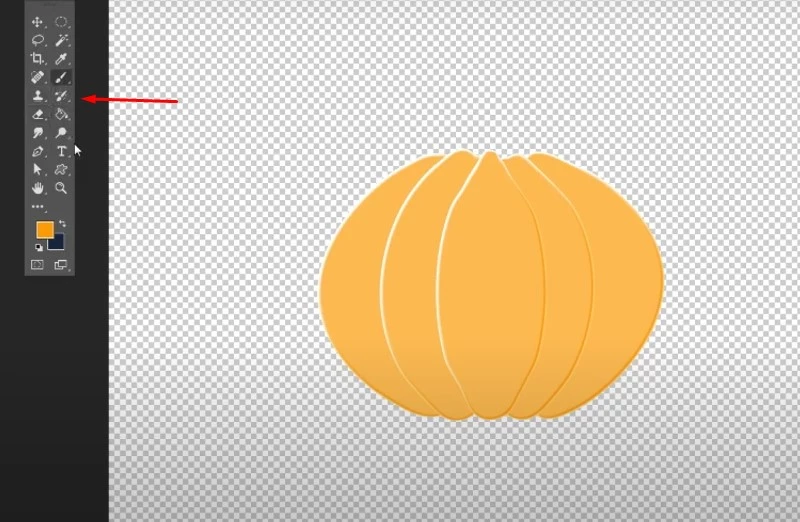
Step 19: Brush the Tool to Change the Pumpkin Shape
After clicking the liquify, you can use the brush tool to change the pumpkin shape. And play around with it until you are satisfied with the shape and look of the pumpkin.
Step 20: Make a Stem for the Pumpkin
To make a stem, you must first click the brush tool and pick a green color.
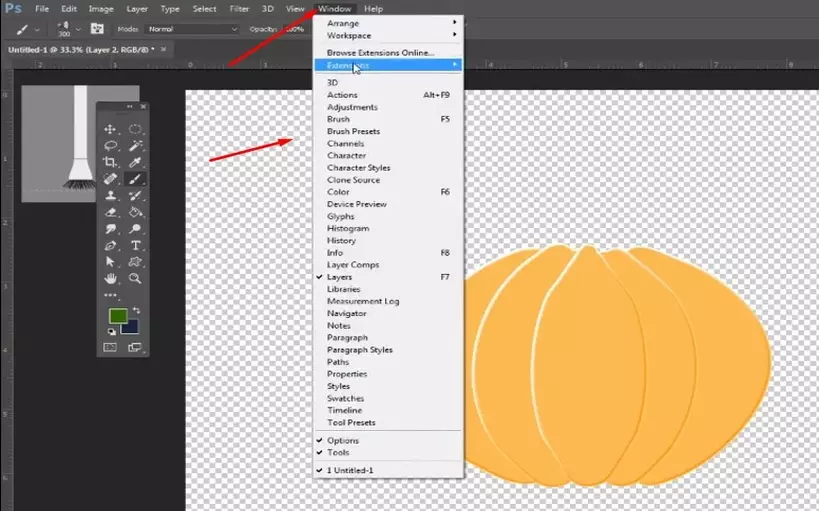
Step 21: Choose Brush Presets from Windows
Then go to Windows and choose brush presets.
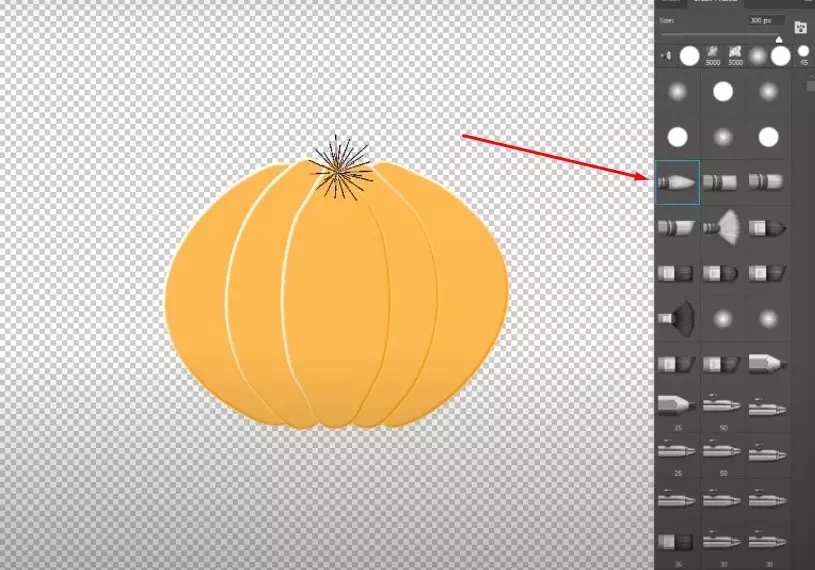
Step 22: Using a Brush for Stem Shape
You will find here all kinds of brush tools. Choose this brush that points to the image, then rub it in the middle of the pumpkin to give a stem shape.
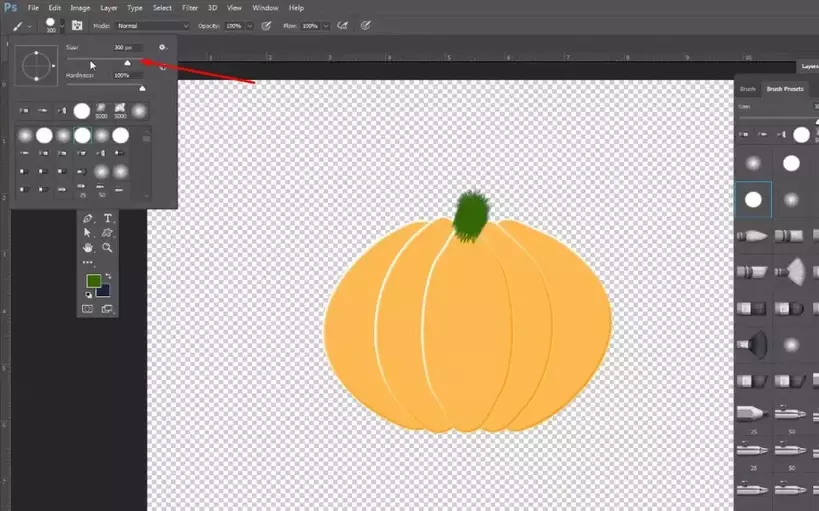
Step 23: Change the Size According to Your Requirements
After rubbing the middle of the pumpkin, it may look like this. We want the stem size to be a bit longer. In that case, we can change the size according to your requirements.
Step 24: Curbing to Change the Layer Serial
After curbing a little bit, we could stem the height underneath. To do that, we can change the layer serial.
Step 25: Make a Perfect Pumpkin Drawing Shape
After changing the layer serial, the stem will go underneath the pumpkin, which makes a more beautiful and accurate-looking pumpkin.
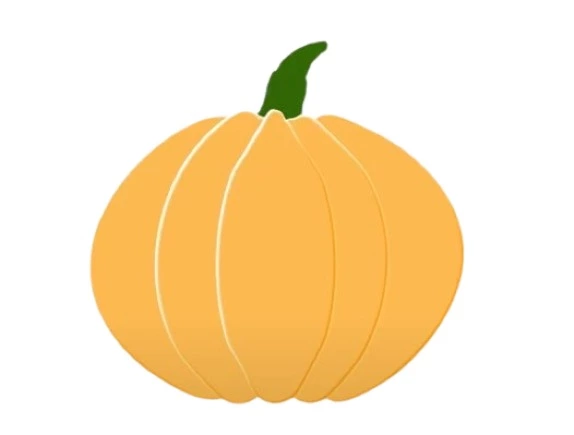
Final Result | Draw a Pumpkin Drawing in Photoshop
Now, this is the final result of the pumpkin. As you can see, we manually made the pumpkin using traditional Photoshop. Consequently, you can do a simple pumpkin drawing with any traditional Photoshop tool. I hope you enjoy the tutorial and learn some basic techniques from it.
Check out Our Latest Photoshop Tutorials:
- How To Create Custom Shapes in Photoshop
- How To Manipulate Text On Face In Photoshop
- How To Create a Snowflake Shape Border In Photoshop
FAQ | How to Draw a Pumpkin Drawing in Photoshop
Q. How Can You Turn an Image into A Pattern for A Pumpkin?
Make a picture file. Open the digital file for the picture you wish to use as a stencil for carving pumpkins. Then, resize the image and measure the height of the carving surface of your pumpkin. Halloween pictures with a measuring tape. Trace the image’s outlines after printing the image in black and white. Lastly, erase the background of the image.
Q. How to Draw a Pumpkin Easily?
First, create a circle. Then draw two dots, one at the top and one at the bottom. The next step is to triple-connect the dots. Draw two curved lines at the top. Then connect the two lines with a circle and draw a wavy line representing the vine. Following this simple step can help you draw a pumpkin easily.
Struggling to draw a pumpkin in Photoshop? Don’t worry! This step-by-step guide will show you how to create stunning pumpkin designs with ease. Perfect for beginners, these simple techniques will help you master pumpkin drawing in no time. Let’s get started!