
Can I make white skin black in Photoshop? Yes. Hi there. Today we will learn one less important but technical editing of the human photograph. We also include how to change skin color in Photoshop CC. The important part is, how we can do it with less effort and perfectly. Let’s get started.
Step-By-Step Guide | White Skin Black in Photoshop
The process is the way by which you can do the thing you want. We do not find any good reason for making white skin black processes. So, why are we discussing the process?
That is because there are several ways to do the job naturally. We may not go for all of them. But we will go through easy and effective ones. With this, you can also learn how to turn skin in Photoshop.
Let’s explore these techniques step by step to ensure a smooth and realistic transformation!
- Using Blend Mode
- By Curves Adjustment Layers
- Adding Levels Adjustment Layers
- Blending Solid Color Adjustment Layer
- With Brightness/Contrast Adjustment Layer
- Multiple Adjustments Together
01. Using Blend Mode
The use of Blend mode is the easiest and most convenient one. It is good for most of the images that are not too bright. The use of Blend mode is the easiest and most convenient one. You may require more adjustments or additions that will not keep the uniqueness.

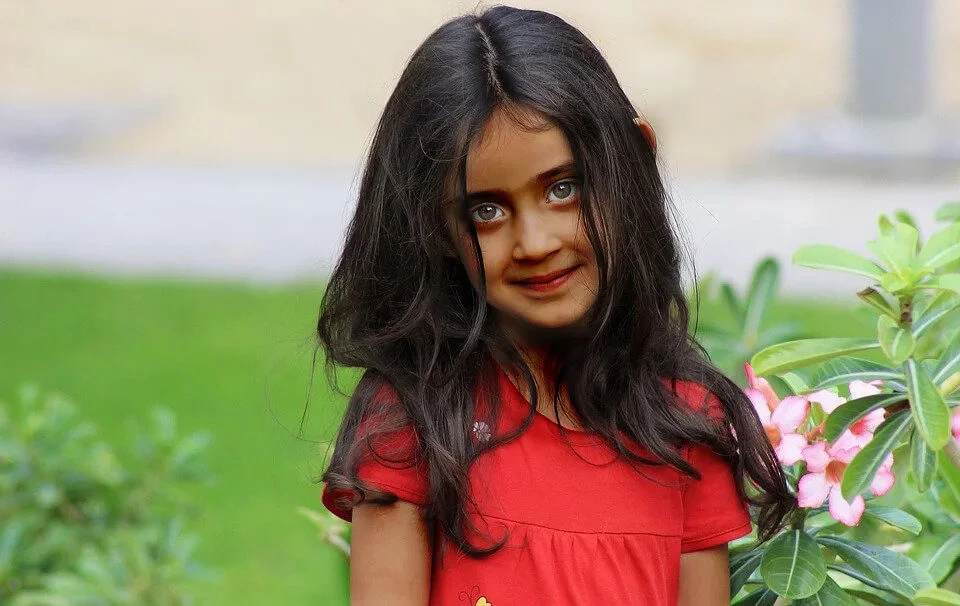
Here we are taking a photograph of a cute girl child in white skin. For the procedure, we opened the image in Photoshop and made a copy. We are naming it ‘Blended’. Selecting the Blended layer we are changing the Blend Mode from Normal to Multiply.
However, the dark shade affected the whole image. So we are taking a mask in the Blended layer and using Ctrl+I for Win or Command+I for Mac to invert the selection.
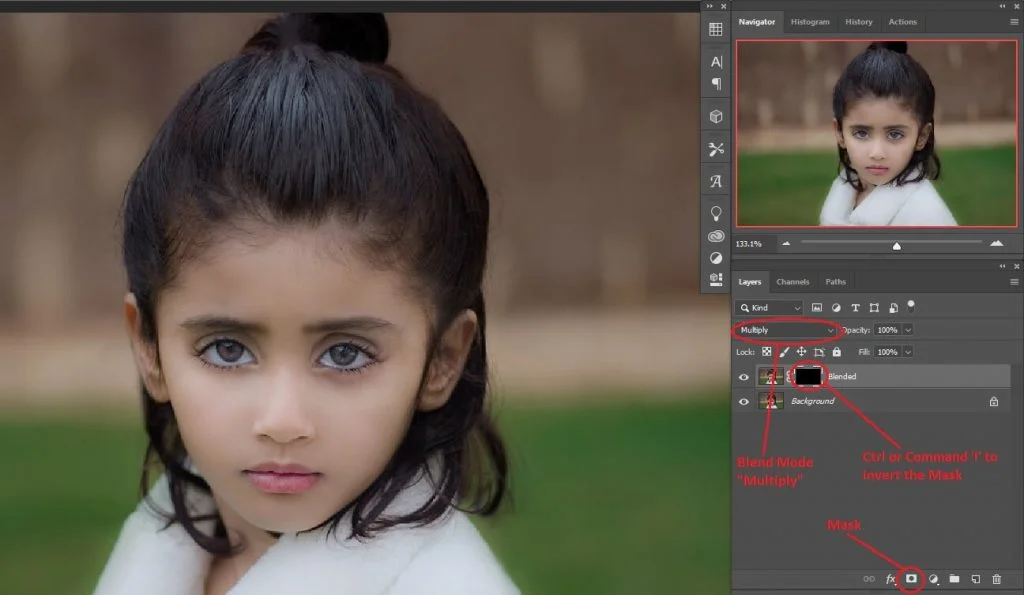
Selecting the Mask we will use the soft round brush. For the image, we are using the ‘Blend Mode’ Normal, Opacity 100%, and Flow around 20%. With the foreground color ‘White’ we are brushing over the visible skin area only.
We are not brushing over the eyes because we want them bright. You can also leave the lips area but we are not doing that. The photograph of the girl looks naturally black. You can also copy the Blended layer to make the effect more black. Photoshop skin black transformation is amazing, isn’t it?
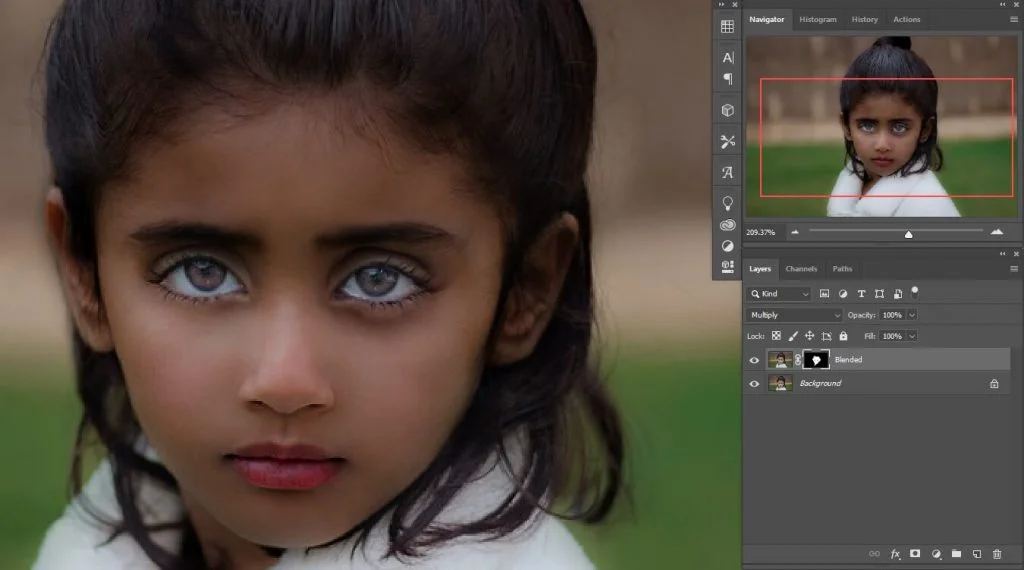
We are happy with the first blending and here is the final result.

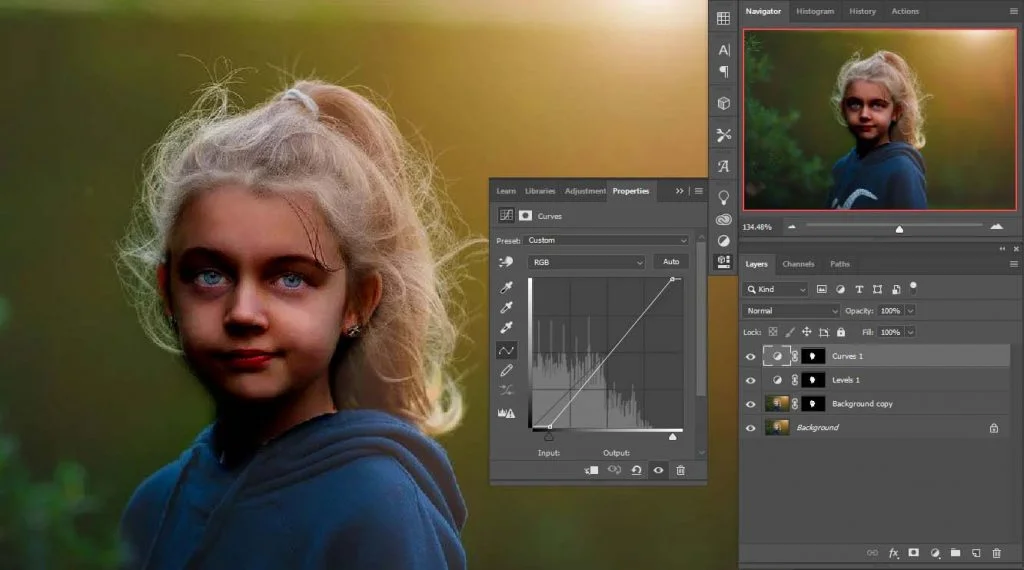
02. By Curves Adjustment Layers
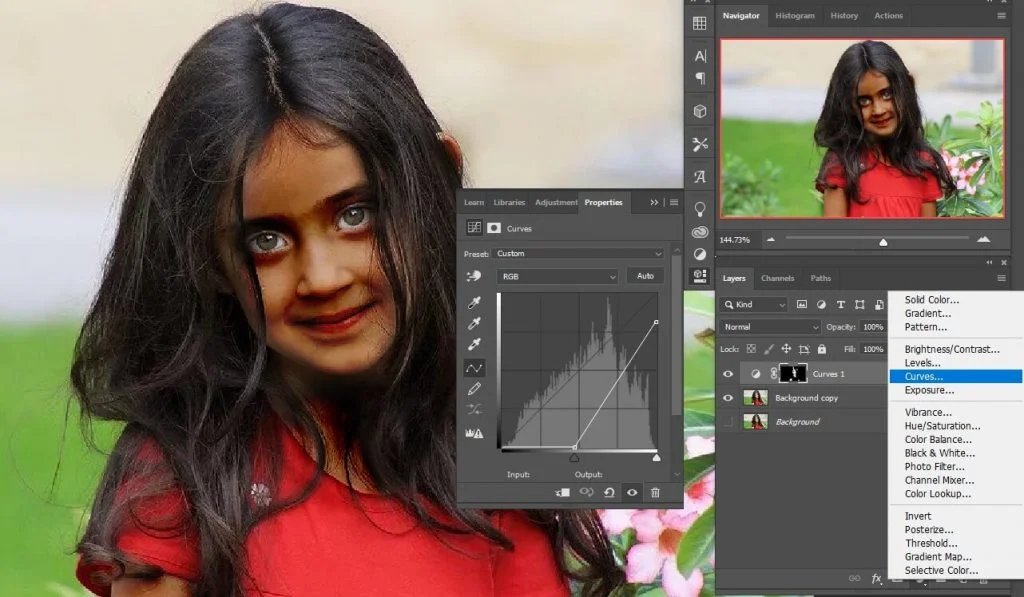
Adobe Photoshop has an amazing feature that is the ‘Curves’ adjustment layer. With this one, you can adjust the brightness, darkness as well as color and get your desired shade. Open an image in Photoshop and copy the background layer in the convenient way you want.
Add a Curves Adjustment Layer and move the line a little. Move the darker portion a little right and the brighter portion a little down. You will get dark shade all over the image. Select the ‘Mask’ from the Curves Adjustment Layer and use Ctrl+I for Win and Command+I for Mac to invert the selection.
With the foreground color White and a low Flow of around 20%, brush over the skin area only. If you made a mistake and brushed over the other areas, no problem. Take the foreground color Black and brush on them.
To change the foreground color use the keyboard key ‘X’ to toggle between Black and White. If the colors are different, use the keyboard key ‘D’ for the default colors which are Black and White.
Well, this time too, do not brush over the eyes because they are as good as the original ones. Check out the final image. The background of the image is as before only the skin color is dark. Also, this is another process of black skin tones in Photoshop.
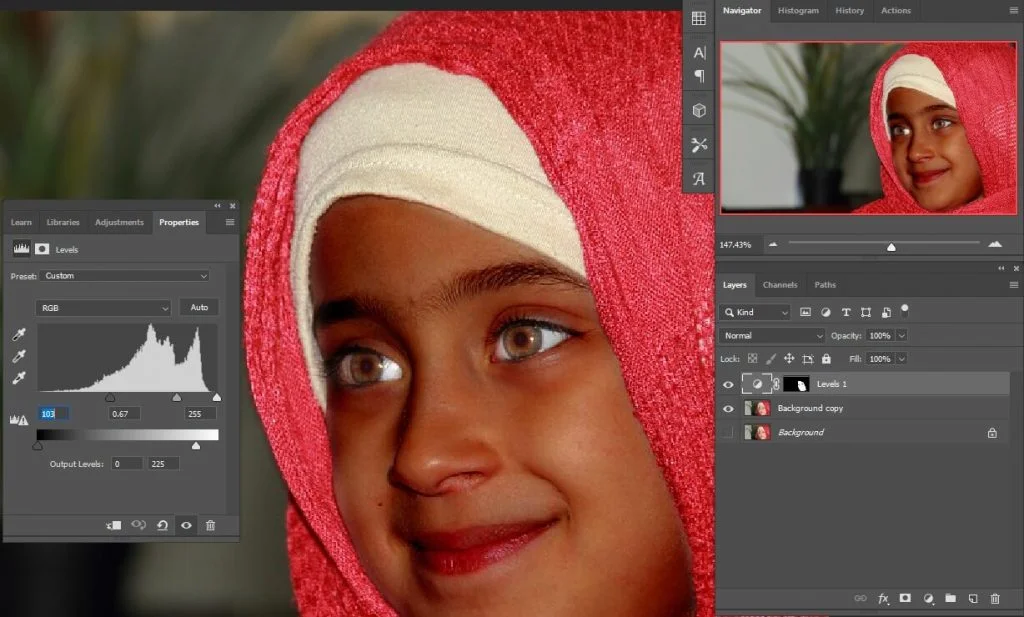
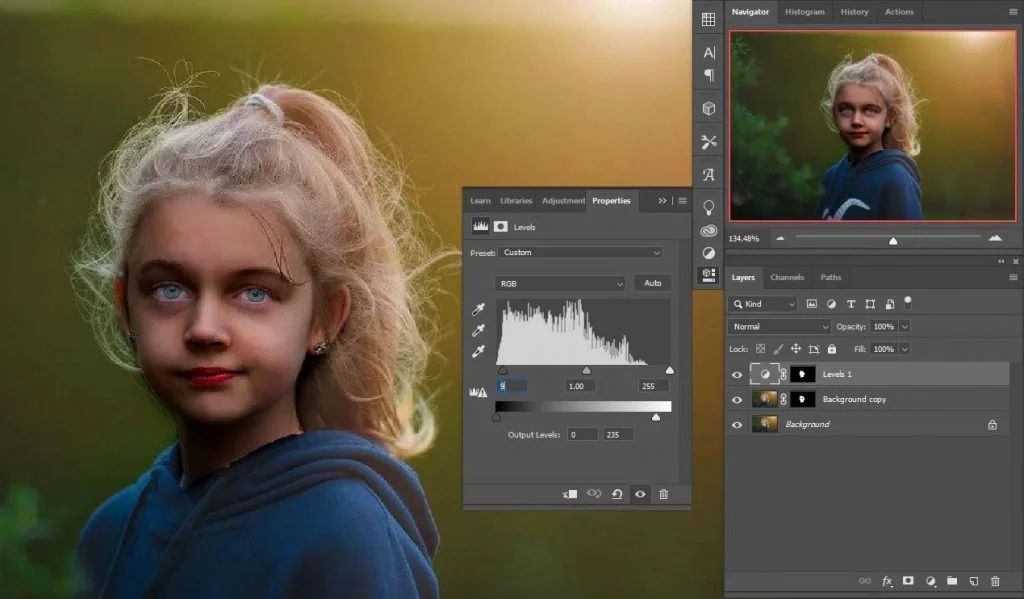
03. Adding Levels Adjustment Layers
We have gone far enough to mention each step in detail. So we will go in brief from now on. With the image opened in Photoshop, we have copied the background and added a Levels Adjustment Layer.
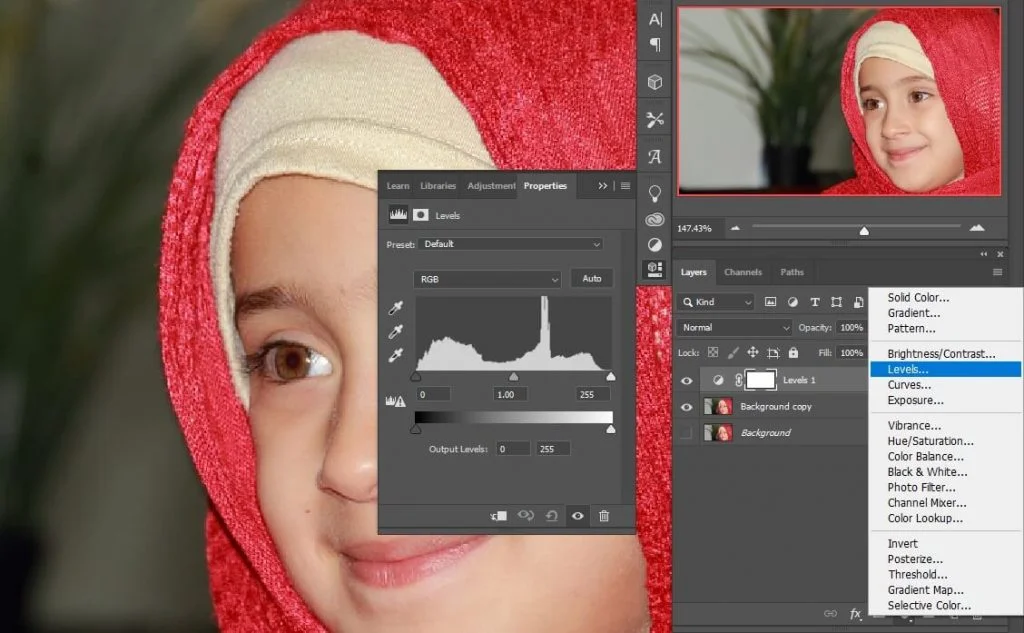
We have changed both the adjustment bars a little (See below image) and stopped at the point when satisfied. Then we selected the ‘Mask’ and inverted it. With the soft round brush and low Flow, we have brushed over the face area only. Make sure the foreground color is White and the blend mode is normal. Leave the eye area as before.
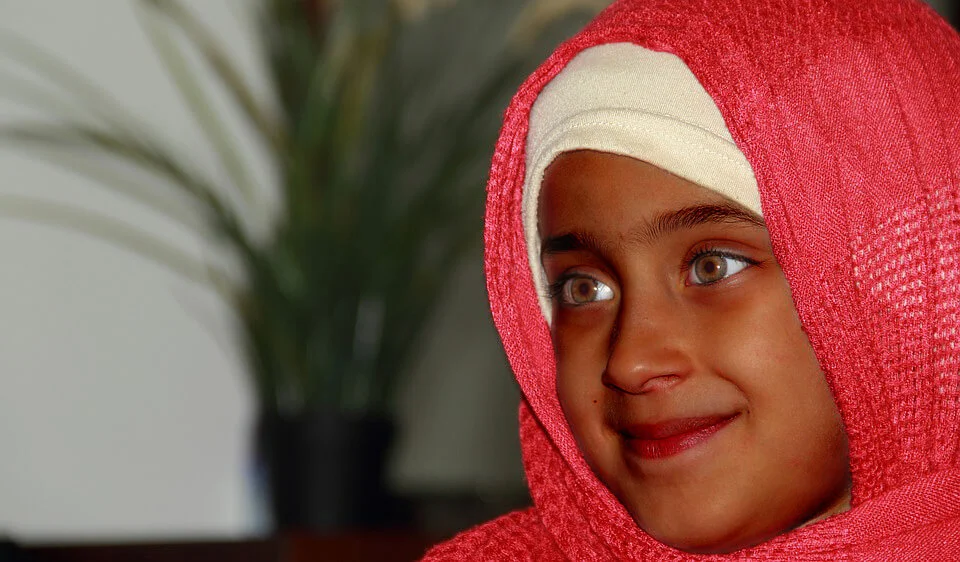
We have completed the job. Save the image to any format you need. But, keep a copy saved in the ‘PSD’ format. Because, if you want to change anything in the image or inside the process, you do not need to do them all over again.
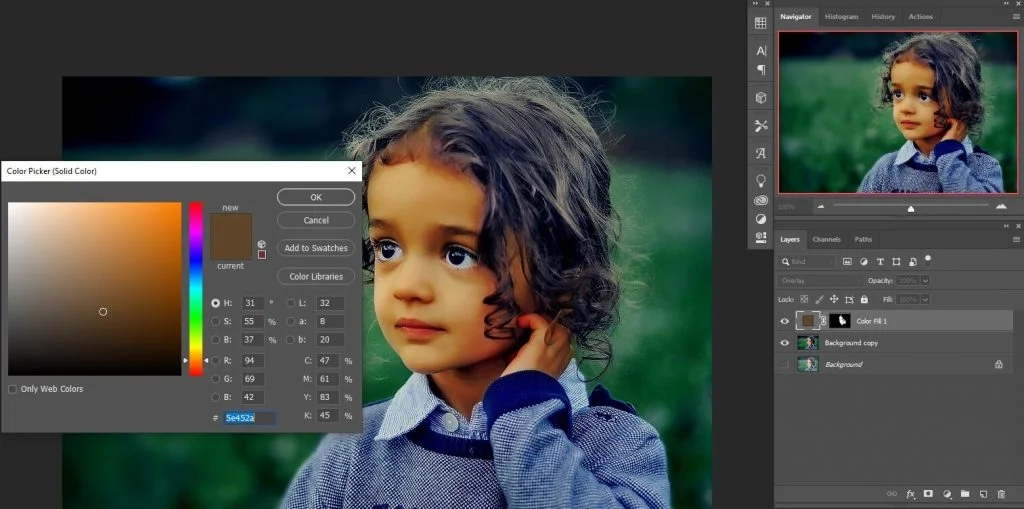
04. Blending Solid Color Adjustment Layer | White Skin Black
Another option of Blend mode but a little different. Here, we use a solid color darker tone. With the image open and copying the background, we are adding a Solid Color Adjustment Layer. The image we are using may require two layers of this.

Let’s choose a darker shade and select the Mask. Ctrl+I for Win or command+I for Mac to invert the Mask. Brush over the skin with the soft round brush in low flow. A face appeared out of the darkness.
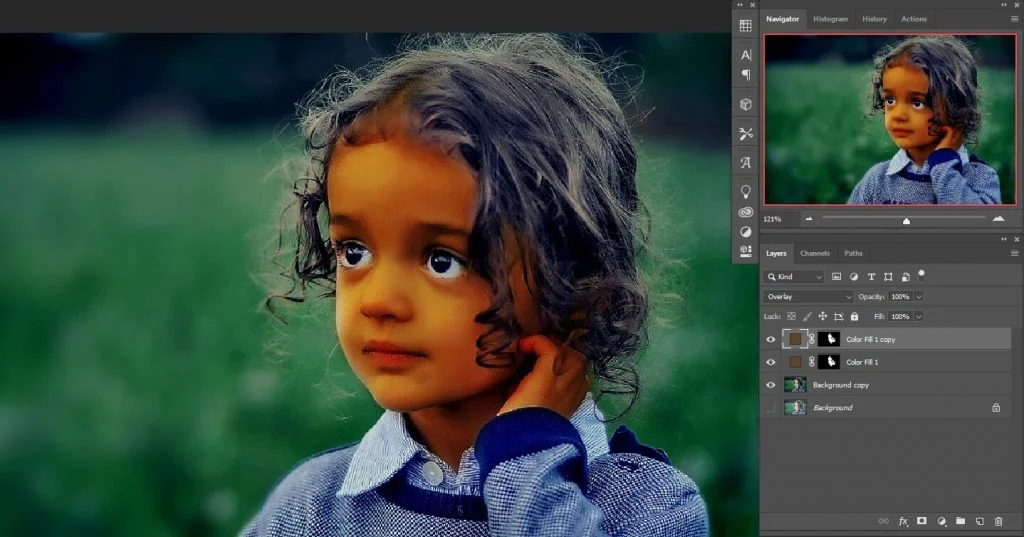
For the image, we are copying the Solid Color Adjustment Layer with the mask to make the skin tone even darker. The background is fine, the skin tone is dark, and still a beautiful little girl.
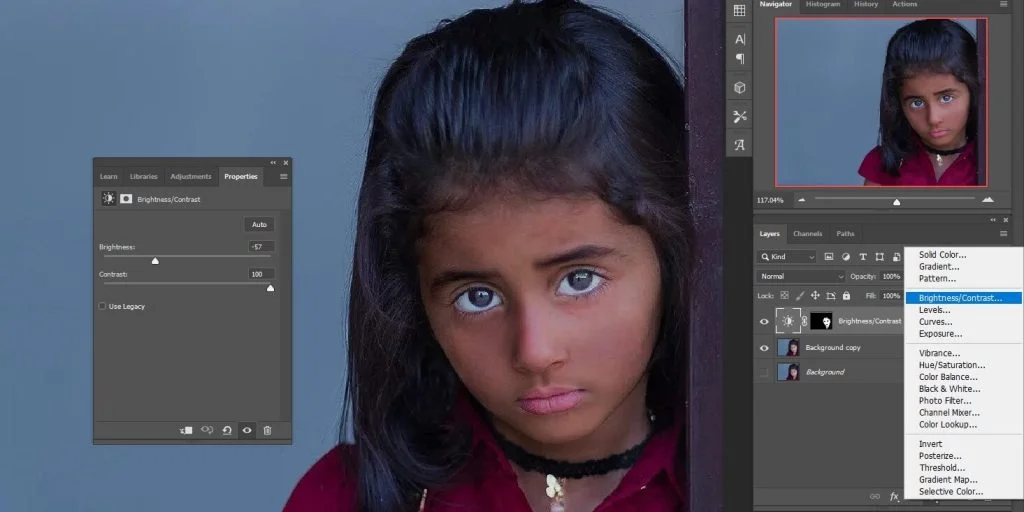
05. With Brightness/Contrast Adjustment Layer
The brightness/Contrast Adjustment Layer is no different than the above ones. The main goal is to darken the image and then mask it. With the image copy, we are using a Brightness/Contrast Adjustment Layer and moving the slider for contrast to the right.

As for the brightness, we are moving it to a little left. And, this makes the whole image darker. With the inverted mask, we are brushing over the skin only to get a dark tone. The skin reveals natural black and the background is as it was before.
06. Multiple Adjustments Together
In this, we need to add several darkening methods to make the skin black. Generally, we do not need to apply multiple ways for skin darkening but this is an option. You can apply more if you want. Just make sure the natural beauty stays attractive. Do not exaggerate any settings or you may lose the perfection.

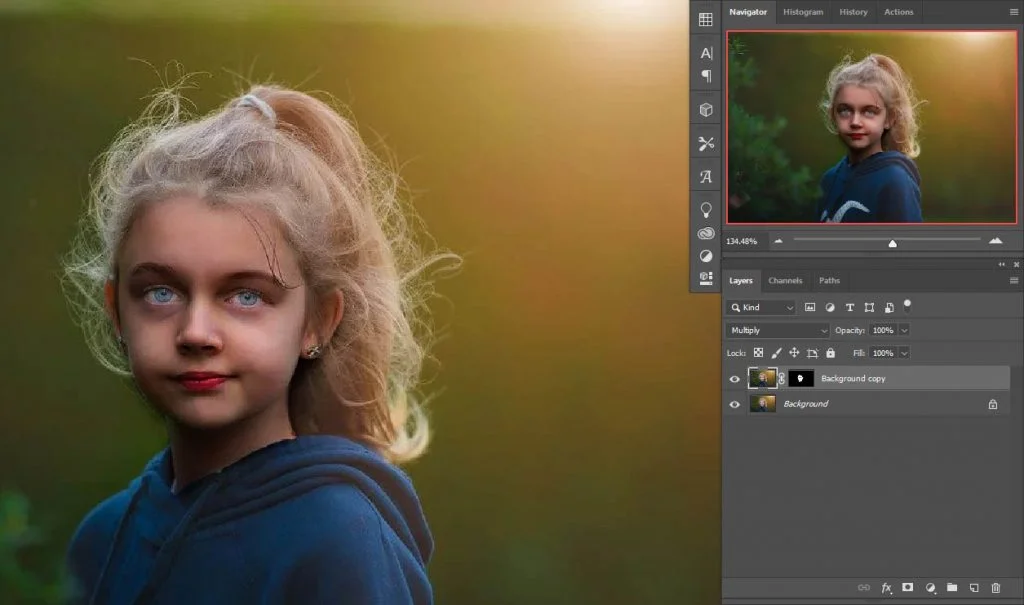
For the procedure, we are taking an image of a little white girl. Loading the image in Photoshop, we are using the Blend Mode ‘Multiply’. To do that, we copy the image and select the copy layer, we are changing the Blend Mode from normal to multiply.
By pressing and holding the Alt for Win or Option for Mac we are taking a mask. With the soft round brush and foreground color white, we are brushing over the skin area only.
Next, we are taking a Levels Adjustment Layer and changing the settings a little bit. We will not make the image dark enough otherwise it may not look good. As for the Mask, we will copy the mask from the layer below. To do so, press and hold Alt for Win or Option for Mac and click and drag the masking from one layer to another.
Now we are adding a Curves Adjustment Layer and adjusting the settings a little darker. As before we are copying the mask from the layer below.
This shows how to use multiple adjustment layers at the same time. We have shown you some of the adjustments. You can apply other options as well that suit the image.
Final Thought
Turning white skin into black is a Photoshop editing process to apply to the photographs only. You will see no resemblance to the real world with the change. How to edit dark skin in Photoshop? The process is a little further. The Almighty Creator has created every single creation the most beautiful and unique. Skin is just the outer color. The real beauty lies within the mind.
Read Our Latest Articles-
- Professional Image Masking Service From Clipping World
- Midjourney AI Software Review
- 61+ HD & Free Aesthetic Wallpapers For Professionals
FAQs
How To Make White Skin Black in Photoshop?
Several ways you can follow to make white skin black in Photoshop. For example, you can use the Blend Mode, Curves adjustment layer, Hue/Saturation adjustment layer, etc. By changing the settings a little bit and adding the inverted mask, you can make white skin black.
How Long Does It Take To Make White Skin Black?
The procedure does not take long for the skin only. You can do the job within a minute. But if you want to match the skin tone with the background to create a great combination, it may require enough time.