
Swap body in Photoshop is an image editing process that allows you to change the subject body with another one. Welcome to today’s blog. In this tutorial, we will learn one beautiful trick to make your photograph stunning and attractive.
The procedure was the easiest & most convenient. Unlike that one, the body swap is a much more complicated process. So, how do Photoshop ahead onto another body? Follow the steps properly to learn the process and you will have as you want in images.
Swap Body in Photoshop Editing Process
- Program for Editing
- Opening the Images for the Body Swap
- Select the Body and the Head
- Copy Head to Another Image
- Place the Head in Position
- Fill the Head Part with Background
- Applying Image Masking
- Adding Curves Adjustment Layers
- Match the Tones
- Save the files.
As already informed by the subject we are using Adobe Photoshop, the most renowned of all. Adobe Corporation is the oldest and richest with the tools and utilities. You can do whatever you want with the image.
From simple transformations to complex ones, no other programs are comparing this. You may find other ones on the web, but this is the best declared by most graphic designers.
We are using Photoshop CC 2019 to perform how to do a head swap in Photoshop elements.
Steps-01: Opening the Images for the Body Swap
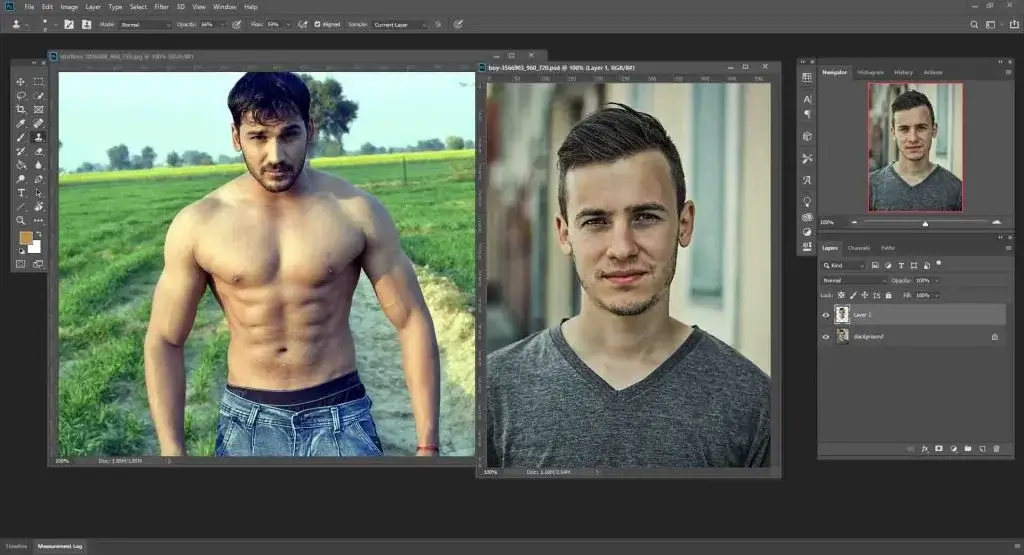
Open both images in Photoshop CC2019 in separate windows. Follow the conditions of the images and compare them side by side. If they are not similar, abort for the next steps. Grab another one that is similar to each other.
Steps-02: Select the Body and the Head

For this project, we are using a face with a simple outlook and a body with six packs. We have taken the images from Pixabay, one of the rich open-source image sites in the world. Well, this is for reference purposes only. But choose your images according to your will.
Select the Head with a convenient tool you like, such as the Pen Tool, Quick Selection Tool, Lasso Tool, etc., and copy it to another layer. Press Ctrl+J for Win or Command+J for Mac to make a copy.
Then, use the Clipping Path service or Background eraser tool for the operation. We are using the Quick Selection Tool for convenience.
Steps-03: Copy Head to Another Image
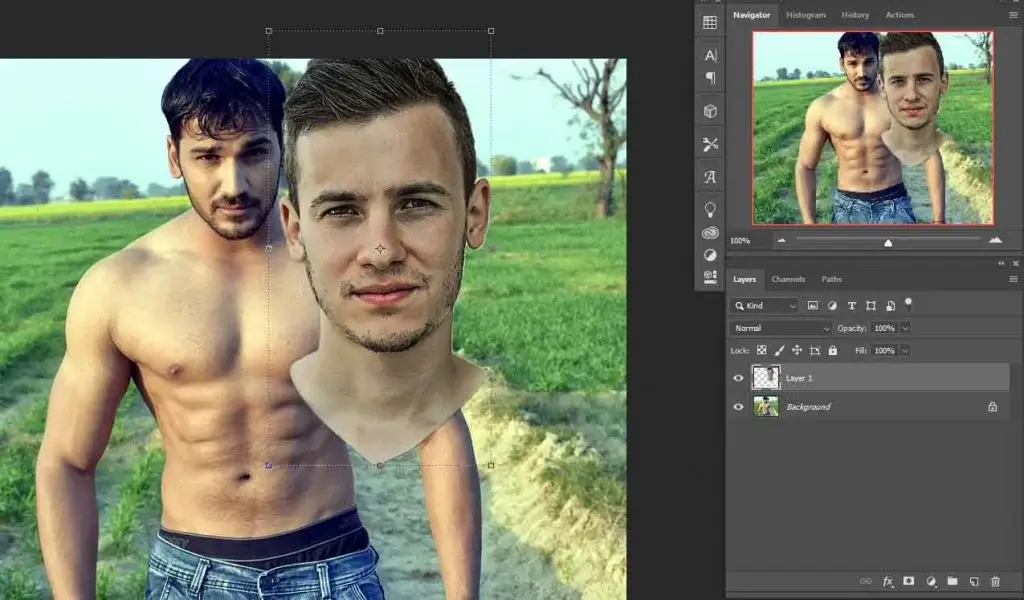
We select the head of an image and place it on another one in proper rotation. You can copy with Ctrl+C for Win or Command+C for Mac and paste with Ctrl+V for Win or Command+V for Mac. You can also click and drag the Head layer to another image and drop it over. This way we will also learn how to swap faces in Photoshop.
Steps-04: Place the Head in Position
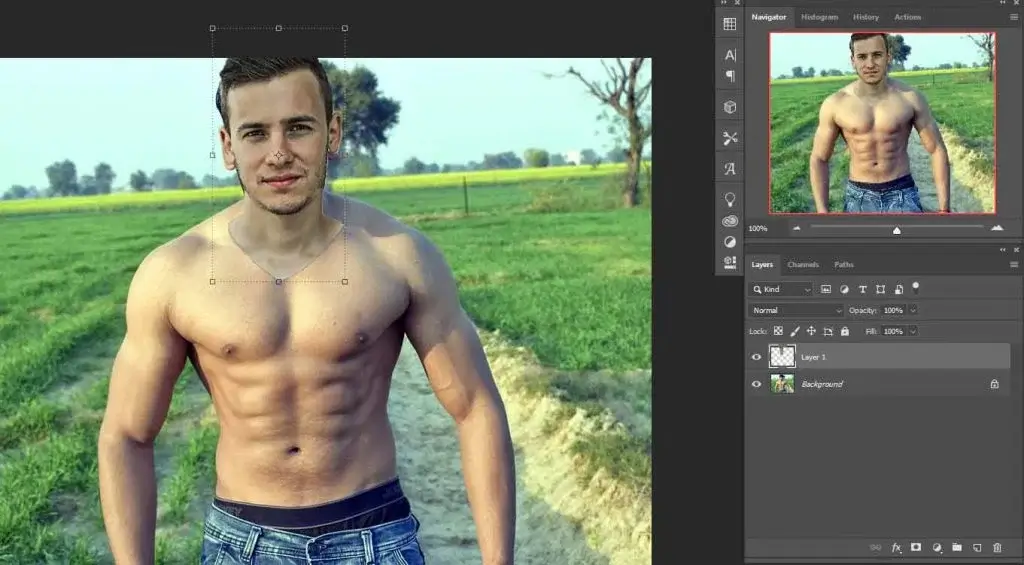
To place the head properly, we have decreased the opacity to 50%. After placing we have increased the opacity again to 100%. You can change the Head layer into a smart object so that it does not pixelate during resizing. You may need to make it bigger and smaller a couple of times to get the proper match.
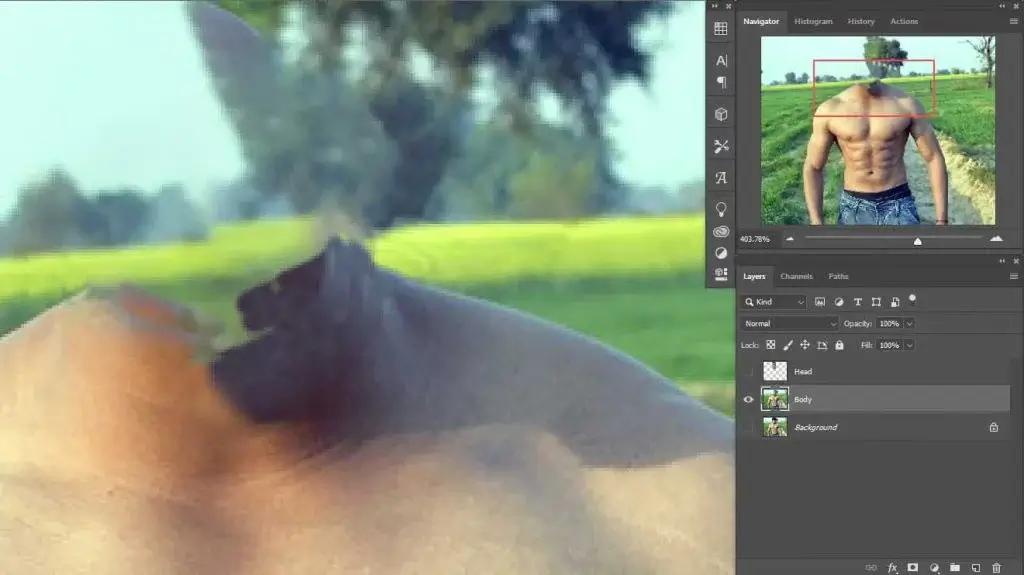
Steps-05: Fill the Head Part with Background
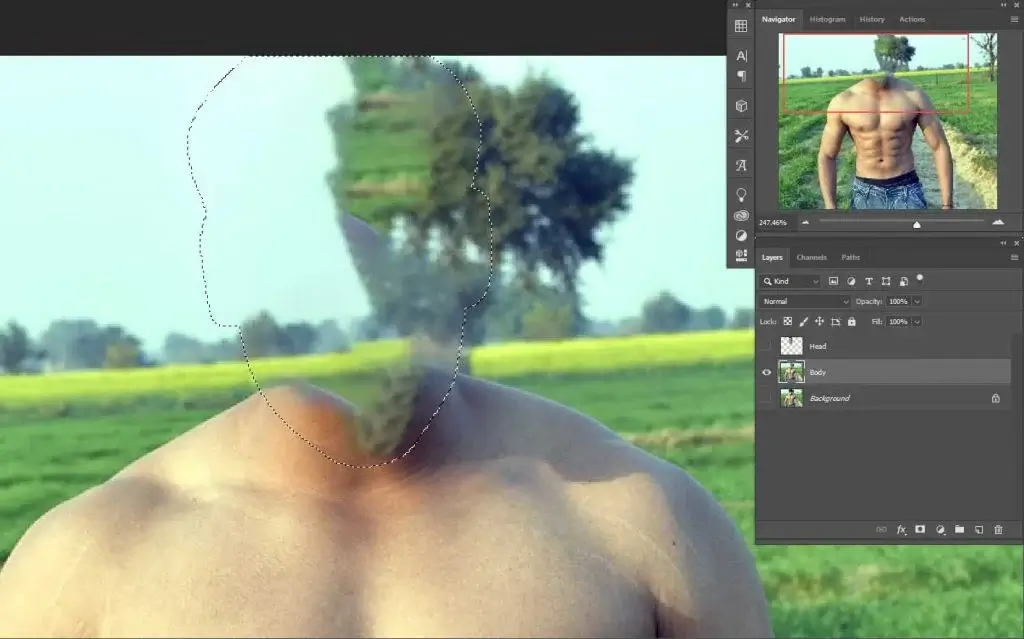
Hide the Head layer and select the Background layer. Press Ctrl+J for Win or Command+J for Mac to make a copy of the Background layer. Rename the layer ‘Body’ and rename the Head layer as ‘Head’.
Select the Body layer and use the lasso tool or any other tool to select the head only. Go to Edit then Content-Aware Fill, click on that, and wait until Photoshop calculates to fill the area.
We are doing this because the head of the body takes more space than the head we want to place here. Besides, this process also gives some extra facilities to match the head to the body.
We will press Ctrl+D for Win or Command+D for Mac to deselect. We are using the Clone Stamp Tool in some areas where the background of the subject looks unreal. This is to hide the areas for some time.
From time to time, we have made the Head layer visible and hidden to create a better position.
Steps-06: Applying Image Masking
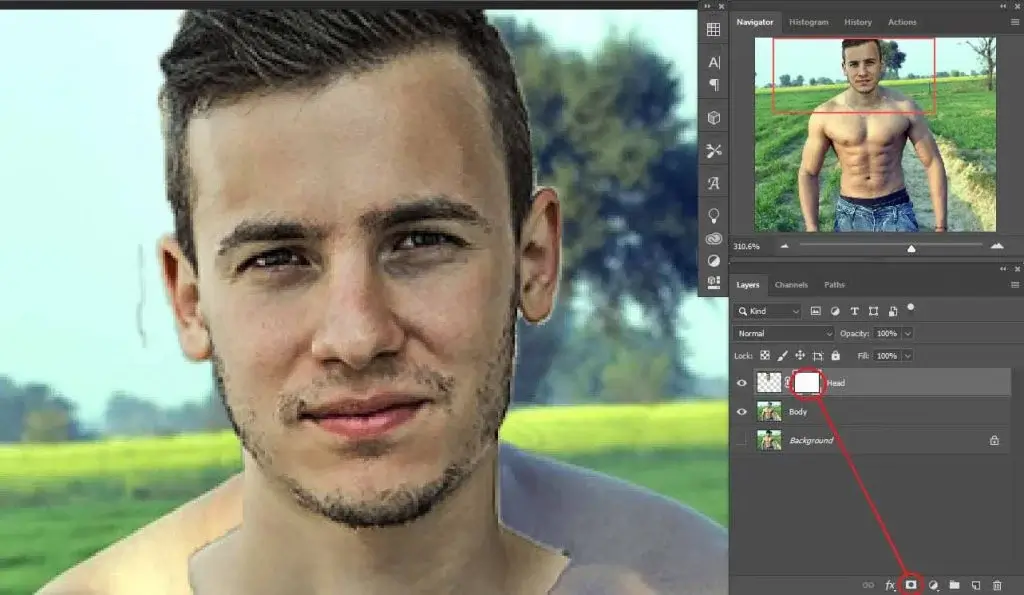
Now we are going to add a Mask. This is a complex combination with a busy background, so the editing procedure is a little bit hard. With the Head layer visible and selected, we will click on the mask.

We are using a soft round brush, and the foreground color is black. We are brushing over the areas that we want to reveal. Seal the above image.
Make sure the brushing conditions such as Blend Mode are Normal, Opacity at 65% or closer, and Flow at 50%. The reason for the settings is when you brush on the mask it will not have a harsh effect.
Steps-07: Adding Curves Adjustment Layers
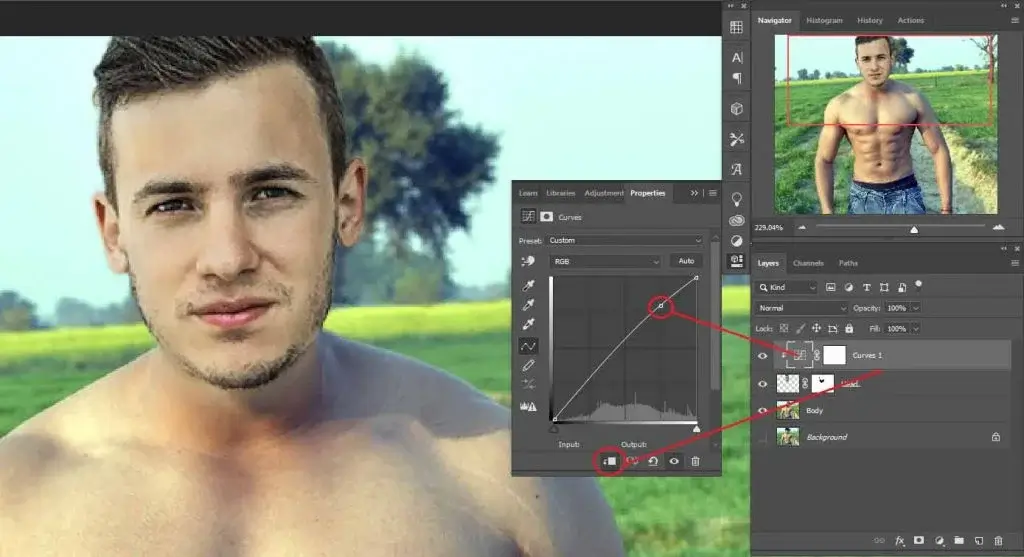
Let’s add a Curves Adjustment layer and brighten it up a little. Put the layer at the top. Press and hold Alt for Win or Option for Mac and click between Curves and Head layers.
This will make changes only to the Head layer. You can also combine the Curves layer by clicking the circled button on the below image that indicates between two layers.
Let’s create another Curves Adjustment Layer and we will darken up a little. Also, we will select the mask and press Ctrl+I for Win or Command+I for Mac to select inverse. We will use the soft round brush with an Opacity of about 40% and Flow of around 10%.
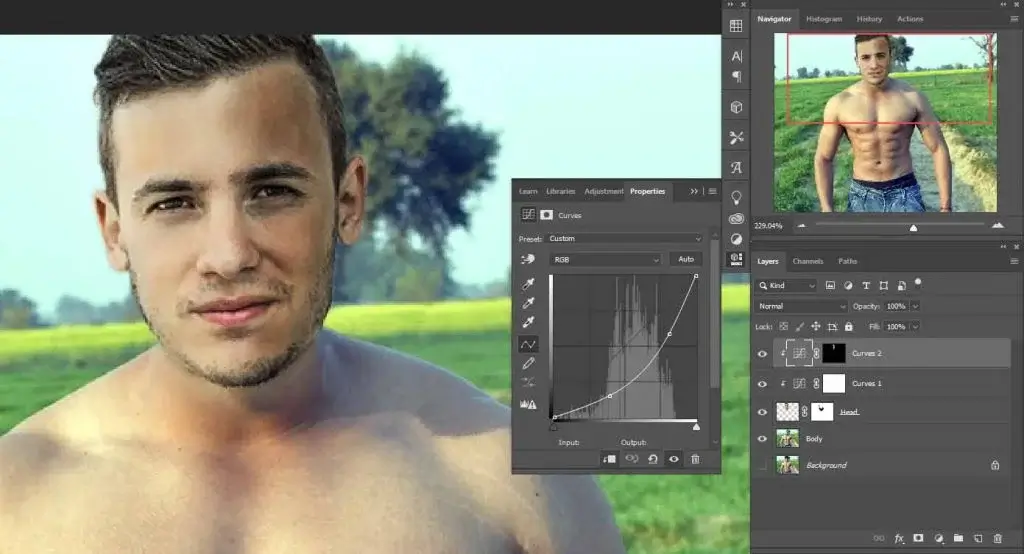
Make sure the foreground color is white. We are brushing over the dark side of the face following the body to create a shadow. Do not forget to apply this only for the Head layer. Press and hold Alt for Win or Option for Mac and click between Curves layers.
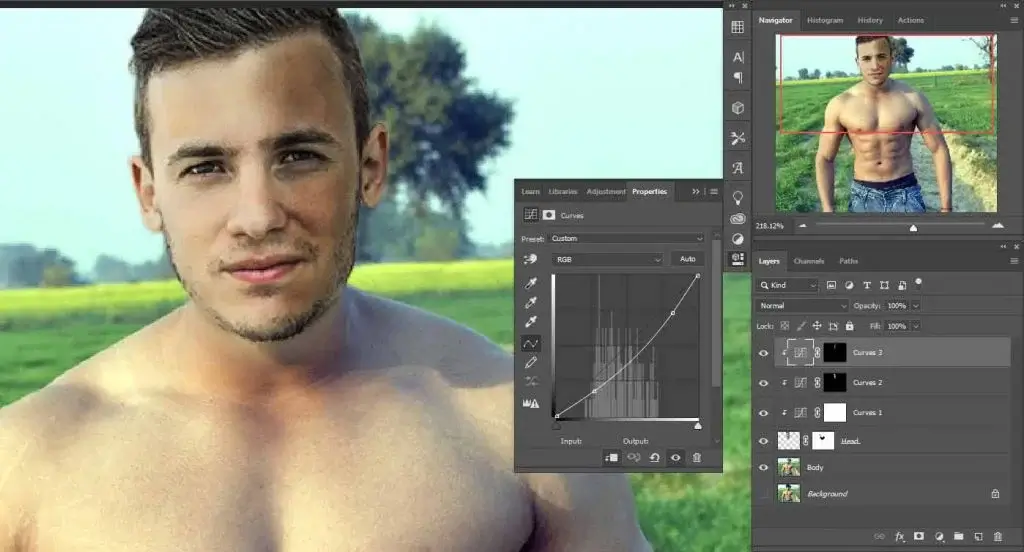
Now we will repeat the process one more time. You may have a question, “Why so many Curves Adjustment Layers in the project”? This is because, if we try to apply all the changes in one, it may look unreal. Adding enough Curves can minimize the harshness that gives a natural look in the final output.
Steps-08: Match the Tones
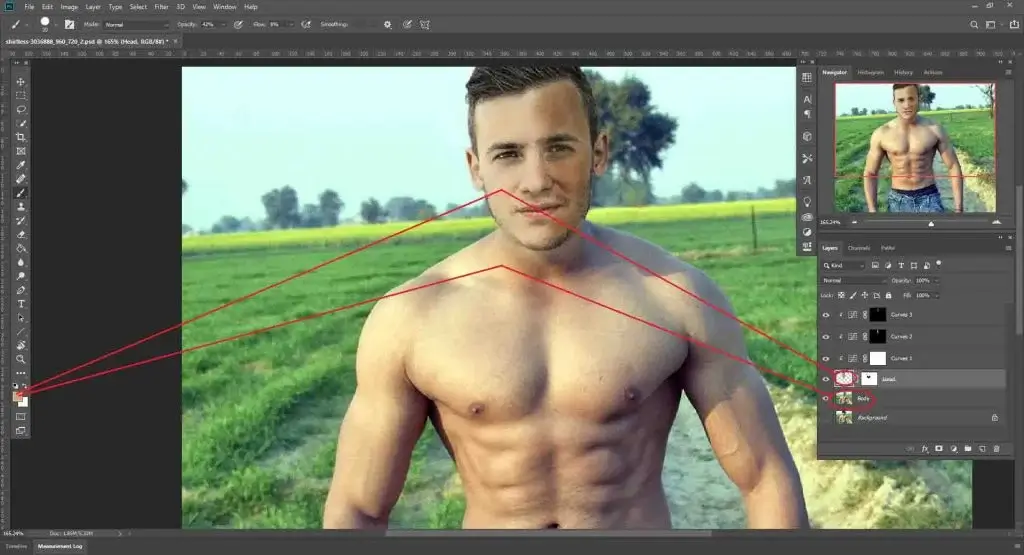
Body and Head skin tones must match each other. Or else the composition will fail. First, we are taking the Eye-dropper Tool and picking a color from the Body layer.
Then we will select the Head layer. Taking the soft brush with low Opacity and very low Flow, we will brush over the face. This will help to match the Head tone with the body. This step is a sort of Photo Retouching Service.
Steps-09: Save the Files | Swap body in Photoshop
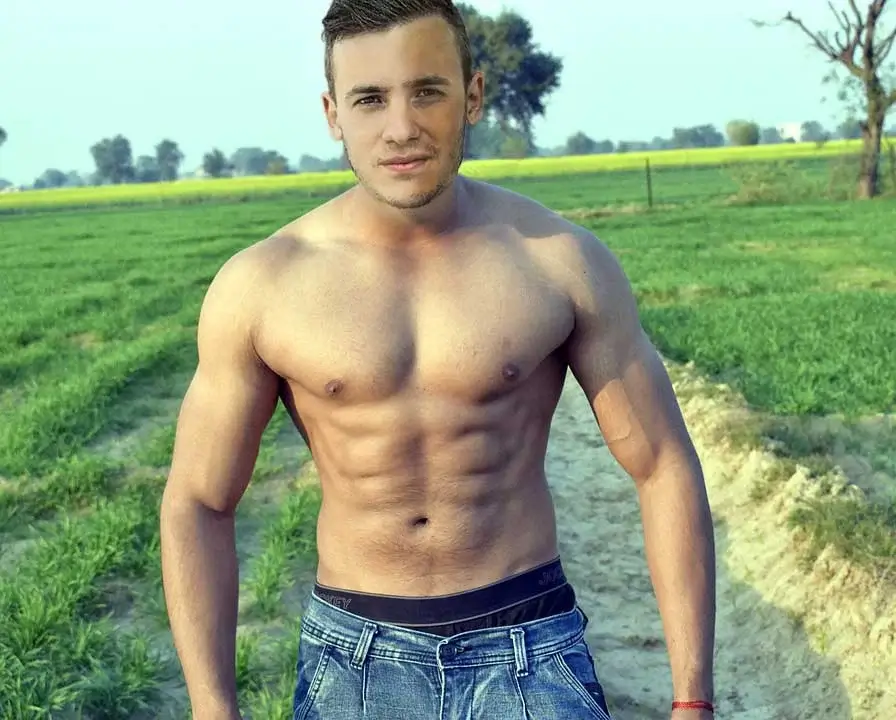
After completing all of them we will save the image. Go to File and select Save As. The default format will be ‘PSD’. Save the file in the format for backup so that you can change or modify it anytime you need. You can also select any format you require by the same procedure. The final result is as below.
The swap body in the Photoshop process is a kind of editing. There is no resemblance to real-life actions. This tutorial is to help the body enhancement by duplicating. You can surprise your friends and family just for fun. You can also motivate yourself by placing a muscular body in the image.
If you can do it properly, you can make everyone believe that this is real. Still, there is another question. “How to photoshop a face onto another body without Photoshop?” Well, that is another tutorial, and we will discuss that some other time.
Related Tutorials
- How to do a Hair Transplant in Photoshop
- How to do hair color correction in Photoshop
- How to turn a Photo into a sketch using Photoshop
FAQ | Swap Body in Photoshop
What is a Body Swap?
Body Swap is a photo editing technique to change the body of one image on purpose. This is not real but with the correct editing, you can make an impression.
How to Body Swap in Photoshop?
In order to swap the body, you need to have a body image with a similar outlook and tone. Take the body layer under the head layer, add masks, add curves, and some editing techniques. Use your imagination and expertise and you are all good.
Where Can I get Body Swap Professional Service?
There are lots of websites for photo editing services. All are not good in real. Check out their free trials to get the best out of all. We recommend Clipping World at your service for satisfactory and well-finished editing.
What About the Cost of the Body Swap Service?
As the editing is creative work, it is hard to mention the price without seeing the project. Clipping World offers industry-bottom prices and negotiable options depending on quantity. Get the free trial then decide to place an order.